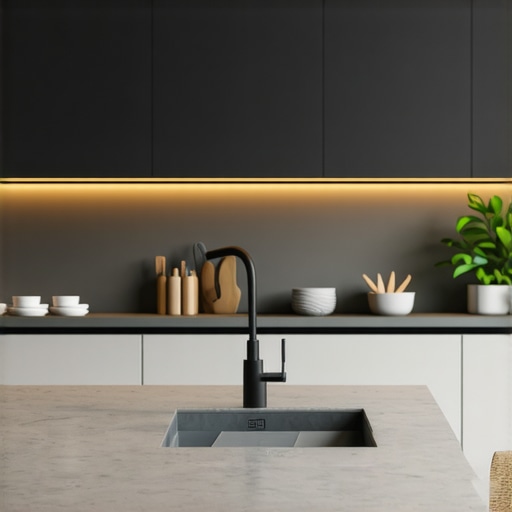
Why Your New Kitchen Island Needs a Dedicated Prep Sink
It’s a lightbulb moment I’ll never forget. During my first big kitchen remodel, I eagerly designed a stunning new island, complete with sleek countertops and a built-in wine rack. But as I started cooking, I realized something was missing—something that would’ve saved me countless messes and trips. The problem? No dedicated prep sink.
I’d overlooked how crucial a separate sink can be for efficient food preparation. Instead, I was juggling dishes, rinsing vegetables, and washing hands all in one basin. It seemed like a minor detail initially, but that oversight turned into a constant source of frustration. I remember standing at my island, soap in one hand and a pile of chopped veggies in the other, wishing I’d added that extra prep station with its own water source.
This wasn’t just a personal misstep—it’s a common mistake many homeowners make when designing their kitchens. You want a beautiful, functional space, but without considering the nuances of workflow, your dream kitchen can quickly morph into an everyday headache.
Today, I promise to guide you through why a dedicated prep sink on your kitchen island isn’t just a luxury—it’s an essential for making your cooking experience smoother and more enjoyable. Think of it as the secret ingredient that elevates your entire kitchen design.
Maximize Your Kitchen’s Potential: Why a Prep Sink Changes Everything
The goal of any kitchen remodel should be to improve how you live and cook daily. Yet, many folks underestimate how a simple addition like a prep sink can revolutionize this space. It’s about more than aesthetics; it’s about creating a layout that allows you to work smarter, not harder. This small but mighty fixture helps you keep the mess contained, your workspace clear, and your workflow seamless.
From personal experience, installing a dedicated prep sink transformed my entire kitchen routine. No longer was I scrambling to rinse ingredients while the main sink was occupied with dirty dishes. Instead, I had a dedicated water station that kept my prep area tidy and efficient.
According to a study from the National Kitchen and Bath Association, homeowners who incorporate functional elements like secondary sinks report higher satisfaction with their kitchens—and they work better. Whether you’re preparing a week’s groceries or hosting a dinner party, having a separate water source near your prep zone can save precious time and alleviate stress.
If this sounds like your current reality, or if you’re tired of the chaos that comes with limited sink options, then you’re in the right place. We’ll explore how to design your custom kitchen to include this game-changing feature, and I’ll share practical tips to avoid common pitfalls.
Have you ever felt overwhelmed by the mess and inefficiency in your kitchen during meal prep? If yes, you’re not alone—and I’ll show you how a dedicated prep sink can be the game-changer you need.
For inspiration and detailed ideas on how to make your kitchen both stylish and functional, check out custom cabinets ideas that transform your home’s style. Now, let’s dive into why this simple addition makes such a big difference and how to get started designing your own optimal layout.
Designing Your Ideal Prep Area
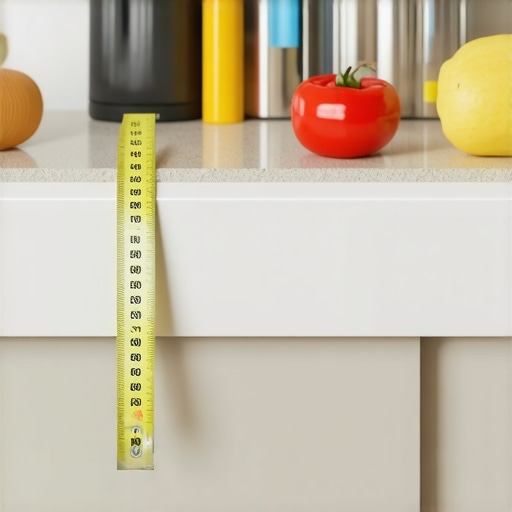
Start by assessing your workflow: identify the tasks you perform most during meal prep, such as rinsing vegetables, washing hands, or filling pots. Visualize where these activities occur naturally, and plan your prep sink placement accordingly. I once measured my countertop’s height and sketched a layout on scrap paper, which helped me see the optimal spot for my new sink—considering ease of access from both the stove and fridge. This step ensures your prep sink integrates seamlessly into your kitchen’s flow.
Choosing the Right Location
Locate the prep sink close to your main workspace but away from the main sink to minimize traffic congestion. Think of your kitchen as a well-orchestrated dance floor; each element needs room to move without bumping into others. When I installed mine, I positioned it near the cutting board and spice shelves, making cooking more efficient. Use a measuring tape to determine the ideal distance—typically within 24 inches of your primary work zone—and mark the spot. This precision prevents awkward reaching or clutter buildup.
Planning for Plumbing and Electrical Needs
Before building, consult a professional to map out your home’s plumbing and wiring routes. You need a water supply line, a drain, and electrical outlet if you plan to add accessories like disposers or garbage compactors. I learned this the hard way when I forgot to account for electrical outlets—forcing me into a costly retrofit after installation. By reviewing your home’s current plumbing schematics and discussing with licensed tradespeople, you can avoid surprises and ensure your prep sink functions flawlessly from day one.
Selecting Built-In Storage Solutions
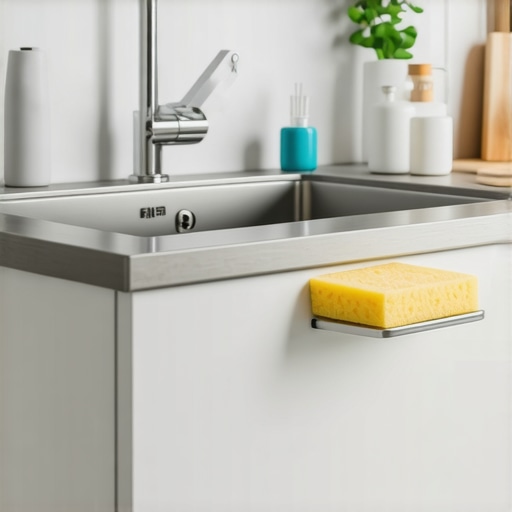
Maximize efficiency by integrating drawers or shelves beneath your prep sink for sponges, brushes, and cleaning supplies. Think of these as the backstage storage in a theater—keeping essentials close yet out of sight. I installed custom pull-out drawers that fit snugly beside my sink, drastically reducing clutter. Use catalogs or consult a cabinet maker to specify dimensions and organization features, ensuring your storage adapts perfectly to your needs. This approach streamlines cleaning and keeps your workspace tidy.
Thinking About Material and Finish
Choose durable, easy-to-clean surfaces that match your existing cabinetry and countertop palette. Materials like quartz, stainless steel, or composite resins resist staining and damage. When I redesigned my kitchen, I selected a stainless steel prep sink paired with a matte countertop—creating a sleek, modern look that’s also practical. Discuss options with your cabinet specialist or explore our custom cabinets guide for tailored advice on finishes and integration.
Ensuring Proper Ventilation and Noise Control
Incorporate soundproofing materials or insulated pipes to minimize noise from running water or disposal units. Adequate ventilation is also key—consider installing a range hood or vent fan if your prep area is enclosed. I added acoustic panels behind my sink and a quiet disposer, which made a noticeable difference during busy mornings. These subtle improvements enhance comfort and keep the focus on cooking, not noise distractions.
Finalizing the Installation and Finishing Touches
Work with your contractor to double-check measurements, alignment, and finish details. Seal edges properly to prevent water seepage and add protective coatings if necessary. As I watched my installer precisely mount the sink and connect the plumbing, I appreciated the importance of detail. Once installed, decorate with accessories like a chic soap dispenser or a wooden cutting board that fits over the sink for added style and functionality. Attention to these finishing touches pulls the design together and transforms your kitchen into a custom, efficient workspace.
When it comes to kitchen remodels, many homeowners focus on the big-picture aspects like layout and aesthetics, but there’s a subtle trap that often goes unnoticed: oversimplifying the role of built-in storage solutions and custom cabinets. Contrary to popular belief, choosing stock or semi-custom options without understanding their limitations can lead to frustration and costly regrets. The common myth is that all cabinets or built-ins are created equal, but in reality, the nuances of joinery, material selection, and integration can make or break your design’s functionality and longevity. For example, many assume that standard MDF doors are suitable for high-moisture areas, yet seasoned professionals warn that particleboard can swell and warp over time, especially in humid environments—diminishing the investment’s value. It’s vital to recognize these details early, or you’ll find yourself caught in the “oops” trap of replacing or repairing cabinets sooner than expected.
In fact, one of the biggest pitfalls is neglecting to tailor storage solutions that truly fit your needs. Modular systems or off-the-shelf units often fail to optimize space, especially in challenging layouts like corner areas. Sophisticated homeowners understand that custom cabinetry with integrated storage, like toe-kick drawers or hidden compartments, can revolutionize kitchen organization. You might consider exploring options that maximize every inch—like pull-out spice racks, vertical organizers, or built-in magazine racks—ensuring your kitchen remains both beautiful and highly functional.
What most people overlook is the importance of intricately planning the joinery and material consistency across different elements. Improper alignment or incompatibility between cabinet styles and appliances can create visual dissonance, undermining your design goals. Skilled craftsmen emphasize the value of joinery details—such as dovetail drawers or soft-close hinges—which not only enhance durability but also elevate the overall aesthetic.
Make no mistake: a poorly executed remodel with generic solutions can lead to recurring headaches, especially if storage isn’t thoughtfully integrated. For instance, installing a large, cumbersome pantry without considering door swing or clearance can block pathways, causing everyday inconvenience. To avoid this, always collaborate with experienced designers who understand the subtle art of seamless integration, as detailed in our comprehensive guide on custom cabinets.
Thinking ahead, advanced homeowners ask: How can I incorporate smart storage that adapts to my evolving needs? This involves integrating intelligent solutions like adjustable shelving, modular inserts, and even hidden compartments that blend into your cabinetry. By doing so, you future-proof your kitchen, ensuring it remains organized regardless of changing lifestyle demands. According to industry experts, these nuanced choices significantly impact satisfaction and the longevity of your investment. For inspiration on how to elevate your kitchen with tailored storage, discover our cutting-edge storage ideas.
Ultimately, the key is to look beyond the surface and understand that every detail—from the type of wood to the precision of joinery—affects the final result. Custom cabinetry isn’t just about aesthetics; it’s about crafting a seamless, durable, and personalized experience that transforms your kitchen into a true heart of the home. Have you ever fallen into this trap? Let me know in the comments.
Investing in Quality Tools for Long-Term Success
Having the right tools is crucial to maintaining the integrity and beauty of your custom cabinets and built-ins over time. I personally swear by a high-quality cordless drill with adjustable torque settings—it’s versatile enough for securing hardware or making minor adjustments without damaging delicate finishes. Additionally, a soft microfiber cloth combined with a gentle cabinet cleaner helps preserve finishes and prevent scratches.
For precision work, I rely on a digital angle finder to ensure drawers and doors stay perfectly aligned during adjustments. This small device saves me hours of tweaking and guarantees professional results every time. When dealing with hinges and drawer slides, a dedicated screwdriver set with interchangeable bits streamlines the process and ensures you won’t strip screws—saving you money on repairs down the line.
Implementing Maintenance Routines for Longevity
Consistent upkeep is key. Schedule biannual inspections to tighten loose hardware, check for water damage, and ensure seals around sinks remain watertight. I recommend setting reminders for this; even a quick 15-minute check can catch issues before they escalate. Keep an eye on moisture levels in your kitchen—excess humidity can warp cabinet frames or cause hardware to corrode. Installing a dehumidifier or making sure vents are functioning properly can mitigate this risk.
Regularly cleaning and sealing wood surfaces adds to their durability. For painted or lacquered cabinets, avoid abrasive cleaners—stick with gentle, pH-neutral solutions. Applying a furniture polish designed for wood finishes can renew your cabinets’ appearance and provide a protective barrier against everyday wear. Remember, a little preventive care goes a long way.
Planning for Scale and Upgrades
As your household evolves, so too will your storage needs. Modular storage solutions and customizable cabinet inserts can adapt to changing demands without requiring a full remodel. For example, adding pull-out spice racks or vertical dividers in existing cabinets maximizes space and keeps things accessible. When considering long-term upgrades, think about integrating smart features like sensor-activated lighting under cabinets or app-controlled locks for added security.
Looking ahead, the trend is moving toward sustainable and low-maintenance materials. Engineers are developing coatings that resist stains and scratches better than ever—expect these innovations to become standard in future renovations. Exploring these options early can save you a lot of frustration and enhance your home’s value.
How do I maintain my built-in storage solutions over time?
Maintaining your built-in storage involves regularly cleaning, inspecting moving parts like hinges and slides, and replacing worn seals or hardware. Keep track of manufacturer guidelines; some materials benefit from periodic re-sealing or refinishing. For intricate drawers with soft-close mechanisms, lubricate the tracks with manufacturer-approved lubricants every couple of years to ensure smooth operation. Ultimately, staying proactive prevents costly repairs and keeps your storage solutions functioning flawlessly.
If you haven’t already, try adjusting your cabinet hinges with a precision screwdriver and a level to ensure everything lines up perfectly. Small tweaks can dramatically improve the overall look and function of your kitchen. For more detailed tips on adjustments and maintenance, visit our expert guide to storage maintenance.
Remember, investing in the right tools and routine upkeep today ensures your kitchen remains a beautiful, functional space for years to come. Discover innovative storage ideas to keep your space organized and effortlessly stylish.
Many homeowners learn the hard way that the subtle nuances of custom cabinetry and clever storage solutions define the success of a kitchen remodel. A simple oversight—like ignoring the importance of properly scribing cabinets to uneven walls—can compromise both functionality and aesthetic cohesion. My biggest lightbulb moment was realizing that paying attention to these small details saves time, money, and headaches in the long run. Building custom solutions tailored to your space isn’t just about looking good; it’s about creating a kitchen that adapts to your lifestyle seamlessly.
Another key lesson is that investing in quality materials and craftsmanship pays dividends over DIY shortcuts. Sticking with tried-and-true joinery techniques and durable finishes ensures your built-ins retain their beauty and utility through years of family life. Remember, the real magic lies beneath the surface—so choose your cabinet maker wisely and prioritize functional, not just decorative, features. Since incorporating thoughtful storage and durable hardware, I’ve experienced how well-planned built-ins turn a chaotic space into a sanctuary that truly works for everyone.
Lastly, don’t underestimate the power of integrating smart technology into your custom cabinetry. From hidden charging stations to motorized pull-outs, these innovations elevate your kitchen from beautiful to extraordinary. Combining traditional craftsmanship with modern features creates a space that is both timeless and tailored to your changing needs. As you plan your own kitchen, keep in mind that the details—like proper drawer slides and carefully planned lighting—make all the difference. Dive deeper into this topic with our comprehensive guide on custom cabinets and discover how to transform your kitchen into a highly functional and stunning masterpiece.
My Secret Arsenal for Dwelling in Built-In Bliss
- High-Quality Tools: A precision screwdriver set and a digital level are my go-to for perfect alignments and tight fits, making installation projects much easier and more accurate.
- Design Resources: Books like Creative Storage Solutions have reshaped my perspective, showing how to squeeze maximum utility out of every inch—trust me, your future self will thank you.
- Reliable Suppliers: Partnering with vetted vendors ensures you receive top-notch materials like brass hardware and moisture-resistant finishes that stand the test of time.
- Installation Guides & Forums: Online communities and detailed tutorials give me insights on tricky details like scribing for uneven walls or selecting the right hinge types.
Get Inspired and Take Action Today
Remember, creating a kitchen that balances beauty and function isn’t just a dream—it’s within your reach. With a little knowledge, the right tools, and a willingness to pay attention to details, you can craft a space that truly works for your family’s rhythm and style. Embrace the journey of designing and building your perfect kitchen with confidence, knowing that each thoughtful choice you make today brings you closer to that ideal space.
What’s one small detail you’ve overlooked in your current kitchen that, if fixed, could improve your daily routine? Share your thoughts below—I’d love to hear your stories and help you take the next step towards a smarter, more beautiful kitchen!