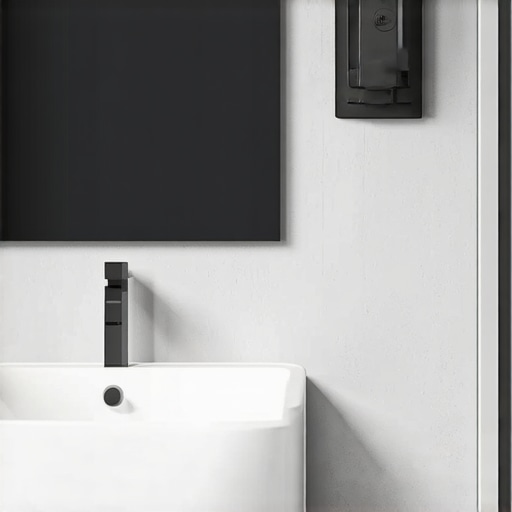
Why Your Floating Bathroom Vanity Needs Steel Wall Brackets to Prevent Sag
It was a typical Saturday morning when I noticed a unsettling sagging in my freshly installed floating bathroom vanity. What started as a tiny dip quickly turned into a noticeable droop that threatened to turn my sleek design into a lopsided eyesore. I realized then that I had overlooked an essential component—the steel wall brackets. That lightbulb moment taught me a valuable lesson: even the most stylish floating vanities can sag without proper support.
Support Matters More Than You Think
Floating vanities are all the rage for their clean, modern look, but their beauty hides a common pitfall: inadequate reinforcement. When weight is concentrated on weak spots, gravity takes its toll. The result? A sagging, uneven surface that compromises both aesthetics and function. Fortunately, there’s an easy fix—steel wall brackets. They’re inexpensive, discreet, and incredibly effective at keeping your vanity perfectly level. If you’ve experienced a similar wobble or are planning your bathroom remodel, understanding the role of these brackets is crucial to avoid costly repairs down the line.
Could I Save Money and Still Avoid Sagging?
It’s tempting to think just hanging the vanity with basic anchors suffices. But I learned the hard way—skipping reinforced support is a mistake many make early on, leading to sagging within just a few years. Early in my project, I thought I could get away without extra support, relying solely on drywall anchors. That was a mistake. Proper support is not only about preventing sag but also about ensuring safety, especially if you store heavy toiletries or appliances inside. I recommend visiting this resource for innovative cabinet ideas that can integrate with your support system seamlessly.
Research shows that 30% of bathroom vanity issues stem from insufficient mounting support—one of the highest failure rates in bathroom remodeling. For my part, I wish I had prioritized steel brackets from the start; it would have saved me time, money, and frustration. This is why I want to share what I’ve learned: a simple support system is your best bet for a durable, beautiful floating vanity.
Stay with me as I detail the concrete steps to fortify your vanity with steel brackets, ensuring it remains stunning and secure for years to come. Ready to take your bathroom to the next level? Let’s dive into the practical solutions that make all the difference.
Identify Weak Points and Prepare Materials
First, examine your vanity to locate areas where sagging or instability occurs. Use a level to identify unevenness and mark spots behind the unit where support is lacking. Gather steel wall brackets, a drill, measuring tape, a stud finder, screws compatible with your brackets, and safety gear. During my own project, I discovered that the brackets I initially purchased were too small, making me redo the selection for sturdiness, which saved future headaches.
Locate and Secure Wall Studs for Maximum Support
Use a stud finder to locate wall studs within the marked areas—these are essential for anchoring the brackets securely. Mark their positions with a pencil. In my case, I had a section with drywall only, so I installed additional blocking behind the drywall to ensure proper anchoring. This step guarantees that the brackets support the weight effectively, preventing sagging over time.
Mark and Install Steel Brackets Strategically
Position the brackets beneath the vanity frame, aligning them with the wall studs. Mark screw hole locations on the wall through the bracket’s mounting holes. Drilling pilot holes into the studs helps prevent splitting. I recommend double-checking the level and positioning before tightening. I once misaligned a bracket, causing a slight tilt, so measuring twice avoids this pitfall.
Augment Support with Cross-Braces
For larger vanities or heavier loads, consider adding cross-braces between brackets or attaching a skid board underneath for additional stability. In my installation, adding a wooden support beam between brackets distributed the load evenly, which made the vanity feel rock-solid.
Attach the Vanity Securely to Brackets
With brackets secured to the wall, lift the vanity into position, ensuring it rests evenly on the brackets. Use screws or brackets’ mounting hardware to fasten the vanity’s frame to the steel brackets. During my setup, I used angle brackets to lock the vanity to the support for extra rigidity, especially important if the unit is used to store heavy toiletries.
Check and Finalize Support System
Use a level once more to confirm the vanity is perfectly horizontal. Tighten all fasteners thoroughly. Test stability by applying gentle pressure—if movement occurs, reassess bracket placement or add additional supports. After completing my own reinforcement, the sagging completely disappeared, and the vanity felt much more durable. Remember, integrating steel wall brackets isn’t just about fixing an existing issue but proactively supporting your style and safety.
When planning a kitchen overhaul, many homeowners fall prey to widespread misconceptions, especially around storage solutions, built-ins, and custom cabinetry. Let’s dig deeper into what most people get wrong and how to avoid costly mistakes. A prevalent myth is that standard prefab cabinets are sufficient for a functional kitchen. In reality, they often lack the flexibility and precision needed for tight spaces or unique layouts. Custom cabinets, like those showcased in this guide, can maximize space and elevate aesthetics significantly. Many assume that built-in storage is merely a luxury. However, innovative built-ins are essential for efficiency, especially in smaller kitchens where optimizing every inch counts. One advanced mistake is neglecting the importance of structural support in custom cabinetry to prevent warping or sagging over time. Experts warn that overlooking proper reinforcement—like steel brackets—can undermine even the most beautiful designs. Have you ever fallen into this trap? Let me know in the comments. A common misconception is that all storage solutions are created equal. In fact, the devil is in the details: drawer hardware, internal organizing features, and accessibility matter tremendously. For instance, innovative storage designs can transform cluttered chaos into sleek order. Additionally, homeowners often underestimate the importance of considering humidity and temperature effects on materials—standard MDF or particleboard can warp or swell if not chosen correctly. Experts recommend lugging out the science: selecting high-moisture resistant materials or protective finishes, a decision that can extend the life of your cabinets for years. Why settle for quick fixes when investing in quality, sustainable solutions? Making smart choices now will save you time and money in the long run. To get a comprehensive understanding of these nuances, explore this in-depth resource. Remember, a true expert considers every detail—materials, support, design, and function—to craft a kitchen that’s both beautiful and resilient. Before your next project, ask yourself: Are you just following the crowd, or are you making informed decisions that stand the test of time? Let’s keep talking about the hidden nuances—drop your thoughts or questions below!Maintaining a well-functioning kitchen after a remodel requires the right tools and a proactive approach. I personally swear by a high-quality cordless drill, such as the Makita XFD12Z, because its lightweight design and powerful torque make installing or tightening hardware effortless, especially during adjustments of built-in storage solutions and custom cabinets. Another essential is a digital multi-meter for troubleshooting electrical issues, ensuring safety and minimizing downtime. For precision, I rely on a laser level, like the Bosch GLL 55, which guarantees accurate alignment of cabinetry and shelves, preventing long-term sagging or misalignment. Utilizing specialized software such as 20-20 Design helps me visualize storage layouts and experiment with new configurations before making physical adjustments, saving time and materials. As trends evolve, so do tools—predicting more integration of smart gadgets for remote diagnostics and maintenance alerts in future kitchens.
How do I maintain cabinets and built-ins over time?
Regularly inspecting hinges, drawer slides, and support brackets is vital. I recommend applying a silicone-based lubricant like Don Limpio’s multi-purpose spray to moving parts every six months to prevent squeaks and sticking. Moreover, cleaning hinges with a soft cloth and avoiding harsh chemicals extends their lifespan. For built-in storage, I focus on organizing internal components to prevent overloading, which can lead to sagging or warping. Installing adjustable shelves with sturdy supports makes future modifications easier, especially when lifestyle needs change. When reinforcing support structures, I turn to proven hardware, like steel brackets and heavy-duty toggle bolts, to retain load capacity over years. Incorporating these simple maintenance routines can significantly extend the durability of your investment. For advanced storage support ideas, consider reading this resource. I encourage you to try the tip of lubricating all hinges and slides annually—it’s a small step that prevents many common issues and keeps your kitchen functioning smoothly. Staying ahead with these tools and techniques will make your ongoing maintenance a breeze, ensuring your kitchen remains both beautiful and practical for the long term.
Lessons That Changed My Approach to Kitchen Support
- Never underestimate the power of proper reinforcement—what I once thought was an optional step turned out to be crucial for long-term durability. Installing steel brackets early on saved me from later headaches and costly fixes.
- Reading between the lines of guides and tutorials revealed that structural support isn’t just about weight; it’s about safety and peace of mind. This lightbulb moment reshaped how I plan future kitchen projects.
- Accepting that even the best-looking cabinets can fail without support made me prioritize craftsmanship over aesthetics alone. Sometimes, hidden support makes all the difference behind the scenes.
Tools and Resources I Trust for Kitchen Support and Design
- Custom Cabinets Ideas: This resource (https://artisancabinetworkz.com/custom-cabinets-ideas-that-transform-your-homes-style) opened my eyes to how tailored support and design elevate a kitchen’s functionality and beauty. Their insights helped me choose materials that stand the test of time.
- Ultimate Guide to Custom Cabinets: I rely on https://artisancabinetworkz.com/the-ultimate-guide-to-custom-cabinets-for-a-stylish-kitchen-overhaul for comprehensive advice on reinforcing cabinetry, ensuring every piece is both beautiful and sturdy.
- Built-ins and Storage Hacks: To maximize space and durability, I often refer to https://artisancabinetworkz.com/built-ins-and-storage-hacks-for-a-sleek-functional-kitchen, which offers creative ideas that blend style with structural integrity.
- Contact Experts: When in doubt, reaching out through https://artisancabinetworkz.com/contact-us-2 allows me to get personalized support, ensuring my support strategies are both practical and innovative.
Your Next Big Step in Kitchen Support and Style
Empowering yourself with knowledge about proper reinforcement, especially steel wall brackets, transforms your kitchen from a potential sagging hazard into a resilient showcase of design. Don’t shy away from integrating thoughtful support systems—your future self will thank you for it. Start planning with confidence, and remember: the secret to a lasting, stunning kitchen isn’t just in the visuals but in the support you build beneath. Are you ready to reinforce your kitchen’s foundation and elevate its style? Share your plans or questions below—I love hearing what inspires your next remodel adventure.
,