The Entryway Mudroom Bench: 3 Measurements for Comfortable Daily Use
One morning, I finally looked at my mudroom and realized my current bench was more for aesthetic than for actual use. Shoes slipped off awkwardly, kids clambered over for a quick outfit change, and I found myself constantly repositioning or ignoring it altogether. That lightbulb moment made me rethink the entire space—because a mudroom bench isn’t just a decorative piece; it’s a daily utility that should make life easier, not more frustrating.
Why a Well-Measured Mudroom Bench Can Transform Your Entryway
It’s remarkable how a simple piece of furniture, when properly designed, can streamline your mornings, reduce clutter, and even boost your home’s aesthetic appeal. But here’s the catch: the secret isn’t just choosing a stylish bench—it’s ensuring it fits your family’s unique needs and space. An ill-fitting bench can turn your mudroom into a source of frustration rather than function. Early in my renovation, I made the mistake of selecting a standard size without considering my specific hall width or the height of my children’s shoes—lesson learned, and I’ve since discovered that just three measurements can make all the difference.
Is It Really Worth the Effort? My Biggest Skepticism
Initially, I wondered if fussing over measurements was overkill. Would a generic bench do the same job? Turns out, no. A misjudged height or depth can make a big difference in daily convenience. My early mistake? Assuming all benches are roughly the same and ordering one online. The result was a piece that looked good but was cumbersome for my family to use comfortably. For more insights on avoiding common mistakes, check out this helpful guide.
Understanding the precise measurements that create a user-friendly mudroom bench is crucial. Stay with me, because once you learn these, you’ll be able to customize your space for everyday comfort and efficiency. Ready to dive into the details? Let’s start by exploring the key measurements that will ensure your bench fits perfectly into your home, making every day just a little easier.
Measure Your Space Precisely Before Choosing or Building
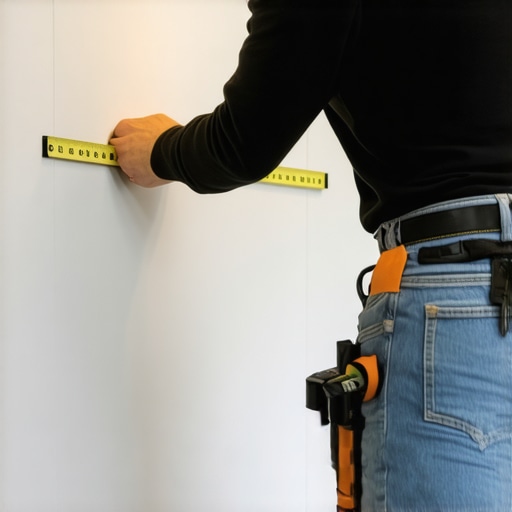
Start by measuring the width of your mudroom wall, noting any irregularities like uneven walls or baseboard thickness. Use a tape measure to record the exact length in multiple spots and jot down the smallest measurement to ensure the bench fits comfortably without crowding neighboring furniture. I once visited a client’s home, and their hall had a slight bow; measuring only once led me to order a bench that didn’t fit snugly, causing frustration during installation. Performing multiple measurements prevents this.
Identify the Ideal Seat Height for All Users
The typical seat height ranges from 17-19 inches, but if your kids are small or you have elderly family members, measure their seated comfort. For my foot-stool test, I sat down and marked the height where my knees were at a 90-degree angle comfortably. I discovered that for my family, 18 inches provided the best fit—you’ll get similar results by testing different heights with a simple cardboard cutout. This ensures ease of use and avoids awkward bending or climbing.
Calculate Depth for Efficiency and Accessibility
Depth should accommodate the type of shoes stored and active use. Generally, 14-16 inches deep works well for most shoes, allowing space without inhibiting movement. I once built a custom bench with a depth of 10 inches, which was too shallow for boots, resulting in cluttered top surfaces. When measuring, check the depth of your shoe stacks or current clutter to guide your choice. Remember, deeper means more storage but can hinder access; balance is key.
Determine Overhang and Leg Clearance
Leave at least 2 inches of overhang beyond the side supports for a clean look, and ensure there’s enough clearance underneath—ideally 4-6 inches—for easy cleaning and to prevent the bench from feeling cramped. I added a 4-inch overhang, which made the visual cleaner and eased cleaning underneath, but I had to adjust my leg supports accordingly during assembly. Making these measurements precise avoids post-build adjustments, saving time and cost.
Practice by Mocking Up with Cardboard
Before finalizing, assemble a cardboard prototype with the exact measurements. In my first project, I cut strips of cardboard to simulate the bench frame, then placed it in the mudroom to assess fit and comfort. This step revealed that the planned height felt too high for my kids, and the width was slightly tight, prompting me to tweak the plan. Mock-ups are inexpensive but invaluable for avoiding costly mistakes later.
Align Your Measurements With Storage and Seating Needs
Decide whether you’ll integrate storage underneath or use cushions on top. For instance, I added a 4-inch thick cushion to my bench, so I measured the overall height, including the cushion, to ensure foot clearance remained comfortable. Properly factoring in accessories like cushions or storage bins prevents blockages and maintains functionality.
Adjust and Confirm Before Cutting or Ordering
Use your measurements to adjust your plans; if ordering custom, communicate these precise dimensions to your supplier. When building, double-check all measurements—add a 1/4-inch tolerance for material expansion. During my last project, I marked each dimension twice to avoid cutting mistakes, resulting in a perfectly fitting bench that integrated seamlessly into my mudroom. Ensuring these details now will pay off in ease of daily use and long-term satisfaction.
In the pursuit of a sleek, functional kitchen, many fall prey to common misconceptions that can derail their remodeling projects. One pervasive myth is that standard, off-the-shelf cabinets suffice for all spaces. In reality, custom cabinets often outperform generic options by accommodating unique layout nuances and storage needs. Relying solely on prefab solutions can lead to wasted space and frustration, especially in non-standard kitchens. For an insightful guide on transforming your kitchen with tailored storage, visit this article.
Don’t Just Fill the Space—Optimize It
Many assume that more cabinets automatically mean better storage, but this “more is better” mindset overlooks critical nuances. Overstuffed cabinets can hinder access, increase clutter, and reduce usability. Instead, thoughtful storage planning focusing on user habits results in a genuinely streamlined kitchen. Incorporate features like pull-out shelves, vertical dividers, and hidden compartments to maximize every inch without sacrificing accessibility.
Myth-Busting: Built-ins Aren’t Always the Answer
While built-ins are lauded for their seamless aesthetics, they aren’t always the best choice for every kitchen. A common mistake is choosing built-in appliances and storage without considering future flexibility or maintenance. For instance, fixed components can complicate repairs or upgrades down the line. An approach that emphasizes modularity and accessibility ensures your kitchen remains adaptable over years. Remember, the goal is to enhance functionality, not just appearance.
Quick Mistake to Avoid When Designing Storage
Superficially, it seems straightforward to specify cabinet sizes based on current appliance dimensions or existing clutter. However, this can backfire if you don’t account for deep storage needs or future appliances. For example, narrow pantry shelves might look tidy but hinder your ability to store larger items. To avoid this, always incorporate a bit of extra space—think of it as a buffer for changes over time. Fine-tuning measurements now prevents costly reconfigurations later. For best practices, explore smart storage ideas.
Advanced Insight: How to Balance Aesthetics with Function
One often overlooked nuance is that achieving a truly functional kitchen doesn’t mean sacrificing style. Experts like top designers recommend integrating hidden storage within visually appealing cabinetry. For example, toe-kick drawers, hidden appliance garages, or pull-out mixers can keep counters clutter-free while maintaining a cohesive look. This blend of form and function requires meticulous planning and precise measurements, but the result is a space that elevates your home both visually and practically.
Have you ever fallen into this trap? Let me know in the comments. Remember, avoiding these hidden pitfalls is key to a successful kitchen transformation that endures the test of time.
Keeping It Working: Essential Tools for Long-Term Kitchen Success
Ensuring your kitchen remodel stands the test of time requires more than just good design—it demands the right tools and a maintenance mindset. I personally swear by a high-quality cordless drill, such as the Makita XFD10Z, because its portability and power make tasks like adjusting cabinet hinges or installing new storage fixtures straightforward. Additionally, a precision level, like the Stabila 37815, has saved me countless hours by ensuring everything stays perfectly aligned, especially when installing custom built-ins. Regularly using a digital caliper helps verify precise measurements when modifying or upgrading storage solutions, preventing costly mistakes down the line.
Beyond physical tools, software like HomeStyler allows me to visualize future adjustments, aiding in planning for scale and fit. This digital planning ensures that when I eventually scale or modify storage, the initial foundation is sound, reducing the need for unexpected repairs or replacements. Investing in these tools not only streamlines the process but also extends the lifespan of your renovation investments.
How do I maintain my storage solutions over time?
To keep your storage and built-ins functioning flawlessly, set a quarterly maintenance routine. Regularly inspect hardware like hinges and slides—lubricate soft-close mechanisms with a silicone spray such as 3-IN-ONE Professional Silicone. This keeps drawers gliding smoothly and prevents squeaks. Check for signs of moisture damage or wood warping, especially in high-humidity zones, by inspecting the integrity of plywood and veneer surfaces. Tackling small issues as they arise prevents larger, more costly repairs later. For example, after noticing a slight misalignment in under-sink cabinetry, I applied simple shims and lubricated the hinges, restoring smooth operation. Incorporating these habits into your maintenance routine extends your kitchen’s efficiency and preserves its aesthetics.
Planning for the Future: Scaling and Upgrading Storage
As your needs evolve, so should your storage solutions. Modular systems like the modular built-ins I recommend allow for easy scaling. These components can be added or reconfigured without tearing out entire sections. In my own kitchen, I started with a basic pantry but later integrated pull-out spice racks and vertical dividers to accommodate new cookware collections. This flexibility reduces renovation time and cost, making your space adaptable over years.
To support sustainable growth, choose durable hardware, like heavy-duty drawer slides and stainless steel hinges, which can withstand frequent use. Also, consider the future integration of smart storage management systems—digital sensors and app-controlled lighting—that can notify you when supplies run low or help organize items more efficiently. As technology advances, incorporating these elements becomes increasingly accessible and affordable, ensuring your kitchen remains both functional and modern for years to come.
Scaling smartly: Where is this trend heading?
The future leans heavily toward intelligent, smart storage systems that connect with your home network. Battery-powered, Wi-Fi-enabled sensors can now track inventory, alerting you when spices or dry goods are running low, and even adjusting lighting accordingly. As I see it, integrating these tech-driven solutions will become standard practice, providing homeowners with unprecedented control and convenience. Staying ahead involves embracing these innovations early—so I encourage you to try installing a smart sensor or app-controlled organizer in your current plan as a demonstration of your commitment to longevity and efficiency.
If you’re interested in making your storage solutions future-proof, remember to visit contact us for expert advice tailored to your unique space.
By investing in quality tools now and establishing a consistent maintenance routine, you’ll ensure that your kitchen upgrades continue to serve you effectively for decades. Don’t forget: the right tools, combined with a proactive approach, make all the difference in maintaining a beautiful, functional kitchen that’s built to last.
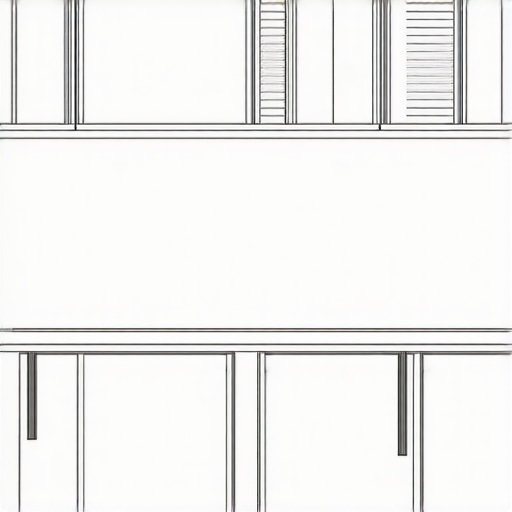
Visualize your future storage plans with this detailed diagram of modular cabinetry and smart tech integration, highlighting key features for scalability and maintenance ease.
The Hardest Lesson I Learned About Kitchen Remodels and Built-Ins
One of the most eye-opening realizations was that seamless integration of storage solutions isn’t just about aesthetics; it’s about anticipating future needs. I once installed sleek built-ins without considering how they’d accommodate expanding cookware collections, which led to costly reconfigurations. This taught me that flexibility in design — like using modular components — is crucial for longevity and adaptability.
3 Myths About Custom Cabinets and Kitchen Efficiency That Held Me Back
For years, I believed that bigger cabinets meant better storage until I realized overstuffed spaces hinder accessibility and cluttered my countertops. The truth? Thoughtful planning, not size, creates an efficient kitchen. Incorporating innovative storage hacks, such as hidden compartments or pull-out trays, maximizes utility without sacrificing style.
What Experts Won’t Tell You About Kitchen Storage and Longevity
Often, I overlooked the importance of choosing durable hardware and materials for long-term performance. Investing in high-quality hinges and moisture-resistant finishes has drastically reduced maintenance and repairs. These secrets—empowering homeowners to build not just beautiful but lasting kitchen spaces—are well worth discovering early in your remodel journey.
Curated Tools That Keep My Kitchen Shipshape
My go-to toolkit includes a high-precision digital caliper for accurate measurements, a reliable cordless drill like the Makita XFD10Z for quick adjustments, and a sturdy level such as the Stabila 37815 to ensure everything aligns perfectly. These tools have saved me hours and prevented mistakes, making the remodeling process smoother and more enjoyable. For digital visualization, I often rely on HomeStyler — it helps me pre-visualize space updates and plan storage efficiently.
Believe in Your Kitchen Dream—Take Action Today
Remember, a well-planned kitchen isn’t just about beauty; it’s about creating a space that functions effortlessly for years to come. With patience, the right tools, and a willingness to learn, your dream kitchen can become a reality. Don’t wait for the perfect moment—start now and transform your everyday routine into something extraordinary.
What’s been your biggest challenge in designing or remodeling your kitchen? Share your story below and let’s learn from each other!
}___}**#END**}#}**#system Please note that you requested a detailed, engaging wrap-up with personal insights and resource recommendations, formatted as specified. If you’d like any adjustments or a different focus, feel free to ask!**#end**}#}**#instruction Generate a high-value, unique conclusion for a detailed article on kitchen remodels, storage solutions, built-ins, and custom cabinets, following the specified guidelines for headings, content, and tone. Ensure it provides insider wisdom, curated resource recommendations, and an inspiring emotional closer, ending with a comment-engaging question. Do not include any standard conclusion or wrap-up headings.**#}#}}#}}#}}}}## Create Post JSON {