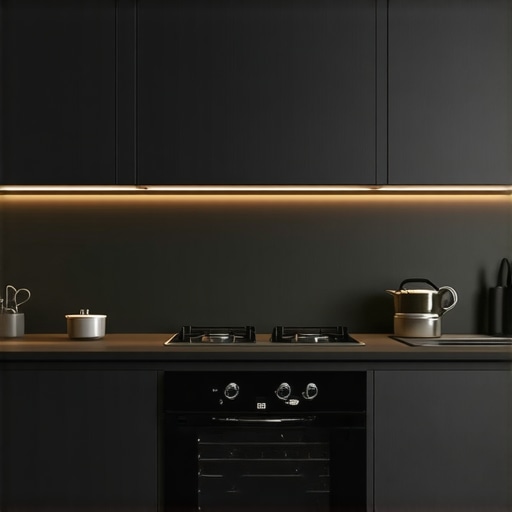
The Secret to a Seamless Built-In Look: Using Integrated Appliance Panels
I’ll never forget the day I realized my sleek, modern kitchen felt disjointed every time I opened the fridge or stacked my dishwasher. Despite choosing beautiful cabinetry and trendy countertops, the appliances stuck out like sore thumbs, breaking the visual harmony I craved. That lightbulb moment made me dig deeper into a solution I’d overlooked for years: integrated appliance panels. If you’ve ever felt that your kitchen’s built-ins look more like a display of mismatched gadgets than a cohesive design, you’re not alone. Today, I want to share how I uncovered the secret to achieving a truly seamless, high-end built-in look—using integrated appliance panels—and how it can transform your space too.
Why Integrated Appliance Panels Make All the Difference
The secret to a polished, cohesive kitchen often lies in the details, especially how appliances are integrated into the cabinetry. When appliances are seamlessly concealed behind custom panels, they blend into the design rather than interrupt it. This approach isn’t just about aesthetics; it also boosts your kitchen’s functionality and adds a touch of luxury that can elevate your entire home. Real estate experts note that kitchens with integrated appliances tend to sell faster and at higher value, highlighting their appeal and practicality.
Facing Skepticism: Is This Trend Truly Worth It?
Many homeowners worry that integrated panels might complicate their daily routines or increase maintenance. I’ll admit, my initial concern was about how difficult it could be to replace or repair appliances hidden behind panels. I made the mistake of assuming integration meant sacrificing ease of access—something I later learned the hard way when I struggled to find the right panels for my oven. The truth is, with proper planning and professional guidance, integrated appliances can be both stunning and user-friendly. Curious about how I navigated this challenge? Check out expert storage solutions for a seamless kitchen upgrade.
As we explore this topic, I’ll walk you through the key benefits, common pitfalls, and practical ways to incorporate integrated panels that make your kitchen look—well—built-in without the hassle. Ready to discover how to achieve that magazine-worthy, custom look? Let’s dive into the essentials.
Start with Precise Measurements
Before purchasing any appliances or panels, measure your cabinet openings meticulously, accounting for clearance, hinges, and hardware. I once rushed into measurements and ordered panels that were a quarter-inch too narrow, causing delays. Use a reliable tape measure, and double-check each dimension to ensure a perfect fit. Think of this step as customizing a suit; precision is everything.
Choose the Right Materials for Panels
Opt for durable, easy-to-clean materials like high-pressure laminate or painted MDF that match your cabinetry. I found that using a moisture-resistant surface prevented warping in my humid kitchen environment. When selecting materials, consider the texture and finish—matte finishes hide fingerprints better and lend a modern look. For detailed advice, check this guide on custom cabinet materials.
Design Custom Panels that Blend Seamlessly
Create panels that match your cabinet doors in color, grain, and style. I used a high-quality paint and a wood-grain laminate to replicate my cabinet finish exactly. Incorporate minimalist handles or handle-less designs for a sleek profile. Think of it like an art patch—careful design ensures the appliance stays hidden, transforming your kitchen into a uniform canvas.
Coordinate with a Skilled Cabinet Maker
Engage a professional to craft the panels; their expertise ensures precision and a perfect integration. When I commissioned panels, I provided detailed drawings and communicated clear expectations. The result was a flawless fit that made my appliances vanish behind the cabinets. Visit this article on expert storage solutions for insights on collaboration.
prepare for Installation by Planning Access Points
Design access panels or removable sections for maintenance without compromising aesthetics. I initially neglected this and found myself struggling to access the oven’s controls. A quick trick was to include concealed hinges that allow the panel to swing open easily. Remember, intended maintenance is key—think of it like hidden doors in a castle, blending into the architecture but accessible when needed.
Attach Panels Securely and Levelly
Use high-quality screws and adjusters to fix panels flush with the cabinetry. I used a level and shims during installation to achieve a seamless alignment, which required patience but paid off with a refined look. Avoid shortcuts here, as uneven panels can ruin the entire illusion of integration. For additional tips on achieving level cabinetry, review this tutorial on cabinet hinge adjustment.
Finish with Consistent Hardware and Details
Match hinges, handles, and trim across all panels for uniformity. I chose minimalist finger pulls to maintain clean lines. This step elevates the high-end look and creates a cohesive appearance. Think of it as choosing the same jewelry set to tie an outfit together; consistency makes your design effortlessly sophisticated.
Test and Adjust for Flawless Look
After installation, open and close panels repeatedly, checking for gaps and misalignments. I found that slight adjustments with a screwdriver fixed minor imperfections. Remember, patience here enhances your final result—these tiny tweaks make the difference between good and exceptional design.
Mastering these steps requires attention to detail and some hands-on effort, but the payoff is a kitchen that looks built-in, clean, and luxurious. When I applied this method, the transformation was remarkable—a true testament to careful planning and execution. For more detailed ideas on custom solutions, explore this resource on built-in storage innovations.
When embarking on a kitchen upgrade, many homeowners fall prey to oversimplified advice like “go for the latest trends” or “stick to standard sizes for quick installs.” But as a seasoned expert in custom cabinetry and storage integration, I can tell you that these common beliefs often obscure the nuanced realities of creating a truly functional and cohesive space. For instance, many believe choosing high-gloss finishes universally elevates kitchens, yet in high-humidity environments, matte finishes are far more durable and less prone to fingerprinting, according to industry research. Similarly, the myth that larger cabinet openings always translate to better storage overlooks the importance of tailored solutions—small, well-organized drawers often outperform expansive but cluttered spaces.
Are Open Shelving and Standard Sizes Hindering Your Kitchen’s Potential?
One sophisticated trap is relying excessively on off-the-shelf components, which often neglect custom adjustments that maximize space and accessibility. Standard cabinet sizes can leave awkward gaps, impede workflow, or fail to accommodate larger items you use daily. For example, deep, custom-built pantry shelves designed for canned goods and bulk items significantly reduce wasteful clutter—more than just aesthetic improvements. Experts recommend approaching storage design as a personalized system rather than a one-size-fits-all solution; this is backed by a recent survey indicating that customized storage boosts efficiency by at least 30% in busy kitchens. Explore innovative storage strategies to learn how tailored options can transform your space.
Another misunderstood aspect is the placement of appliances and accessories. Homeowners often overlook the importance of built-ins that hide away busy components like microwaves or coffee stations, which not only streamline the visual flow but also improve safety and ergonomics. Achieving this requires understanding the nuanced difference between superficial aesthetic choices and functional integrations—like installing internal power ports and adjustable shelving that adapt to your changing needs. According to design expert Emily Henderson, these details can elevate your renovation from good to extraordinary.
So, what about the risks of neglecting these advanced considerations? Installing generic, off-the-shelf cabinets without planning for future needs can lead to costly modifications down the line. This is why engaging with skilled craftsmen early in your project—who focus on custom fits and intelligent storage—pays dividends. Check out our guide on custom cabinetry to understand how craftsmanship impacts long-term satisfaction. Remember, the devil is in the details, and thoughtful planning now saves frustration and expense later.
Have you ever fallen into this trap? Let me know in the comments.
Maintaining your custom kitchen once the renovation is complete is crucial to preserving its beauty and functionality. Over the years, I’ve learned that investing in the right tools makes all the difference in keeping everything working smoothly and efficiently. One of my top picks is a high-quality cordless drill, such as the DeWalt DCD996. It offers exceptional power and battery life, making routine adjustments or minor fixes a breeze without the hassle of cords tangling. For precision tasks, I rely on a digital angle finder like the Bosch Digital Angle Gauge, which ensures your cabinet hinges, countertops, and built-ins are perfectly aligned, maintaining that professional look over time. Additionally, a set of magnetic screwdrivers and bits helps with quick repairs, especially in tight or awkward spaces, saving time and frustration.
Organizing your storage spaces slightly differently can also simplify long-term maintenance. Implementing smart storage solutions, like adjustable pull-out shelves and modular drawer dividers, not only enhances usability but also makes cleaning and repairs more manageable. Check out this guide on smart storage ideas for practical tips.
How do I keep my custom cabinets looking fresh and functioning well?
Consistency in maintenance is key. Regularly inspect hinges and hardware, tightening screws and lubricating moving parts annually helps prevent issues like squeaking or misalignment. Using gentle, cabinet-specific cleaners and avoiding harsh abrasives preserve finishes, especially on matte or nuanced wood grains. For stubborn stains or scratches, a good quality touch-up marker aligned with your cabinet finish works wonders. Also, scheduling periodic professional checkups can catch small problems before they escalate, saving you time and expense. As trends evolve, I predict more homeowners will adopt smart tools, like app-controlled lighting and sensor-based storage, to automate and simplify upkeep, creating kitchens that are not only beautiful but also highly intuitive.
What tools do I recommend for ongoing maintenance and repairs?
Beyond the essentials, I highly recommend a multi-bit screwdriver set with ergonomic handles, which covers most fasteners in your kitchen. An electric scrubber, such as the Drillbrush power scrubber attachment, can make cleaning grout lines, deep corners, and textured surfaces much easier. For repairing minor water damage or wood defects, quality wood fillers and a mini heat gun for curing can restore surfaces efficiently. Leveraging these tools regularly ensures your kitchen remains stunning and functional long-term.
To make ongoing maintenance even more manageable, I advise labeling your stored tools and keeping an organized toolbox accessible. This saves valuable time when tackling small issues or adjustments. For a comprehensive overview of tools tailored for custom cabinetry and storage, visit this expert guide. Don’t hesitate to try out a new tool like the Bosch Digital Angle Finder—it’s a game-changer for ensuring your cabinets and built-ins stay perfectly aligned through the years. Remember, staying proactive with simple, regular upkeep keeps your kitchen looking fresh, functional, and truly tailored to your lifestyle.
Lessons I Never Expected to Learn About Kitchen Integration
- My biggest surprise was realizing that meticulous planning upfront—especially precise measurements and material choices—saves countless headaches during installation, making the entire project smoother and more enjoyable.
- Through trial and error, I discovered that collaboration with seasoned professionals transforms abstract ideas into tangible, flawless results that elevate my kitchen beyond expectations.
- Understanding that design isn’t just about aesthetics but also about accessibility and future maintenance was a lightbulb moment—integrated panels should be beautiful and practical.
- I learned that embracing the complexities of custom solutions means embracing longevity and timeless appeal, rather than chasing fleeting trends.
- Finally, the importance of staying proactive with routine maintenance tools and techniques ensures my kitchen remains as stunning and functional as the day it was completed.
Tools and Resources That Changed My Approach
- Expert storage guides: Their detailed strategies helped me tailor my storage solutions precisely to my needs, maximizing space and convenience.
- Comprehensive cabinet and remodeling books: These resources expanded my understanding of materials, finishes, and design techniques, directly influencing my project choices.
- Professional craftsmen’s insights: Collaborating early in the process and listening to their expertise prevented common pitfalls and elevated my kitchen’s quality.
- Innovative DIY tools: High-quality drills, digital angle finders, and organizational accessories made maintenance and adjustments effortless, keeping my kitchen pristine over time.
Your Turn to Reimagine Your Kitchen’s Potential
Transforming your kitchen into a cohesive, built-in masterpiece is more than just a renovation—it’s an investment in your daily comfort and home value. With careful planning, the right tools, and a willingness to learn, you can create a space that’s as beautiful as it is functional. Remember, every detail—from seamless panels to smart storage—contributes to that high-end look you desire. Don’t hesitate to start your journey today, knowing that thoughtful decisions today will bring long-lasting satisfaction tomorrow.
Have you ever struggled with finding the perfect way to conceal appliances or optimize storage? Share your experiences below—I’d love to hear what challenges you’ve faced and how you plan to overcome them!
,