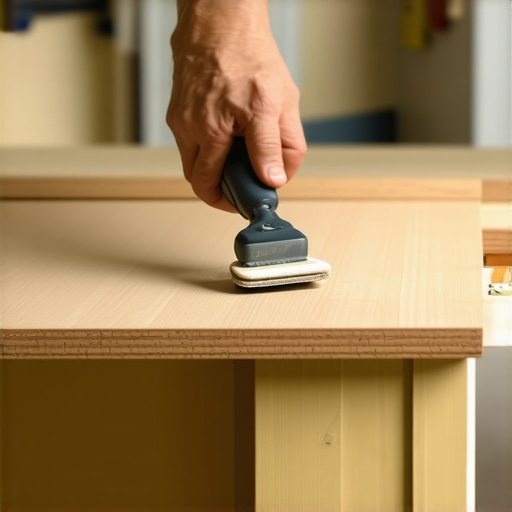
The Sanding Secret for a Glass-Smooth Painted Cabinet Finish at Home
It was a typical Saturday afternoon when I finally decided to tackle repainting my kitchen cabinets. As I pulled out the primer and brushes, I realized I had overlooked one crucial step—sanding properly. The result? Bumpy, uneven surfaces that made me want to ditch the entire project. That frustrating experience was my lightbulb moment. I learned that achieving a flawless, glass-smooth finish isn’t just about the paint itself; it hinges on a secret that most DIYers overlook: proper sanding techniques.
The Secret to a Flawless Cabinet Finish Starts with Sanding
After a few more failed attempts, I researched and experimented until I uncovered a method that transformed my cabinets from rustic to showroom-ready. Now, I want to share this insight with you because, trust me, the difference is astonishing—and surprisingly simple once you understand the technique.
Is Sanding More Trouble Than It’s Worth?
One common fear I hear from fellow DIY enthusiasts is that sanding will turn into a never-ending saga. Believe me, I was there too. Early on, I made the mistake of using coarse grit sandpaper on glossy surfaces, which left visible scratches that only worsened the finish. It’s a mistake I urge you to avoid. The key is in choosing the right grit and technique, ensuring your cabinet surfaces are smooth as glass before painting. Proper sanding creates a perfect bond for the paint, leading to a slick, durable finish that truly looks professional. Did you know that incorrectly prepared surfaces can reduce paint adhesion by up to 60%? That’s a statistic I came across from a leading cabinetry expert, highlighting just how vital this step truly is.
If you’ve ever been disappointed by patchy paint or visible brush strokes, that’s often due to skipping or rushing this critical step. But don’t worry—once you master the art of sanding, your painted cabinets will look like they were done by a pro. Ready to see how it’s done? Let’s dive into the steps that will elevate your home remodel from amateur to stunning.
Start with Proper Surface Preparation
Before you begin sanding, remove all hardware and clean the cabinet surfaces thoroughly with a degreaser or mild soap to eliminate grease, dust, or wax that could impede adhesion. I recall a time when I skipped this step, and the dust trapped under the paint caused a rough texture. That experience taught me the importance of a clean, dust-free surface for optimal results.
Select the Right Sandpaper Grades
Choose a progression of grit sizes—start with 120-grit to remove any roughness or old finish, then move to 220-grit for smoothing out scratches, and finish with 320- or 400-grit for a glass-smooth surface. Think of it like exfoliating your skin: coarse to remove blemishes, fine to smooth out imperfections. During my kitchen project, I initially used only coarse grit, which left visible scratches that marred the final look. Switching to finer grit made a significant difference in achieving a sleek finish.
Use the Right Sanding Technique
Hold the sanding block or orbital sander with firm, even pressure, moving it in the direction of the wood grain. I found that applying too much pressure or sanding against the grain caused uneven surfaces and scratches. Keep your strokes long and consistent—imagine you’re sculpting a smooth sculpture, not patching up a pothole. On one occasion, I hurried through this step, and the uneven surface showed through the paint, forcing me to redo the entire prep. Patience here saves time later.
Sand in Multiple Directions for Evenness
Round the corners and sand in overlapping patterns to ensure every inch is even. For intricate profiles or corners, wrap sandpaper around a foam block or use fine-grit abrasives with a detail sander. This approach is like polishing a gemstone—every angle matters. In my recent kitchen upgrade, neglecting to sand corners meticulously caused visible ridges, diminishing the paint’s smoothness.
Focus on Problem Areas
Identify and spend extra time on areas with previous imperfections or resin drips. Use a finer grit to carefully level these spots, preventing them from bleeding through the paint and ruining your finish. Remember, the devil is in the details. During a past project, I used a coarse grit on a stubborn spot, which resulted in more work to fix the scratch marks later. Taking time here is well worth the effort.
Clean Surfaces After Sanding
Use a tack cloth or vacuum with a brush attachment to remove all dust particles after sanding. This step is critical—residual dust can cause uneven paint application and visible bumps. I once skipped this cleaning, and the dust settled into the paint, creating a gritty texture that undermined my entire project. Investing a few minutes in cleaning up ensures a flawless finish.
Applying Primer and Paint
Once sanding and cleaning are complete, apply a high-quality primer suitable for your surface. After the primer dries, sand lightly with very fine grit (400) before applying the top coat. This process ensures maximum adhesion and a smooth surface for your paint. I learned this lesson after multiple attempts at a DIY paint job that failed to look professional—the extra prep work made all the difference.
Remember, proper sanding isn’t a tedious chore but a vital step that transforms your project from amateur to professional-grade. Approaching it methodically, with patience and attention to detail, guarantees a finish you’ll be proud of for years to come.
Many homeowners and even seasoned renovators hold common beliefs about built-ins, custom cabinets, and storage solutions that can lead to costly mistakes. While it’s tempting to think that more storage always equals better design, there’s a nuanced layer many overlook—especially when it comes to integrating these features seamlessly into your space. Contrary to the popular myth that custom solutions are overkill for small kitchens, well-planned built-ins can actually maximize space more effectively than generic cabinetry. The secret lies in understanding the subtleties of design and function, which can make or break your remodel.
What Do Most People Overlook About Built-Ins?
Many assume that built-ins are only for large, luxurious homes. However, the real advantage of built-in storage is their adaptability to any space, including compact kitchens. The challenge isn’t just in fitting furniture into a room but in customizing it to serve multiple purposes without cluttering the area. For example, incorporating built-in storage hacks can create sleek compartments for tech gadgets, spices, or even trash bins, all hidden from view. Recognizing this subtlety can transform your renovation from standard to extraordinary.
Beware the Common Pitfall of Overconfidence in Standard Designs
A notable trap is relying solely on off-the-shelf cabinets. Standard solutions often seem cost-effective initially but end up limiting your storage capacity and failing to utilize awkward corners. This can lead to frustrating clutter and inefficient use of space over time. For instance, corner cabinets with lazy Susans are popular but may not be the optimal choice for every corner. More sophisticated solutions like custom corner units can provide a cleaner, more accessible alternative, especially when designed to fit the exact angles of your space.
Advanced Insights for the Savvy Remodeler
For those looking to take their kitchen upgrade to the next level, consider the impact of storage ergonomics on daily use. Even the most beautiful cabinets are useless if the contents are hard to reach or poorly organized. Incorporating expert tips on storage selection can help you create a system that is both functional and visually appealing. Innovative storage methods, including hidden compartments and pull-outs, maximize usability without sacrificing style.
Get Expert Advice Before You Make Your Move
One critical mistake is failing to consult with a professional designer or cabinet maker at the planning stage. DIY mistakes—like miscalculating the depth of shelves or ignoring clearance—can be difficult to fix later. A strategic plan that considers these nuances ensures your remodel is an investment in convenience and aesthetic appeal. To learn more about how custom cabinetry can be a game-changer, explore this guide on custom cabinets. Don’t forget: Upfront expert guidance can save you time, money, and regret in the long run.
**Have you ever fallen into this trap? Let me know in the comments!** Understanding the hidden nuances in built-ins and kitchen storage can elevate your project from basic to brilliant. Recognize the traps and leverage expert insights to craft a space that’s both stunning and supremely functional.
Tools That Keep Your Built-Ins in Peak Condition
Investing in the right tools is crucial for maintaining and updating your built-in storage solutions. I personally swear by a high-quality cordless orbital sander because it allows me to perform touch-up sanding without creating a mess, especially in tight corners. Additionally, a digital moisture meter helps me monitor humidity levels, preventing wood warping—an issue that can jeopardize custom cabinetry over time. For cleaning, microfiber cloths combined with a mild, pH-balanced cleaner ensure surfaces stay residue-free and prevent build-up that could affect finishes. Remember, the best maintenance starts with proper tools that you trust to do precise, effective work.
Software and Planning Resources for Longevity
When it’s time to remodel or reconfigure your storage, I recommend using CAD design software like SketchUp. It helps visualize modifications, ensuring that new shelves or cabinets align perfectly, avoiding costly errors. When planning storage adjustments, consider consulting the expert tips on selecting solutions that stand the test of time. Proper planning software and knowledge prevent mistakes that could lead to structural issues down the line, saving you money and frustration.
Routine Maintenance for Long-Term Results
Consistent upkeep, such as lubricating hinges with a silicone spray like the one from this guide, helps prevent slamming and sticking. Regular cleaning of tracks and soft-close mechanisms keeps hardware functioning smoothly. I suggest setting a quarterly schedule: clean, lubricate, and inspect for any signs of wood expansion or contraction due to humidity changes. This proactive approach ensures your custom cabinets and built-ins continue to operate flawlessly for years.
How do I maintain my custom cabinetry over time?
Beyond routine cleaning and hardware lubrication, it’s essential to monitor environmental conditions. Using a dehumidifier in humid climates or ensuring proper ventilation can dramatically extend the lifespan of your investments. Also, periodically check for any signs of paint chipping or hinge misalignment. Addressing small issues early prevents costly repairs or replacements later. For more detailed guidance, I suggest reviewing the comprehensive strategies outlined in this resource.
Scaling and Adjusting for Future Needs
As your storage needs evolve, tools like adjustable shelving systems and modular cabinet inserts can make scaling much simpler. I’ve found that quick-release mechanisms and standardized hardware allow for effortless reconfiguration without major renovations. Keeping a stock of versatile hardware and familiarizing yourself with these adjustability options means your kitchen can grow with your family or lifestyle—without feeling like a mess or a major project.
Don’t overlook the importance of integrating these maintenance tools and strategies early on; it’s what keeps your built-ins looking and functioning like new for years. For expert guidance tailored to your space, consider reaching out through this contact page. And if you’re eager to improve your storage systems further, I recommend trying the innovative solutions discussed on our site—such as hidden pull-outs or modular shelves—to truly maximize space and ease of access.
Throughout my journey working with built-ins, kitchen remodels, and storage solutions, I uncovered a recurring theme: the importance of patience and meticulous attention to detail. One of the most profound lessons I learned was that rushing through simple steps—like sanding—can undo hours of careful planning. Another eye-opener was realizing that many seemingly small design choices, such as the placement of a hidden pull-out or the type of hinges used, have a ripple effect on the overall functionality and aesthetic. These insights, gained through trial, error, and countless late nights, have profoundly shaped my approach and can do the same for you.