How to Sand Between Coats for a Glass-Smooth Cabinet Finish
I’ll never forget the pile of sanding dust on my kitchen floor and the frustration that hit me after finishing my latest cabinet project. No matter how carefully I applied each coat of paint or finish, there was always that tiny imperfection, a rough spot or a visible brush stroke that just wouldn’t disappear. It was like my cabinets were destined to look good from afar but lacked that high-end, mirror-like perfection I was craving. Sound familiar? If you’ve ever felt the sting of a less-than-perfect finish, you’re not alone. That lightbulb moment when I realized I was skipping a crucial step—properly sanding between coats—changed everything.
Why Sanding Between Coats Makes All the Difference
In my experience, the smoothest, most professional-looking finishes come down to this one often-overlooked detail: sanding between coats. It’s tempting to rush through this step, especially when eager to see results. But cutting corners here can result in a bumpy, uneven surface that undermines all your hard work. Properly sanding ensures that each subsequent coat adheres flawlessly, filling in tiny imperfections and smoothing out any brush or roller marks. When I started taking this step seriously, I noticed a dramatic improvement—my cabinets became glass-smooth, practically mirror-like, giving my kitchen that high-end feel I had dreamed of. Don’t underestimate this simple step; it’s truly the secret sauce for professional results. For some added inspiration, check out how custom cabinets can elevate your space, through ideas that blend beauty and function seamlessly.
Is Sanding Between Coats Really Necessary—Or Just Overkill?
Initially, I thought skipping this step would save time. But I quickly learned I was making a costly mistake. Skipping the sanding meant trapping tiny dust particles and brush marks beneath subsequent coats, making finishing touches much harder and the final appearance less polished. The truth is, taking a few extra minutes to sand lightly with a fine-grit paper between coats is worth its weight in gold. It’s like sanding is the bridge between a DIY project and a professional masterpiece. If you’re skeptical, I don’t blame you—I’ve fallen into the trap myself. But once I committed to this routine, the results speak for themselves.
So, are you tired of seeing imperfections in your cabinet finishes, despite your best efforts? Have you faced that nagging doubt if you’re doing all you can to achieve that sleek, glass-smooth look? If so, you’re in the right place. In the next sections, I’ll walk you through the Best techniques for sanding between coats, giving you step-by-step guidance to transform your project from decent to stunning. Remember, little details make all the difference, and mastering this simple step could be the game-changer your kitchen needs—to look professionally finished and beautifully smooth.
Prep Your Workspace and Materials for Success
Before diving into sanding, gather all necessary supplies: fine-grit sandpaper (220 grit or higher), a sanding block or detail sander, a clean microfiber cloth, and a vacuum or tack cloth to remove dust. Lay down a drop cloth to catch debris and ensure a dust-free environment, which is crucial for a smooth finish. When I worked on refinishing my kitchen cabinets, I set up a dedicated area with good lighting and kept my materials within reach to streamline the process. This preparation minimizes dust settling on wet paint and helps achieve a professional-level result.
Implement Gentle, Controlled Sanding
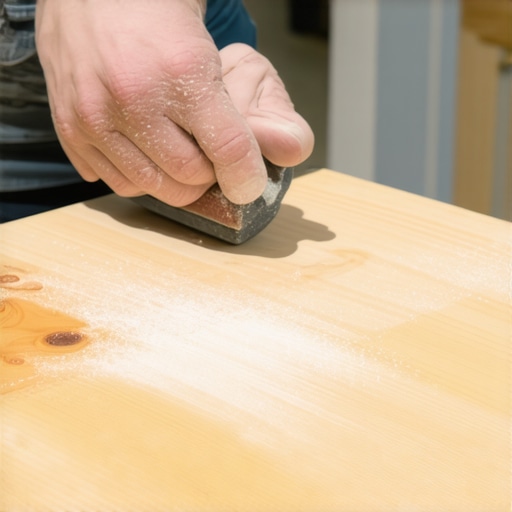
Begin by lightly sanding the dried coat using a fine-grit sandpaper attached to a sanding block. Apply gentle pressure with smooth, even strokes along the grain to prevent creating scratches or uneven surfaces. Imagine you’re massaging the surface; the goal is to smooth out tiny imperfections without removing too much material. In my recent project, I used a foam block for harder-to-reach corners, which allowed for precision without damaging surrounding areas. Always inspect your work with good lighting to identify any rough spots that need extra attention.
Focus on Dust and Residue Removal
After sanding, it’s vital to remove all dust particles before applying the next coat. Use a vacuum or a tack cloth—dampening a microfiber cloth slightly if needed—to wipe down the surface thoroughly. Dust is the enemy of a smooth finish; it settles into wet paint and creates bumps or craters. During my cabinet restoration, I found that meticulous dust removal after each sanding step was the difference between a good-looking kitchen and one that looked like a DIY mess. Take your time here; rushing this step invites imperfections into your finish.
Sand Between Coats Effectively
Evaluate the surface after each coat to determine if additional sanding is necessary. For most topcoats, light sanding with 220 to 320 grit sandpaper enhances adhesion and smooths out minor imperfections. Be cautious not to over-sand or remove the previous layer; you’re aiming to refine, not strip. I learned this the hard way when I aggressively sanded my final coat, which caused uneven sheen. Instead, use a light touch and always check your progress before moving forward.
Use Proper Techniques for Difficult Areas
For corners, edges, or intricate details, utilize a small foam or folded sandpaper piece to reach tight spots. Wrap the sandpaper around a pencil or small stick to maintain control and prevent accidental damage. During my recent project, I paid extra attention to the edges of cabinet doors, knowing that roughness here would be noticeable. Consistent, delicate sanding in these areas ensures uniformity across the entire surface and contributes to that mirror-like finish.
Recognize When to Stop Sanding
Knowing when a surface is sufficiently smooth is key. Run your hand gently over the area—if it feels velvety smooth and no rough patches are felt, you’re good to proceed. If spots still catch your finger or you see microscopic scratches under good lighting, sand a little longer. In my experience, patience here prevents the need for premature recoating or re-sanding later, saving time and effort. Mastering this fine discernment turns amateur projects into professional-looking results.
Applying these techniques with focus and care transformed my cabinet project. The meticulous sanding between coats eliminated typical imperfections, leading to a glossy, high-end finish. Remember, this step might seem tedious, but every minute invested pays off in the form of beautifully smooth, durable surfaces that elevate your entire remodel. For example, I found that detailed work around door edges and corners made a visible difference, offering a seamless transition from plain to polished. Keep dust out of your workspace, handle your tools gently, and inspect regularly—your future self will thank you for the professional-quality results.
Many homeowners believe that simply choosing stylish cabinetry and maximizing storage space automatically leads to a functional kitchen. However, this overlooks the nuanced challenges that can derail even the most well-planned remodel. One prevalent misconception is that built-in storage solutions are a ‘set-it-and-forget-it’ fix. In reality, without careful integration, built-ins can create awkward spaces or difficult access points, especially if not customized to your specific workflow and habits. For example, a poorly placed pantry or an oversized microwave niche can turn into more of a foot-dragging obstacle than a blessing. To truly elevate your kitchen, it’s crucial to consider bespoke details, like adjustable shelving and integrated charging stations, which often go unnoticed but have a huge impact on daily convenience. For insights on designing truly functional built-ins, check out this guide to built-in solutions.
Advanced homeowners often question why traditional storage ideas fall short
Everyone says classic corner cabinets with lazy Susans are the best use of space, but experience shows that they often underperform, especially in tight kitchens. The real advanced trick involves custom swing-out solutions that maximize access and minimize dead space, as explained in this detailed article. A common trap here is oversimplifying the problem and assuming that a lazy Susan is a universal fix. This oversight can lead to frustrating moments when you can’t reach the back of a cabinet or struggle to find what you need quickly. The key lies in understanding that effective storage design requires bespoke mechanisms tailored to your specific spatial constraints and usage patterns.
Another nuance often missed is underestimating the importance of door and hinge quality, which can dramatically affect the longevity and usability of your cabinets. Cheap hinges might save money initially, but they often lead to sagging doors that won’t close properly over time. Investing in high-quality, soft-close hinges is a game-changing move, especially in cabinets that see daily use. These small details help prevent the common mistake of rushing your selection and ultimately facing costly repairs or replacements down the line. For a deeper dive into durable hardware options, see this expert guide.
Why customization often trumps standard solutions—and why many get it wrong
The myth that off-the-shelf cabinetry fits all spaces is one of the most costly misconceptions in kitchen redesign. While prefab cabinets are tempting because of their lower initial price, they often lack the precise fit needed for high-end aesthetic and optimized storage. One overlooked nuance is the importance of wall depth and material thickness; many standard cabinets assume a 12-inch toe kick or a 24-inch countertop overhang, but your specific kitchen might demand more precise measurements or special finishes. Skipping this customization step results in visual inconsistencies and inefficient use of space. An expert-level approach involves working closely with cabinetmakers to match your space’s exact dimensions, considering factors like toe kicks, crown molding, and wall intrusions. Learn more about the advantage of tailored solutions in this comprehensive guide.
To wrap up, elevating your kitchen remodel from ordinary to extraordinary hinges on paying attention to these hidden nuances. Overcoming common myths and avoiding the trap of generic solutions can save you time, money, and frustration, resulting in a space that truly reflects your lifestyle and aesthetic. Have you ever fallen into this trap? Let me know in the comments, and share your experience with customization or hidden challenges in your projects.
Keep Your Cabinets and Storage Systems Working Smoothly for Years
Investing in high-quality materials is just the first step; proper maintenance is key to preserving the beauty and functionality of your kitchen remodel. Regular upkeep reduces the need for costly repairs and keeps everything operating seamlessly. Personally, I swear by using a small, cordless detail sander—like the Makita BO5041—for touch-ups or periodic refinishing of cabinet surfaces. Its ergonomic design and variable speed control allow me to smooth out scratches or refresh finishes without disrupting the entire kitchen. Such tools save time and help maintain the pristine look of custom cabinetry over the long haul.
Essential Tools for Ongoing Upkeep
Beyond initial installation, certain tools become indispensable for routine maintenance. A high-quality, multi-purpose screwdriver with a magnetic tip allows quick adjustments of hinges and handles to prevent sagging or misalignment. I also recommend keeping a digital caliper handy—this precise measuring device helps monitor slight shifts in cabinet dimensions or drawer slides over time, ensuring everything remains within optimal tolerances. For cleaning, a microfiber cloth combined with a gentle, non-abrasive cleaner preserves finishes, and I favor spray formulations with low VOCs to reduce residue buildup. Incorporating these tools into your routine can extend the lifespan of your remodel and keep your kitchen functioning flawlessly.
Remote monitoring and smart hardware to future-proof your space
Looking ahead, the integration of smart technology is set to revolutionize kitchen maintenance. Smart hinges and drawer slides equipped with sensors can alert you when alignment drifts or mechanical issues arise—allowing proactive repairs before problems become noticeable. Currently, devices like the Blum Aventos Lift support system offer smartphone connectivity for troubleshooting and adjustments, which I find invaluable for long-term upkeep. As technology advances, expect more connected hardware that simplifies maintenance and enhances durability, making it easier to retain your investment over decades.
How do I maintain your custom storage and built-ins over time?
To keep your storage solutions in tip-top shape, establish a routine cleaning schedule and inspect moving parts quarterly. Lubricate hinges and slides with a silicone-based lubricant—avoiding oils that can attract dust—to ensure smooth operation. Tighten any loose screws or hardware and replace damaged components promptly to prevent further issues. For intricate built-ins, consider applying protective finishes or sealants periodically, which protect against humidity and wear. Refer to expert guides like this built-in maintenance article to learn more about long-term care practices.
To simplify this process, try implementing a maintenance checklist once every six months. For example, I schedule a quick inspection of hinges and drawer slides, applying a drop of silicone lubricant as needed—this tiny effort preserves the system’s integrity and keeps everything functioning smoothly. Taking these proactive steps not only prolongs the lifespan of your custom cabinetry but also ensures your kitchen remains functional and beautiful for years to come. Don’t wait for issues to arise—start your maintenance routine today and enjoy the peace of mind that comes with a well-kept space.
How I Learned That Less Is More in Finishing Touches
One big lesson I’ve discovered is that over-sanding can be just as detrimental as under-sanding. Too much removal can create dips and uneven surfaces, making the final coat look less uniform. The key is to develop a gentle touch and know when to stop—trust your fingers and lights to guide you.
Why Skipping Dust Removal Costs You in the End
After years of experience, I realized that neglecting dust removal after sanding leads to tiny bumps and craters that ruin the smoothness of your finish. A quick wipe with a tack cloth or vacuum makes all the difference, especially in fine details and corners. It’s a small step that saves hours of rework later.
Choosing the Right Tools for Precision and Control
Investing in quality sanding blocks and flexible abrasive pads has transformed my approach. Using a foam block for intricate areas allows me to get into corners without marring surrounding surfaces. Quality tools ensure consistency and help you achieve that professional, mirror-like sheen.
Timing Is Everything When Applying Coats and Sanding
Patience is a virtue in cabinet finishing. Waiting until each coat dries thoroughly prevents smudges and peeling. Lightly sand between coats to promote adhesion, but avoid aggressive movements that can remove too much. Developing a rhythm and routine makes the process more manageable and results more predictable.
How These Small Adjustments Elevate Your Projects
Implementing these nuanced techniques—gentle sanding, dust removal, precision tools, and patience—has significantly improved my results. The cabinets look stunning, with a smoothness that feels luxurious. The difference is in the details, and mastering them ensures your efforts stand out, making your kitchen truly a tailored masterpiece.
My Favorite Tools That Keep Finishes Perfect
I rely on a few trusted tools to maintain consistent quality: a fine-grit sanding sponge for delicate surfaces, a high-quality tack cloth for dust removal, and a soft-bristled brush for dust in crevices. Using these ensures a pristine surface before the next coat—a step I cannot skip regardless of how many projects I take on. For more insights, check out this guide on selecting the right tools.
Believe in Your Ability to Create Show-Stopping Cabinets
Upgrading your kitchen cabinets isn’t just about choosing the right hardware or color; it’s about embracing the process and paying attention to the little things. When you master proper sanding and preparation, you unlock a new level of craftsmanship that transforms your space from ordinary to extraordinary. Your effort will be rewarded with cabinets that are not just beautiful but durable and a source of pride for years to come. Ready to elevate your project? Dive into this expert guide and start crafting your dream kitchen today.
What’s been the most surprising lesson in your kitchen remodel journey? Share below—I’d love to hear your stories!
,