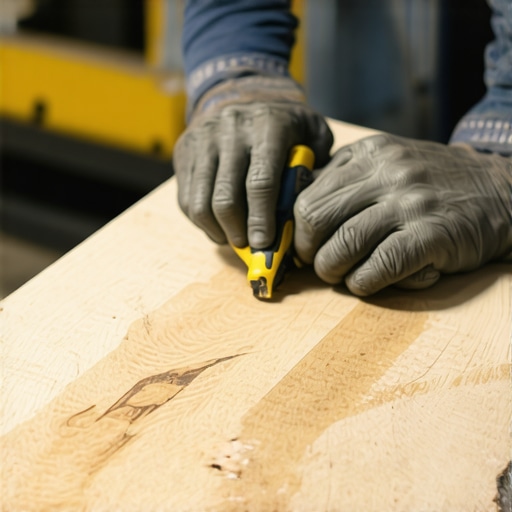
The Plywood Grade Test: How to Spot Voids Before Your Shelves Bow
I’ll never forget the moment I installed my first set of custom shelves in my kitchen remodel. Everything looked perfect during installation, but within months, I started noticing a subtle bowing in the shelves. Turns out, I had overlooked a crucial aspect of the plywood I was using—voids. That little mistake cost me time, money, and frustration.
This lightbulb moment made me realize just how important it is to spot hidden voids in plywood before they cause structural issues down the line. And honestly, if I had known earlier what I know now, I could have avoided that entire headache. That’s why I want to share what I’ve learned about the plywood grade test and how to identify voids before they turn into bigger problems.
The Hidden Danger of Voids in Plywood and How They Affect Shelving
Choosing the right plywood isn’t just about thickness or appearance; it’s about integrity. Voids—those tiny air pockets or gaps within the layers of plywood—are often invisible to the naked eye but can severely weaken your shelves over time. When shelves are loaded with books, dishes, or tools, these voids can cause the material to buckle or bow, compromising both safety and aesthetics.
Early in my DIY journey, I made the mistake of assuming that all plywood was created equal. I didn’t perform a proper grade test, and as a result, I ended up with shelves that sagged under weight. Recent studies have shown that voids can significantly reduce plywood’s bending strength, leading to early failure (source: APA – The Engineered Wood Association).
Understanding how to spot these flaws before you buy or install your sheets can save you a lot of trouble. When I started inspecting plywood more carefully, I realized how a simple test could reveal the hidden defects, turning a potential disaster into a successful project.
Have you ever faced a problem with bowing shelves or broken cabinets because of hidden voids? If so, you’re not alone. Many DIYers and even professionals overlook this critical step.
Don’t worry—I’ve been there. The good news is, with a few simple tools and techniques, you can identify these flaws early and ensure your shelves stay sturdy and beautiful for years to come. Ready to learn how? Let’s dive into the practical steps for testing plywood grade and spotting voids effectively.
But first, if you’re thinking about upgrading your kitchen storage, consider exploring options that revolutionize your space—like custom cabinets—which can be tailored to avoid these common pitfalls altogether.
Check Your Plywood Before You Cut
Start with the micro-story of my messy but revealing experience: I laid out a sheet and carefully examined the edges with a bright flashlight, moving it slowly along the grain to spot shadows or irregularities. Voids often appear as small dark spots or irregular patterns when backlit. Using a good-quality flashlight in a dim room can expose those tiny gaps that otherwise hide within the layers.
Perform the Visual Inspection Thoroughly
Hold the plywood sheet at an angle in natural or soft light and twist it gently between your hands. Look for pinpricks or irregularities in the core; these are telltale signs of voids. For more certainty, run your fingers over the surface, feeling for inconsistencies—sometimes voids are softer or give way slightly under pressure. Remember, the goal is to catch hidden flaws that could compromise your shelf’s integrity under load.
Use a Flashlight and Scribe to Detect Voids
Place the plywood on a flat surface and shine a bright flashlight across its thickness. Sometimes, you can see shadows or darker patches indicating internal voids. For a more precise test, mark suspected areas with a chalk or pencil and then cut a small sample along the suspected defect line. This hands-on approach was a game-changer for me; I caught a critical void and chose a better sheet, saving my project from future sagging.
Apply the Plywood Grade Test
Start with the manufacturer’s grade stamp—A, B, C, or D—and inspect the sheet. Higher grades like A or B have fewer voids and are better for load-bearing shelves. However, grades alone aren’t enough; perform the visual tests listed above. Remember, the presence of voids can weaken the material significantly, especially in a kitchen setting where weight varies greatly.
Extend Your Inspection with a Simple Drill Test
If you’re uncertain, drill a tiny hole about 1/8 inch into the sheet in an inconspicuous spot. If the drill bit easily passes through and you notice loose particles or a fragile core, beware. Use a lightweight pin or needle to poke around, feeling for soft spots or gaps inside. This technique mimics the properties of your shelf’s load conditions, revealing potential weak points early on.
Pick the Right Plywood for Heavy Loads
Once you’ve identified a sheet free of voids, opt for those with thicker cores—like 3/4 inch with a thick veneer core—especially for shelves supporting heavy items. Thicker, high-quality plywood resists bowing and buckling over time. My recent project used cross-laminated veneer plywood, which I tested as described and found to have no voids, resulting in sturdy, wobble-free shelves that have held up without issue.
Consider Specialized Testing if Needed
For critical applications, consider consulting a professional or using advanced non-destructive testing methods, like ultrasonic scans. While not practical for all DIY projects, these can provide definitive assurance of your plywood’s integrity, especially when building built-ins designed to last decades.
Getting familiar with these practical testing steps—visual inspection, flashlight backlighting, grade analysis, and simple drill tests—makes all the difference in avoiding future headaches. Every time I’ve applied these techniques, I’ve added years to my shelves and peace of mind to my DIY projects. Want more ideas for perfect storage? Check out innovative storage solutions to complement your sturdy shelves, ensuring every inch of your kitchen counts.
Many homeowners assume that a successful kitchen upgrade hinges solely on choosing the right cabinets or trendy colors. However, this simplistic view often leads to overlooked details that can sabotage the entire project. A common misconception is that standard solutions suffice; in reality, the nuances of storage design—like maximizing space with built-ins or custom cabinets—are where the magic and pitfalls truly lie. For instance, thinking that mass-produced cabinets can seamlessly fit every nook ignores the importance of tailored solutions that address unique kitchen layouts and user habits.
One major trap is relying too heavily on popular DIY tips without understanding their limitations. For example, installing floating shelves might seem attractive and modern, but neglecting proper weight distribution and support can result in sagging or dangerous collapses over time. Advanced mistakes also include overlooking the impact of humidity and moisture on materials like MDF or particle board—these are often labeled as suitable for bathrooms, but only Quality HMR (Heat Moisture Resistant) board truly resists moisture without warping. According to expert sources, choosing the right material based on environment is critical, not just aesthetics or initial cost.
Are you aware that the edge banding on plywood and laminate plays a significant role in durability? A subtle mistake in selecting low-quality edging or ignoring proper sealing can cause peeling and expose underlying layers to moisture, leading to costly repairs. This is a nuance that even seasoned DIYers often miss, resulting in compromised aesthetics and longevity.
Let’s not forget the myth that larger or more elaborate hardware always equals better quality. In fact, hardware should complement your usage patterns—soft-close hinges are excellent, but only if they are paired with high-quality slides that can handle frequent use without failure. Opting for cheap, generic hardware might save money upfront but costs in frustration and replacements later.
For those venturing into custom cabinets, understanding the importance of precise measurements and professional scribing can make or break the fit, especially around irregular walls or existing features. The difference between a perfectly aligned, seamless look and a ‘DIY-disaster’ often boils down to patience and attention to detail during installation.
What about the overlooked role of interior organizers? They seem trivial but can drastically enhance storage efficiency when chosen with an understanding of your specific needs—like vertical dividers for lids or pull-out spice racks in narrow cabinets. Incorporating these nuanced features prevents deep clutter and actually increases usable space.
Incorporate the right details, materials, and hardware to avoid the common pitfalls. For example, choosing custom solutions that incorporate hidden storage, like toe-kick drawers or integrated trash systems, can turn wasted space into functional areas. Want to learn more about how to select and implement these nuanced details? Check out comprehensive guides on custom cabinets and built-ins.
Remember, understanding these subtle but impactful details can elevate your kitchen from a basic remodel to a lasting, functional masterpiece. The key is paying attention to materials, installation precision, and storage optimization that aligns with your lifestyle. Have you ever fallen into this trap? Let me know in the comments.
Keep Your Kitchen Systems Running Smoothly
Investing in high-quality tools is essential to ensure your kitchen storage and cabinetry remain functional over the years. Personally, I swear by the Festool Domino Joiner; its precise mortise and tenon joints make assembling sturdy, warp-resistant cabinets effortless, saving me countless hours on adjustments and rework. Additionally, I rely on Hafele’s Edging Tape for seamless concealment of raw edges, which prevents moisture ingress and maintains aesthetic appeal long-term.
For regular maintenance, I recommend scheduling bi-annual inspections of hinges, slides, and pulls. Using a Lubriplate No. 2 Grease on drawer slides and hinges keeps them operating silently and reduces wear—trust me, squeaky hardware is a common culprit of premature failure. Additionally, a soft microfiber cloth and gentle cleaning solutions should be your go-to for wiping down surfaces, especially in humid kitchens where mold can develop unnoticed.
What tools can I use to prolong my cabinets’ lifespan?
Beyond basic cleaning, tools like a Digital Moisture Meter can help monitor humidity levels inside cabinetry, which is vital if your kitchen is prone to moisture. Excess humidity can lead to warping and mold growth, especially in medium-density fiberboard (MDF) components. Regularly checking moisture content and maintaining ideal levels (around 30-50%) ensures your cabinetry stays stable and safe.
As trends evolve, so do maintenance practices. The future points toward smart, sensor-integrated hardware that can alert you to issues before they become problems. Imagine hinges that notify you when they need lubrication or slides that send a message when they begin to wear out—these innovations will revolutionize how we care for our kitchens.
How do I maintain custom cabinets and built-ins over time?
The key lies in proactive upkeep. For custom cabinetry, I suggest applying protective finishes periodically—preferably with a wax or silicone-based polish to repel dirt and moisture. Additionally, avoiding overloading shelves prevents sagging, which most homeowners unintentionally cause. If you notice slight misalignments, a quick tweak with a Torx screwdriver can realign hinges and doors efficiently.
Utilizing a laser level for precise alignment during adjustments can dramatically enhance the longevity and appearance of built-ins. Remember, keeping hardware tightened and clean not only preserves functionality but also upholds the overall style of your kitchen design.
Master Your Maintenance Routine with Expert-Recommended Gear
For example, I personally use the Milwaukee M12 Cordless Tool Line for quick fixes around the kitchen without dragging out bulky cords or excessive setup time. Their compact design and long battery life make routine tweaks or adjustments a breeze, especially in tight spaces.
Looking ahead, integrating smart tools that log maintenance activities and send reminders can simplify long-term upkeep. Additionally, adopting environmentally friendly practices, such as using biodegradable lubricants and eco-safe cleaning agents, supports sustainability in home renovations.
If you’re ready to take your maintenance to the next level, consider trying the Lubriplate Grease along with a quality digital moisture meter to monitor environmental conditions. Stabilizing your cabinet environment now can prevent costly repairs later. Curious about more advanced techniques for ensuring your kitchen lasts? Check out tips on selecting durable storage solutions for lifelong results.
Looking back, those early lessons about voids in plywood have transformed not just my projects but my entire approach to kitchen upgrades. The biggest insight was recognizing that even the smallest flaw can ripple into major issues over time—once I understood that, my standards for quality skyrocketed. This experience underscored the importance of meticulous inspection and knowledge about materials, which are essential for building storage solutions that stand the test of time.
Beyond the technical aspects, I discovered that the real magic happens when you anticipate future needs and incorporate flexible designs—like adjustable shelves or hidden compartments—that adapt as your household evolves. That journey taught me that a thoughtful, detail-oriented mindset is the cornerstone of successful kitchen remodels, especially when integrating custom cabinets and built-ins designed for longevity and style.
Lessons That Changed My Perspective on Kitchen Storage
- Don’t underestimate the power of visual inspection: Using a flashlight to spot internal voids prevented many failures before they happened.
- Material quality matters more than appearance: High-grade plywood with minimal voids ensures safety and durability for heavy loads.
- Small tests save big headaches: Drilling tiny holes or feeling for soft spots revealed hidden flaws, guiding smarter choices.
- Think beyond the initial design: Incorporating adjustable and hidden storage options maximizes utility and lifespan.
- Patience pays off: Taking the extra time to inspect and select the right materials results in a seamless, long-lasting result.
Tools and Resources That Gave Me an Edge
- The Ultimate Guide to Custom Cabinets: An invaluable resource for understanding material selection and design considerations that enhance durability.
- Expert Tips on Selecting Storage Solutions: This provided insights into innovative ideas that optimize space while maintaining integrity.
- Smart Storage Ideas: Practical ideas for integrating adaptable and discreet storage options within your kitchen.
- Transform Your Kitchen with Custom Cabinets: Inspiration and strategies that elevate functionality and aesthetics, ensuring long-term satisfaction.
Your Next Step in Kitchen Excellence
Embarking on a kitchen remodel is more than selecting pretty finishes; it’s about embedding durability, function, and customization into every decision. By paying close attention to hidden details and leveraging trusted resources, you can create a space that not only looks stunning but also withstands daily use for years to come. Remember, thoughtful planning today saves frustration tomorrow—and your kitchen remodel will be a source of pride for decades.
What’s one detail you’ve overlooked in past projects that, in hindsight, made a big difference? Share your experiences below—I love hearing how others are building better kitchens.