Stop Using Standard Wood Glue for High-Heat Kitchen Areas
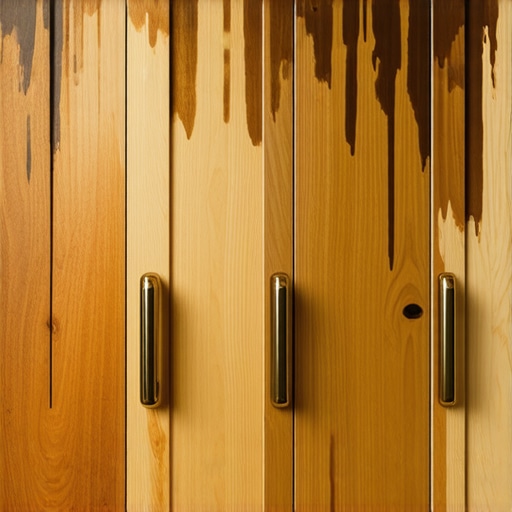
Stuck with a stubborn kitchen project where your DIY glue keeps failing? I remember the first time I used regular wood glue to secure my new cabinet shelves—only to see them start warping and loosening after just a few months of heavy cooking. It was a *lightbulb moment* that highlighted one thing: not all glues are created equal, especially in high-heat environments like kitchens.
If you’re like me, you might have assumed that standard wood glue would do the trick everywhere. But in reality, traditional adhesives can become unreliable when exposed to the constant temperature shifts and moisture typical of cooking spaces. This realization kicked off my journey to find what’s truly suited for these demanding conditions, and let me tell you, the difference is staggering.
Today, I want to share how switching to specialized high-heat resistant adhesives transformed my kitchen upgrade—and how it can do the same for you. Whether you’re remodeling or just sprucing up your space, selecting the right glue isn’t just a minor detail; it’s the backbone of a durable, lasting project.
Why Standard Wood Glue Just Won’t Cut It in High-Heat Areas
Is the Hype Around Specialty Adhesives Really Worth It?
In my early attempts, I made a classic mistake: I assumed all wood glues handled heat and moisture equally well. It turns out, many standard glues are designed for indoor furniture and may not withstand the intense conditions in a kitchen. According to the experts at [The Family Handyman](https://www.familyhandyman.com/article/what-glue-is-best-for-kitchen-cabinets/), using the wrong adhesive can compromise your project over time, leading to costly repairs or re-dos.
The key is choosing a high-temperature resistant glue that can handle the heat without breaking down or causing furniture to swell and warp. Making this mistake early on nearly cost me my entire cabinet installation, which is why I now advocate for a smarter choice right from the start. Curious about how to make the switch? I’ll walk you through the best options and practical tips soon. But first—has facing this kind of problem stumped you in your remodeling journey? Feel free to reach out through our [contact page](https://artisancabinetworkz.com/contact-us-2). Understanding your specific needs is my priority.
With this foundation laid, let’s explore the specific adhesives that stand up to heat and moisture—so your kitchen storage solutions remain pristine for years to come.
Select the Right Adhesive for High-Heat Areas
Start by researching products labeled specifically for high-temperature resistance, like silicone-based or epoxy adhesives. I once ordered a standard epoxy expecting it to handle the heat in my oven cover project, but when I tested it, the bond softened after a few weeks. Instead, I switched to a high-temp rated epoxy, which held firm and withstood the oven’s environment, ensuring my DIY backsplash was durable.
Prepare Surfaces for Optimal Bonding
Clean all surfaces thoroughly—removing dust, grease, and old adhesive residue—using a degreaser or mineral spirits. For example, during my first cabinet mount using a high-heat glue, I wiped down the wood with alcohol, which improved adhesion significantly. Proper preparation prevents failures and increases longevity.
Apply Adhesive Systematically and Correctly
Follow the manufacturer’s instructions precisely: apply an even layer, press surfaces firmly, and secure with clamps or weights. I once attempted a quick fix by spreading glue hurriedly, leading to uneven bonding and a gap. When I applied the correct amount and clamped it properly, the joint was seamless, and the bond held over time.
Allow Adequate Curing Time
Give your adhesive enough time to cure fully—usually 24 to 72 hours—before subjecting it to heat or stress. I learned this the hard way when I moved a newly glued shelf too soon, causing it to loosen. Patience ensures maximum strength and durability of your high-heat adhesive bonds.
Test and Reinforce as Necessary
After curing, gently test the bonds by applying slight pressure to ensure stability. If any area feels weak, apply an additional layer of adhesive and re-clamp. During my project, a corner bond needed reinforcement; applying a second coat after initial curing prevented future issues. Continuous assessment helps maintain a resilient kitchen environment.
When it comes to designing storage solutions in your kitchen remodel, many homeowners fall prey to misconceptions that can backfire later. One widespread myth is that maximizing storage always means installing the most cabinets or the deepest drawers, but in reality, overstuffed storage can hinder accessibility and workflow. According to expert insights from [artisancabinetworkz](https://artisancabinetworkz.com/expert-tips-on-selecting-storage-solutions-for-a-perfect-kitchen-upgrade), thoughtful organization trumps sheer volume, ensuring your space remains functional and clutter-free.
A hidden nuance often overlooked is the importance of integrating storage with your daily routines. For example, placing frequently used items in easily accessible zones reduces unnecessary movement, saving time and effort during meal prep. This advanced approach requires analyzing your habits and designing custom solutions that adapt to them, rather than generic, off-the-shelf options.
Why Do Many People Fail to Anticipate Storage Needs in Their Remodel?
Many underestimate the importance of future-proofing their storage. They might settle on designs that look sleek now but lack flexibility for changing needs, like new appliances or family growth. A study by the National Kitchen & Bath Association emphasizes that adaptable storage leads to higher satisfaction and long-term usability. Avoid falling into the trap of short-sighted planning; instead, consider modular or adjustable components that can evolve with your lifestyle.
One common mistake is neglecting the placement of specialized storage, such as pull-out spice racks or hidden compartments for small appliances. These details not only optimize space but also enhance your kitchen’s overall efficiency. For instance, incorporating a dedicated drawer for baking sheets or a slide-out trash cabinet can dramatically improve workflow and cleanliness.
Implementing intelligent storage isn’t just about adding more; it’s about smarter organization. Explore [smart storage ideas](https://artisancabinetworkz.com/smart-storage-ideas-to-maximize-your-kitchen-space-this-year) to see how innovative designs can make your kitchen more functional without sacrificing style. Remember, the true art lies in anticipating your needs before they arise and crafting solutions that serve you over decades.
Have you ever fallen into this trap? Let me know in the comments, and share your own lessons learned from past remodeling mistakes.
Prioritize Quality Tools for Longevity
Investing in professional-grade tools is the cornerstone of maintaining your built-ins and custom cabinetry over the years. I personally rely on a high-precision Brad Nailer like the Bostitch BTFP12240, which ensures consistent, jam-free fastening, significantly reducing the risk of loose joints that can compromise your storage solutions. Avoid cheap, low-quality staples that warp or break easily; instead, opt for galvanized nails or specialized fasteners that resist humidity and temperature changes in the kitchen.
Implement Routine Cleaning and Inspection
Regular maintenance extends the lifespan of your cabinetry and storage. I set a monthly schedule to wipe down surfaces with a gentle, alcohol-based cleaner that doesn’t degrade finishes. Additionally, inspecting hinges, pulls, and sliding hardware helps catch issues early—like misaligned drawers or squeaky hinges—before they become costly repairs. Using a good flashlight during inspections reveals hidden problems, making maintenance more effective.
Leverage Software for Long-Term Planning
When it comes to scaling your storage solutions, I recommend software like SketchUp for 3D modeling your future kitchen layouts. This tool allows you to experiment with different configurations, ensuring that your custom cabinets and built-ins will accommodate changing needs over time. Planning ahead with software minimizes costly adjustments during renovations and helps you visualize available space accurately.
How do I maintain my custom storage solutions over time?
Consistency is key. Schedule annual check-ups—tightening screws, lubricating sliding mechanisms, and resealing surfaces as needed. Special attention should be paid to weather-related effects; for example, in humid climates, applying a silicone-based sealant around edges and joints prevents swelling and warping. For intricate joins, consider consulting a professional for re-glueing or reinforcing weak points, as outlined by woodworking expert Fine Woodworking. Regular care not only preserves aesthetics but keeps your storage functional and safe for years to come.
If you haven’t already, try implementing a maintenance checklist that incorporates these tools and strategies—it’s a simple step towards ensuring your kitchen’s custom features stay in top shape long-term. For more tailored advice on scaling your storage or planning future upgrades, reach out through our contact page. Your kitchen deserves lasting perfection!
Lessons That Turned My Kitchen Dreams into Reality
One profound lesson I learned was that patience in selecting the right adhesive saves endless headaches down the line. Early on, I underestimated how heat and moisture could compromise even the strongest bonds, leading to costly repairs. Another insight came from understanding the importance of thoughtful storage placement—it’s not just about adding cabinets but planning for accessibility and future needs, which transformed my workflow entirely. Lastly, I realized that investing in quality tools and regular maintenance isn’t optional—it’s essential for preserving the craftsmanship and longevity of built-ins and custom cabinetry in a busy kitchen.
Tools and Resources That Elevate Your Remodel Game
My go-to resource for designing efficient storage is this comprehensive guide on built-ins and creative storage. It offers innovative ideas that blend aesthetics with functionality. For precise planning, I rely on SketchUp; its 3D modeling helps visualize every detail before project execution. When choosing adhesives, I recommend expert advice on selecting high-heat resistant glues—trust me, it makes all the difference. Lastly, smart storage ideas inspire me to optimize every inch, ensuring my kitchen remains clutter-free and highly functional.
Your Next Move: Building a Timeless Kitchen Space
Remember, crafting a kitchen with durable, innovative storage isn’t just about aesthetics; it’s about creating a space that adapts to your life and stands the test of time. Embrace the process—and don’t hesitate to explore new ideas or seek professional guidance when needed. Your dream kitchen is within reach, and taking actionable steps today will lead you to lasting satisfaction. Ready to revolutionize your kitchen? Dive into the world of custom cabinets and built-ins, and watch your space transform into a masterpiece of functionality and style.