How to Clean Greasy Cabinet Tops Without Ruining the Lacquer
Ever washed your kitchen cabinet tops and ended up with dull, streaky stains that seem impossible to remove? I remember the frustration vividly. One busy Saturday, after a quick wipe with a harsh cleaner, I noticed my lacquered cabinets looked worse—dull patches, tiny scratches, and that unmistakable greasy film that just wouldn’t go away. It was a lightbulb moment for me—I was doing more harm than good.
Why Finding the Right Cleaning Method Matters
Most people assume that any cleaner will do, but in reality, choosing the wrong products or techniques can damage your lacquer, leading to costly repairs or even replacement. Your kitchen cabinets are a significant investment and a focal point in your home. Keeping them pristine without risking their finish requires a bit of knowledge. I’ll share what I’ve learned through trial, error, and some expert advice to help you maintain your cabinets beautifully.
Is Scrubbing with Household Cleaners Actually Worth the Hype?
Early on, I made the mistake of using abrasive scrub brushes and heavy-duty degreasers that promised quick results. Spoiler alert: they only made my cabinets worse. I found that gentle, purpose-made cleansers for lacquered surfaces do a far better job. Plus, they’re safer for your health and the environment. You want to avoid products loaded with alcohol or ammonia, which can strip delicate finishes. Trust me, I learned this the hard way.
Knowing what not to do is half the battle won. Once I adjusted my approach, the cleaning process became more effective, and my cabinets stayed shiny longer. But before jumping into the steps, I want to see—have you faced stubborn grease on your cabinets that just won’t budge? If so, stick around. I’ll guide you through a simple, safe, and effective way to restore your cabinet tops without risking that glossy lacquer finish.
Let’s get started on transforming your kitchen into the pristine space you deserve. For more ideas on transforming your shiny new cabinets, you might want to explore [custom cabinet ideas that completely overhaul your style](https://artisancabinetworkz.com/custom-cabinets-ideas-that-transform-your-homes-style). Now, onto the good stuff—ways to clean those greasy tops without ruining their lacquered beauty.
Select the Right Cleaning Supplies to Protect Your Finish
Begin by choosing gentle, lacquer-safe cleaners like a mild dish soap diluted with water or a specialized cabinet cleaner. Avoid abrasive pads or products containing alcohol, ammonia, or bleach, as these can damage the delicate finish. I once grabbed a generic degreaser, thinking it would save time, but it left a cloudy residue that took days to buff out. Using the right supplies upfront prevents such mishaps.
Prepare Your Workspace to Avoid Cross-Contamination
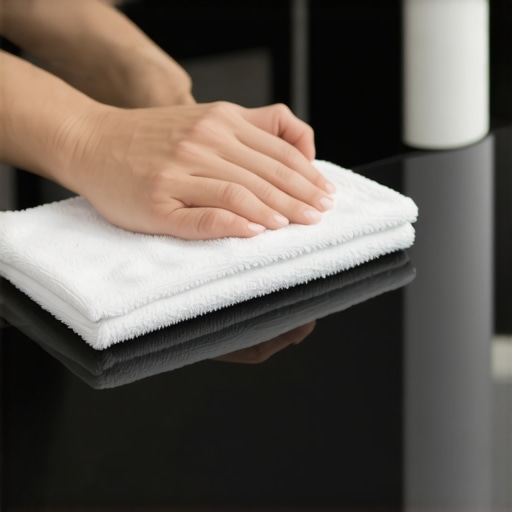
Clear the area around your cabinets and lay down a soft, lint-free cloth or towel. This creates a clean surface for wiping and prevents debris from scratching the finish. I remember working during a kitchen remodel, where dirt and grit kept getting into my cleaning cloth, scratching the surface. Prepping your workspace ensures a mess-free process and the best results.
Remove Items and Dust Off Surfaces
Take out all decorative items, appliances, and utensils from the cabinet tops. Use a feather duster or microfiber cloth to remove loose dust and cobwebs. This step avoids moving dirt around when you begin wiping, reducing the risk of scratches. I once skipped this, only to realize afterward that dust had caused tiny abrasions on the lacquer during a deep clean.
Apply Cleaner Gently with a Soft Cloth
Dampen your microfiber cloth with your chosen cleaning solution. Wring out excess water to prevent oversaturation. Wipe the cabinet surfaces in a gentle, circular motion, focusing on greasy spots. I learned this when I used a soaked sponge, which left streaks and water spots that took additional polishing to remove. Going light with moisture avoids streaks and preserves the finish.
Pay Special Attention to Greasy Stains
For stubborn grease, apply the cleaner directly to a cloth and gently rub the area. Avoid harsh scrubbing or using metal brushes. On one occasion, I used a plastic scraper to gently lift baked-on grease, avoiding scratches. Always test on a small, inconspicuous area first to ensure the cleaner won’t discolor or damage the lacquer.
Dry Thoroughly to Prevent Water Marks
Use a dry, soft cloth to buff the surface immediately after wiping. This step removes any remaining moisture and enhances shine. I found that skipping this left streaks that made the cabinets look dull. Regularly drying your cabinets prolongs the finish’s lifespan and keeps them gleaming.
Reinstall Items and Maintain Regularly
Once dry, put back decorative pieces and utensils. Establish a routine cleaning schedule—once a month or after heavy cooking—to keep grease and dirt at bay. Remember, frequent light cleaning is less abrasive and more effective than infrequent deep scrubbing. I’ve kept my cabinets looking brand new for years by sticking to this routine.
If you want tailored solutions for your kitchen, exploring options like custom cabinets or efficient storage can make maintenance easier. Properly maintained cabinets not only look better but also last longer, preserving your investment and style.
** **When it comes to designing a functional and stylish kitchen, many homeowners fall prey to misconceptions that can hinder their renovation success. Let’s dig deeper into some overlooked nuances and myths that often mislead even seasoned DIY enthusiasts. For instance, a widespread belief is that built-in storage solutions are always a space-saving miracle. While they can be highly effective if designed properly, many assume that simply adding more built-ins will automatically enhance functionality. In reality, an ill-planned built-in can clutter your space and make the kitchen feel cramped. Take it from the experts—strategic customization is key. The trap here is assuming bigger is better; however, overbuilt or oversized units may disrupt your kitchen’s flow. Advanced users know that optimizing storage involves clever depths and hidden compartments rather than just more cabinetry. For example, incorporating pull-out pantry shelves or corner drawers maximizes often-wasted space without overwhelming the room. Do you think that all custom cabinetry automatically adds value? Not necessarily. Poor craftsmanship or generic designs may not deliver the durability and aesthetic appeal you expect, wasting your investment. This is where understanding the nuances becomes crucial. Instead of following popular trends blindly, focus on quality materials and tailored configurations that suit your family’s needs. Want to elevate your kitchen’s efficiency? Explore innovative storage ideas like vertical dividers or under-cabinet organizers—these features often get overlooked. Additionally, many believe that built-ins are only a post-remodel luxury, but integrating them thoughtfully can actually simplify daily routines, saving time and reducing clutter. For instance, dedicated baking zones or hidden charging stations streamline activities. An advanced consideration involves the upfront planning of electrical and plumbing access within custom units, a step that many overlook but significantly affects longevity and maintenance. Experts emphasize that neglecting structural integrity or future adaptability leads to costly fixes later. For more insights into smart design strategies, check out [revolutionize your kitchen by using built-ins and creative storage](https://artisancabinetworkz.com/revolutionize-your-kitchen-remodel-using-built-ins-and-creative-storage). As you plan your renovation, avoid the common trap of over-customization—focus on balanced, purpose-driven designs. Have you ever fallen into this trap? Let me know in the comments. Remember, the difference between a good kitchen and a great one often lies in the details of how you manage storage and custom features.Maintaining your kitchen cabinets, especially built-ins and custom pieces, requires not only good habits but also the right tools and methods to ensure long-term durability and ease of upkeep. Over the years, I’ve refined my toolkit to include some specific equipment and software that help me diagnose issues early, execute repairs professionally, and plan future upgrades efficiently. Investing in quality maintenance tools now can save significant time and money down the line, while also helping your cabinets retain their aesthetic appeal.
How do I maintain my built-in storage solutions over time?
First, regularly inspect hinges and sliding mechanisms—loose or squeaky hardware often signals upcoming failure. I recommend keeping a high-quality torque screwdriver set in your garage or tool chest, such as the Wiha Precision screwdriver kit. It allows for precise adjustments to hinges and drawer slides, which prolongs their lifespan. I personally prefer models with magnetic tips for ease of use and to prevent losing tiny screws.
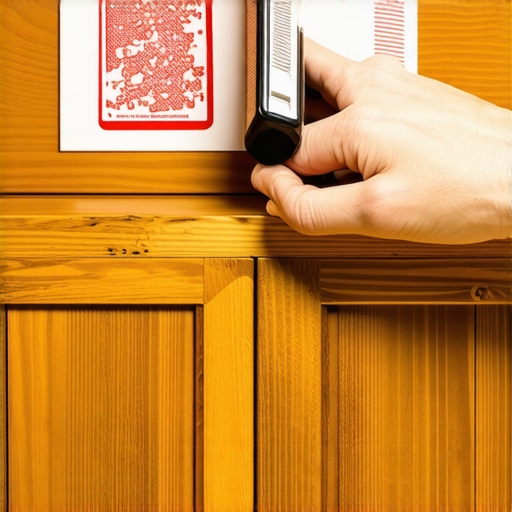
Second, a digital moisture meter like the Protimeter Mini helps monitor humidity levels inside cabinets, especially in environments prone to dampness. Excess moisture can warp or swell the wood, so catching these issues early with such sensors can make your maintenance far more effective.
To streamline your planning and keep track of maintenance intervals, I rely on project management software like Trello or Notion. These platforms let me schedule regular inspections, record repairs, and plan upgrades. For example, I mark when hinges were last checked or when seals or weatherstripping need replacing—ensuring nothing slips through the cracks.
In terms of cleaning and preventative care, I swear by an ultrasonic jewelry cleaner for small hardware parts. It effectively removes gunk from hinges, tension clips, and rollers—restoring smooth operation without extra disassembly. As a bonus, ultrasonic cleaning is gentle enough not to damage delicate lacquers or paint finishes.
The future of maintenance tools is exciting. We’re seeing more integration of smart sensors that connect via Bluetooth to smartphones, sending alerts about humidity spikes or hardware failures before they become noticeable problems. As these technologies become more affordable and user-friendly, expect proactive cabinet care to become the norm.
For comprehensive planning of customized storage solutions, exploring detailed guides like the one on custom cabinets for kitchen upgrades can help you pick tools tailored to your project scope.
Ready to give your cabinets a professional touch? Try investing in a set of precision screwdrivers and a moisture meter—these small upgrades can make a big difference in maintaining perfect operation over years. Remember, staying ahead with simple diagnostics now prevents costly repairs later. And if you’re looking to transition to smart maintenance, keep an eye on emerging sensor technologies that can alert you to issues before they happen. Don’t wait until a hinge breaks or a drawer gets stuck—your kitchen’s efficiency depends on proactive care.
Lessons from My Design Journey That Changed Everything
One of the most profound lessons I learned was that over-customization can sometimes backfire, making spaces feel cluttered rather than functional. I once designed an elaborate built-in with multiple niches, only to realize that simplicity offers more flexibility for everyday use. Additionally, I discovered that neglecting proper structural planning—like missing support for heavy cabinets—inevitably leads to costly repairs and compromises the design integrity. These realizations pushed me to always prioritize adaptable solutions and solid craftsmanship in every project.
I also found that trusting intuition isn’t enough; you need expert advice. Consulting experienced cabinet makers taught me that quality materials, like quarter-sawn oak for high-end finishes, significantly extend your investment’s lifespan. Lastly, I learned the importance of considering future needs—an adaptable design can accommodate changing family dynamics without requiring a complete overhaul.
Tools and Resources That Elevated My Approach to Built-ins
My essential toolkit includes a high-precision torque screwdriver set, which ensures hinges and hardware are perfectly tight—preventing sagging and misalignment over time. For measuring humidity and preventing warping, a digital moisture meter like the Protimeter Mini has been invaluable, especially in humid climates. To stay organized and plan ahead, I rely on digital project management platforms such as Notion, where I record maintenance schedules and upgrade ideas.
Furthermore, I trust sources like this comprehensive guide to custom cabinets for detailed insights into designing functional and aesthetic solutions. Additionally, following innovative ideas from this article on creative storage has helped me incorporate space-saving features that make a real difference in small kitchens. Incorporating smart sensors for proactive maintenance is the next frontier—some emerging tools now send alerts about humidity spikes or hardware wear, allowing me to address issues before they escalate.