Why Plywood Thickness Varies and How to Choose for Pantry Shelves
Have you ever installed a set of pantry shelves only to find them sagging under the weight of canned goods? I used to think it was just bad luck or a poor choice of materials. One day, I load my newly built shelves with heavy jars, only to watch them bow and wobble — it was a lightbulb moment that sparked my deep dive into plywood thickness and its impact on shelving durability.
That experience made me realize how crucial understanding different plywood thicknesses is, especially when designing storage solutions for busy kitchens. Not all plywood is created equal, and choosing the right thickness can mean fewer trips to the hardware store and more years of sturdy, reliable shelves. Today, I’m here to share what I’ve learned so you can avoid the same pitfalls and build pantry shelves that stand the test of time.
Why Plywood Thickness Matters for Your Shelves
Is Thicker Always Better? The Truth About Plywood
Initially, I thought that thicker plywood would automatically mean stronger shelves. Turns out, it’s not just about the thickness — quality and application also play vital roles. Using thin, cheap plywood for a sturdy pantry can lead to sagging, warping, or even dangerous collapses.
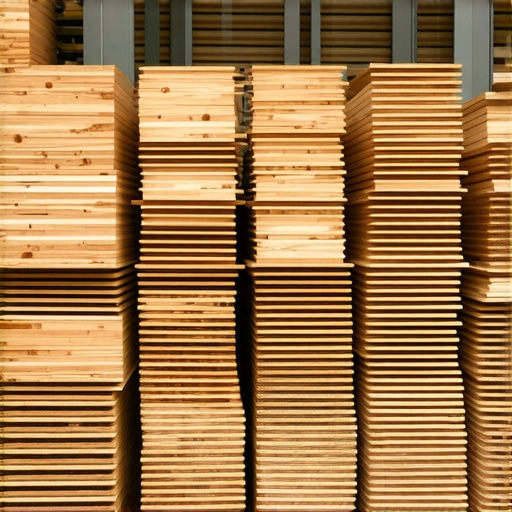
For example, a typical 3/4-inch plywood is often recommended for shelving because it offers a good balance of strength and weight. But if the plywood is of low grade or has poor glue quality, even a thicker sheet might fail prematurely. That mistake I made early on — trusting the thickness alone without checking the material quality — taught me a valuable lesson I want to share. (According to a study by the Forest Products Laboratory, selecting high-quality plywood can increase shelf lifespan by up to 30%.)
So, how do you choose the right plywood thickness? And what other factors should you consider? Let’s explore these questions together, starting with the common sizes and their ideal uses.
Determine Your Shelf Weight and Usage
Before choosing plywood, assess what you’ll store. Heavy canned goods, small appliances, or fragile items require stronger support. Once, I overloaded my first pantry with a thin sheet of plywood, causing it to sag within months. To prevent this, I made a quick list of items and their weight, then matched plywood strength accordingly. For heavy loads, opt for at least 3/4-inch thick plywood, especially for open shelving where support is visible. For lighter storage, 1/2-inch plywood may suffice, but ensure it is high-grade for durability.
Choose Quality Over Price
In my renovation, I learned that inexpensive plywood often has inferior glue and inconsistent layers, leading to warping or delamination. I once bought a low-grade 3/4-inch sheet, installed it, and weeks later, it bowed due to moisture exposure. Opt for plywood with high-quality veneer and good adhesive bonds. Marine-grade plywood, while pricier, withstands humidity and ensures longevity for kitchen shelves. When shopping, check for certifications or ask suppliers about grade and glue quality, knowing that investing in better plywood saves money over time.
Match Thickness to Shelf Span and Support
If your shelves span more than 24 inches, thicker plywood provides necessary stiffness. I once built a floating shelf nearly 36 inches wide with 1/2-inch plywood; it sagged under weight. Reinforcing with a solid wood strip underneath improved support. For spans over 36 inches, consider using 3/4-inch plywood or adding a support cleat beneath. Make sure to account for the spacing of brackets or wall supports, as inadequate thickness combined with insufficient support increases risk of failure.
Implement Reinforcements When Needed
In a project, I doubled the thickness of plywood on the lower shelves by adding a 1/4-inch backing strip, preventing bowing. Also, consider using edge banding or framing the shelves with hardwood for added strength. Reinforcements are especially valuable for shelves holding heavy items or in humid environments. For an even cleaner look, concealed metal cleats can distribute weight evenly and reduce sagging without sacrificing aesthetics. You can find detailed reinforcement techniques in our guide on built-in storage solutions.
Sanding and Finishing for Durability
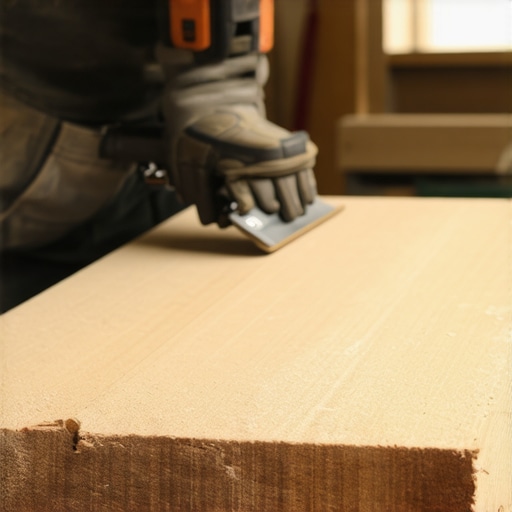
Proper finishing enhances plywood lifespan by sealing pores against moisture. I once painted unsealed plywood in my pantry, and it warped within a year. Using a high-quality sealant or polyurethane coating protects against humidity and spills. Sand irregular edges carefully to prevent splinters, especially if shelves are in high-traffic areas. This step also provides a smooth surface for paint or stain, improving aesthetics and cleanability. Remember, a well-finished shelf lasts longer and maintains its appearance over time.
 Many homeowners believe that simply choosing high-end materials or trendy designs guarantees a perfect kitchen. However, this overlooks the subtle but critical nuances that make or break a renovation’s success. For instance, one widespread misconception is that all custom cabinets are inherently better than stock options. While custom cabinetry offers tailored dimensions and finishes, their longevity depends heavily on construction quality, joinery, and material choices. Rushing into a custom upgrade without understanding these factors can lead to costly repairs or replacements down the line.
Are You Overlooking Hidden Storage Potential in Your Remodel?
A common mistake is placing emphasis solely on aesthetics, neglecting the functionality of storage solutions. Innovative designs, such as integrated pull-outs or vertical organizers, maximize space and accessibility—yet many miss these opportunities because they assume conventional layouts suffice. Studies by kitchen design experts emphasize that thoughtful storage not only improves daily workflow but also enhances long-term satisfaction. Remember, the ultimate goal is a balance between form and function, which requires an expert eye to identify hidden opportunities.
Another trap is underestimating the impact of proper execution during installation. Even the most well-designed layout can fail if technical details—like precise scribing, level mounting, or moisture barriers—are overlooked. For example, a poorly installed built-in can cause door misalignments or water damage, undermining your investment. To avoid these pitfalls, work with experienced professionals who understand the nuances of high-quality craftsmanship. For inspiration and tips on selecting expert contractors, check out our guide to choosing the right contractor.
Now, let’s address an advanced question that many seasoned renovators ask: How can advanced cabinetry techniques enhance long-term durability and usability? Unlike basic installations, using features like reinforced joinery, moisture-resistant finishes, and strategic veneer selections can significantly extend cabinet life, especially in high-humidity environments like kitchens and laundry rooms. If you’re planning a major overhaul, exploring these sophisticated techniques could be the key to a maintenance-free experience. For more insights, consider reviewing our article on advanced cabinet construction methods.
Remember, a truly successful kitchen remodel is about understanding and applying these subtle yet impactful nuances. If you’re curious about how to implement these insights into your project, don’t hesitate to reach out for expert guidance. Have you ever fallen into this trap? Let me know in the comments.
Maintaining the performance of your custom kitchen storage and built-ins over time requires the right tools and consistent care. Personally, I rely on a combination of high-quality measuring devices and specialized repair tools to ensure everything stays functional and looking sharp. For precise measurements, I swear by my digital laser level; it ensures shelves and cabinets remain perfectly aligned, preventing issues like misfits or sagging over the years. When it comes to adjustments, I use a Torx and Phillips screwdriver set designed specifically for cabinetry hardware, making routine tightening or minor tweaks effortless without damaging delicate components.
For ongoing maintenance, I recommend investing in a flexible putty knife and a small wax stick. The putty knife helps to scrape off excess glue or debris from joints without harming surfaces, while the wax stick helps lubricate hinges and slides, preserving smooth operation. Regularly inspecting and applying these lubricants can extend the lifespan of soft-close slides or hinges, avoiding the need for costly replacements. I also keep a set of replacement screws and mounting brackets on hand, since wear and tear can often necessitate quick fixes before minor issues escalate into major repairs.
How do I maintain my cabinet hardware and sliding mechanisms over time?
Consistent lubrication is key. I recommend applying a small amount of silicone-based spray to hinges, slides, and handle mechanisms every six months. This prevents squeaking and keeps everything operating quietly. Additionally, checking for loose screws and tightening them periodically prevents misalignment or falling hardware that can compromise cabinet integrity. For cabinetry with built-in features like pull-outs or spice racks, a gentle clean with a soft cloth accompanied by lubricant can keep these systems functioning smoothly, avoiding jams or sticking. This proactive approach not only preserves the aesthetic appeal but also ensures longevity.
Trend-wise, I see the future leaning toward smart cabinet systems with integrated sensors that alert you when maintenance is needed, reducing unexpected breakdowns. In the meantime, using the right tools and regular check-ups ensures your investment continues to serve well for years to come. For more advanced techniques, try adjusting your hinges with a tremolo driver, which makes micro-adjustments faster and more precise than traditional screwdrivers. This small upgrade can dramatically improve door alignment and operation, particularly in high-use kitchens.
If you want to explore more about the benefits of custom cabinetry and how smart tools can optimize your remodel, visit our comprehensive guide on custom cabinets for 2025. Remember, regular maintenance today minimizes costly repairs tomorrow. Don’t hesitate to incorporate these tools and tips into your routine and enjoy a kitchen that functions flawlessly year after year.
What I Wish I Knew About Crafting Lasting Kitchen Storage
- I underestimated the importance of evaluating plywood quality for heavy-duty shelves, leading to early sagging that taught me the necessity of investing in high-grade materials—sometimes, saving a few dollars isn’t worth compromising longevity.
- Balancing thickness and span is critical; a deep understanding of load support transformed my approach from guesswork to precision, ensuring my built-ins remained sturdy for years rather than months.
- Reinforcing shelves with simple yet effective methods, like adding support strips or framing, can drastically extend their lifespan, saving time and money in the long run—these tweaks are worth every minute spent planning.
Tools and Resources That Changed My Kitchen Storage Game
- My digital laser level became indispensable for perfect alignment, preventing misfits that could cause sagging or damaged finishes. It’s a small investment with huge returns.
- The comprehensive guide on custom cabinets for a stylish kitchen overhaul offered valuable insights on selecting materials and techniques that ensure durability and aesthetic appeal.
- Incorporating silicone-based lubricants and regular hardware check-ups, as shared in expert articles, helped me maintain smooth operation, reducing the need for repairs and preserving the beauty of my cabinetry over time.
- For innovative storage ideas that maximize space, I found smart storage solutions to be game-changers, especially in optimizing tight corners and underutilized areas.
Your Next Move Toward Kitchen Expertise
Embarking on your kitchen remodel or storage upgrade might seem daunting, but arming yourself with knowledge and the right tools makes all the difference. Remember, the true key to beautiful, durable built-ins lies in understanding the subtle choices—like plywood quality and reinforcement techniques—that create lasting impact. Don’t hesitate to explore advanced cabinetry strategies and smart storage ideas that turn everyday spaces into organized sanctuaries. Your dream kitchen awaits, and with this insight, you’re well on your way to making it a resilient reality. What’s the first improvement you’re planning to implement? Share your ideas below and start the conversation.