The Hidden Toe-Kick Drawer Strategy for Flat Baking Sheet Storage
Imagine this: after months of remodeling, you finally unveil your dream kitchen. Everything looks stunning—sleek cabinets, beautiful countertops, and a space that screams modern elegance. But then, disaster strikes every time you reach for your baking sheets. They’re somehow lost behind a mountain of clutter, shoved into dead space under the cabinets, or worse, poked far back where no light ever reaches. It’s frustrating, right? That moment of realization that no matter how gorgeous your kitchen looks, storage problems can turn your culinary haven into a chaotic mess.
Reclaim Your Space with a Clever Hidden Drawer
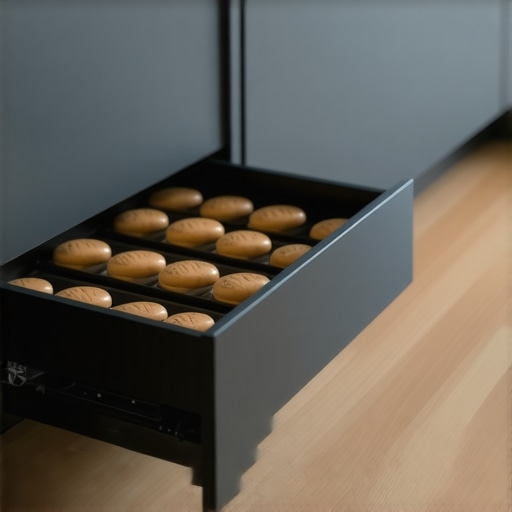
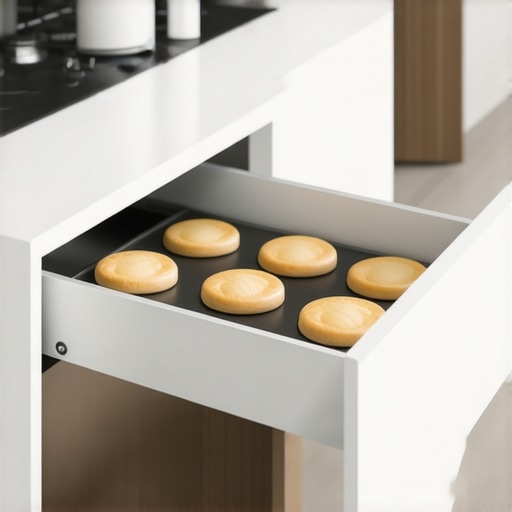
One of the most overlooked areas in kitchen design is the toe-kick space at the bottom of your cabinets. It’s a sneaky spot that’s perfectly suited for hidden storage—think of it as your secret weapon against clutter. I discovered this gem when I was struggling to organize my baking sheets and pans, cursing the limited cabinet space and inefficient stacking methods. My lightbulb moment? Creating a toe-kick drawer designed specifically for flat items like baking sheets, cutting boards, and cookie sheets. Not only did it free up precious cabinet space, but it also made everything easily accessible and neatly organized.
This strategy is a game-changer—I promise. It transforms dead space into a functional, discreet storage solution. And, best of all, you won’t need to overhaul your entire kitchen or add expensive custom cabinets. Just a little clever planning and some basic carpentry, and you’re on your way to a clutter-free, efficient kitchen.
Before we dive into the step-by-step process, I want to share a little of my early missteps. I once thought that building a toe-kick drawer was overkill—just a minor detail. Turns out, overlooking these small spaces is a common mistake, and it can cost you in wasted time, frustration, and even damage to your storage tools. Trust me, I learned the hard way, and I don’t want you to make the same mistake. By the end of this, you’ll see how this hidden drawer can make your kitchen feel twice its size and twice as organized.
Are you tired of digging through piles of baking sheets every time you want to bake? Do you wish there was a better way to utilize that dead, forgotten space beneath your cabinets? If so, you’re in the right place. Let’s take a closer look at how to incorporate this smart storage hack into your kitchen remodel or upgrade.
Ready to discover the secrets of maximizing every inch of your space? Well, don’t worry—this isn’t just theory. I’ll guide you through the practical steps to turn that underused toe-kick area into your new favorite storage spot. For more ideas on sleek, functional storage solutions, check out [this comprehensive guide](https://artisancabinetworkz.com/built-ins-and-storage-hacks-for-a-sleek-functional-kitchen). Now, let’s get started on transforming that tricky toe-kick into something truly extraordinary.
Measuring and Planning Your Hidden Drawer
Begin by assessing the toe-kick space beneath your cabinets, typically 3-4 inches high and extending across the cabinet base. Use a tape measure to determine the width, height, and depth, ensuring you leave room for the drawer to open fully without obstruction. For example, I measured my kitchen and discovered a 36-inch width, 4-inch height, and available depth of 3 inches. Mark these dimensions on a piece of scrap plywood or MDF to create a prototype. Consider also how you’ll access the drawer—adding a handle or a push-to-open mechanism. Planning carefully prevents costly mistakes later.
Cutting and Assembling the Drawer Frame
Use a circular saw or table saw to cut your plywood or MDF panels according to your planned measurements. For my project, I cut a 36-inch by 4-inch front panel, a matching back, and side pieces that matched the depth of 3 inches. Assemble the frame using wood screws and wood glue, ensuring the corners are square. Think of this step as building a box—accuracy here guarantees smooth operation later. I recommend drilling pilot holes first to prevent splitting, especially in thinner material. A well-assembled frame is the foundation of a sturdy, functional drawer.
Adding the Drawer Bottom and Hardware
Next, attach a 36-inch by 3-inch panel to serve as the drawer bottom, securing it with nails or screws along the edges inside the frame. Choose a durable material, like plywood, to withstand weight. Install slides or runners—either side-mounted or under-mounted—according to the manufacturer’s instructions. For my drawer, I opted for side-mounted full-extension slides, which made accessing contents effortless. Position the slides at the top and bottom of the sides, ensuring they are level. Proper hardware choice and installation are critical for smooth, reliable operation and easy retrieval of stored items like baking sheets or cutting boards.
Fitting the Drawer Into the Toe-Kick
Remove the toe-kick panel and cut a matching opening in its center if needed, accounting for the thickness of the slide mechanisms. Mount the assembled drawer into the space, aligning the slides with the opening. Test the movement multiple times, adjusting as necessary to prevent sticking. Replace the toe-kick panel, making sure the drawer sits flush and sits below the surface to avoid tripping hazards. I found that securing the drawer with screws into the cabinet frame ensured longevity. This step transforms the previously useless space into a sleek, hidden storage solution that blends seamlessly with your kitchen design.
Finishing Touches
Sand any rough edges or surfaces, then paint or finish the drawer to match your cabinetry. Installing a handle or a push-to-open latch provides easy access. Consider labeling or organizing the tray inside for different baking sheets, so everything stays neat. As a final tip, test the drawer regularly to prevent jamming, especially if your floor is uneven. This simple addition greatly improves your kitchen’s functionality, giving you quick access to flat items without cluttering your main space. To see how this project fits into larger remodeling strategies, explore built-in storage examples.When it comes to kitchen remodeling, many homeowners believe they have the basics covered—choosing trendy cabinets, installing high-end appliances, or maximizing open space. However, in my experience as a design specialist, a prevalent misconception is that investing in beautiful cabinetry suffices, neglecting the nuances of effective storage solutions.
Are custom cabinets always the smartest choice for every space?
Not necessarily. While custom cabinets can tailor your kitchen’s look, they often come with pitfalls like overestimating storage needs or ignoring the importance of built-in, integrated solutions. A common myth is that larger cabinets automatically mean better storage, but without thoughtful internal organization or strategic shelving—like those detailed in our modern storage innovations—you risk clutter and wasted space.
Many believe the more cabinets, the merrier, yet clutter can still persist if the layout doesn’t prioritize accessibility. For instance, corner cabinets are notorious for dead space—a trap often overlooked during design. Implementing built-in corner solutions or specialized storage like pull-out shelves can drastically reduce wasted space and frustration.
Another advanced mistake is underestimating the importance of environmental conditions. Moisture, temperature fluctuations, and humidity in kitchens can damage poorly chosen materials over time. Experts recommend selecting moisture-resistant finishes or materials, especially when designing for longevity. For example, HDF panels, often used in painted cabinet centers, resist warping better than solid wood in humid environments, which is an essential consideration often missed by amateurs.
Overconfidence in DIY solutions can also be a trap. Installing hardware or built-ins without considering the operational nuances often leads to misalignment or hardware failure—think self-closing hinges or sliding shelves. Proper hardware selection and professional installation mitigate these risks, ensuring smooth operation over years. For a detailed look into hardware choices, check our storage hardware insights.
To avoid these pitfalls, study expert advice, plan long-term, and focus on integrations that maximize space, accessibility, and durability. It’s not just about aesthetics but creating a kitchen that remains beautiful and functional for decades. For more expert tips on optimizing storage, visit smart storage strategies.
Have you ever fallen into this trap? Let me know in the comments and share your experience with kitchen design mistakes—your story could help others avoid the same errors.
Tools I Recommend for Lasting Results
Investing in the right tools is essential to ensure your kitchen remodel remains functional and beautiful over the years. I personally swear by a high-quality cordless drill like the DeWalt DCD771C2—its lightweight design and powerful torque make assembling and adjusting built-ins effortless. For precise measurements, I rely on a Bosch GIM 120 Digital Angle Finder, which guarantees perfect alignment—crucial when installing custom cabinets or hidden drawers. Additionally, a Kreg K4 Pocket Hole System has been invaluable for creating strong, wood-to-wood joints in DIY projects, especially when reinforcing drawer frames or internal dividers.
Software-wise, I recommend SketchUp for planning your storage layout. Its intuitive interface allows you to visualize space utilization and make adjustments before cutting any material. This prevents costly mistakes and helps you plan for future scale-ups, such as adding modular shelving or pull-out systems. As technology evolves, incorporating 3D modeling tools ensures your storage solutions adapt seamlessly to long-term needs.
How do I maintain my storage innovations over time?
Maintaining your custom storage solutions requires regular checks and some straightforward upkeep. Begin by inspecting hinges, slides, and handles—lube them annually with silicone-based spray or a dedicated hardware lubricant like WD-40 Specialist Dry Lubricant. Tighten loose screws and replace worn-out hardware immediately to prevent larger issues. Remember, a well-oiled and tightened system keeps drawers sliding smoothly and prevents misalignments that could compromise your setup. Additionally, clean surfaces gently with mild soap and a soft cloth, avoiding harsh abrasives that could damage finishes. For the internal compartments, periodic decluttering ensures your storage remains functional and prevents overloading, which can stress the mechanisms. By maintaining these elements, you extend the lifespan of your investments and keep your kitchen organized effortlessly.
Looking ahead, I predict that smart, sensor-enabled hardware will become standard in custom kitchen setups by 2025. Imagine drawers that alert you when items are running low or automatically close silently—a perfect blend of craftsmanship and technology enhancing long-term usability. To prepare now, consider installing high-quality soft-close hinges and durable slides from trusted brands like Blum or Hettich, which are known for longevity and smooth operation—these are critical if you plan to scale up your storage solutions or add automation later. Explore more about built-in innovations here.
The Wisest Lessons From My Kitchen Makeover Journey
One profound realization I had was that not every space needs a full cabinet to be useful; sometimes, the smallest nooks, like toe-kicks, hold the most promise. Early on, I underestimated these tucked-away spots, thinking they were insignificant—big mistake that cost me precious time and frustration. Now, I see them as opportunities, not obstacles. Additionally, I learned that custom solutions don’t have to be elaborate or expensive; clever modifications, like installing a hidden drawer, can transform standard cabinetry into personalized storage havens. Lastly, understanding that storage needs evolve, just like kitchens themselves, pushed me to think long-term, choosing flexible and durable solutions instead of quick fixes. These lessons remind us that true kitchen efficiency comes from attention to detail—small changes make big impacts.