Why Your Appliance Garage Door Keeps Jamming and the Hardware Fix
I remember the frustration all too well. One morning, as I was hurriedly trying to get breakfast on the table, I reached for my appliance garage door—the sleek little cabinet designed to hide mixers and toasters—and it stubbornly refused to budge. Instead of a smooth glide, it jammed, leaving me annoyed and wondering, “Why is this happening?” It was one of those lightbulb moments when I realized that even the most thoughtfully designed kitchen features can become problematic if not properly maintained or installed. If you’ve encountered similar issues, you’re not alone.
Why Do Appliance Garage Doors Keep Jamming?
This question plagues many homeowners and DIY enthusiasts alike. An appliance garage is meant to be a tidy, functional addition to your kitchen, but when it starts sticking or jamming, it can throw off your entire workflow. In most cases, the cause is a simple hardware hiccup—be it misaligned tracks, worn-out hinges, or dirt accumulation. Over time, hinges can loosen or become warped, especially in humid environments, leading to misalignment. A study by the Home Innovation Research Labs suggests that improper hardware installation is among the top reasons why cabinetry accessories fail prematurely, costing homeowners time and money to fix or replace.
Before jumping into complicated repairs, I made a classic mistake early on: ignoring the importance of regular maintenance. I didn’t keep the hinges and tracks clean or ensure they were properly lubricated, which only worsened the problem. This experience taught me that routine checks are vital. Now, with a few simple tools and some know-how, I can troubleshoot and fix issues quickly, ensuring my kitchen stays functional and beautiful.
In the next sections, I’ll guide you through the most common causes of appliance garage door jams and share practical, proven fixes. Whether it’s tightening loose screws or replacing worn hardware, I’ll help you restore your cabinet’s smooth operation. So, if you’re tired of your garage door sticking or jamming, keep reading—you’re about to learn how to fix it yourself and avoid costly repairs down the line.
Assess the Hardware and Track Alignment
Start by removing the appliance from the garage and inspecting the hinges, rollers, and track for any visible debris, rust, or misalignment. I once found a small pile of crumbs and pet hair embedded in the track, which I cleaned out using a toothbrush and a damp cloth. After cleaning, gently test the door movement; if it still sticks, proceed to realign the tracks. Loosen the track mounting screws slightly, then tap the track gently into alignment with a rubber mallet. Tighten the screws and test the door again.
Check for Loose or Damaged Hinges
Loose hinges can cause the door to sag and stick. Tighten all hinge screws with a screwdriver, making sure they are snug. If hinges are bent or corroded, replace them with new ones, which you can often find at home improvement stores or order online. When I replaced a worn hinge on my own garage door, I used a level to ensure the door hung perfectly straight afterward, preventing future misalignment issues.
Lubricate Moving Parts Properly
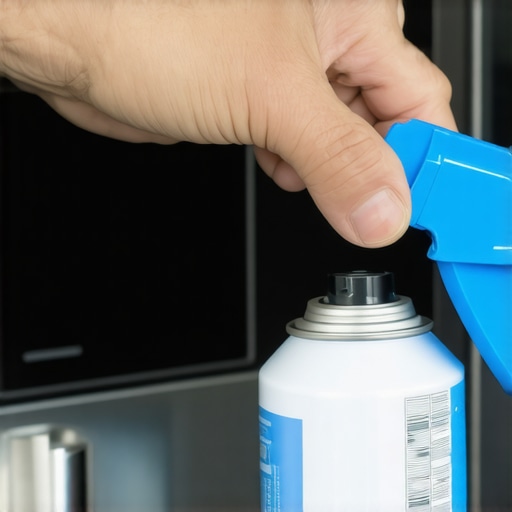
Use a silicone spray or lithium lubricant on hinges, rollers, and tracks to allow smooth movement. Avoid traditional oil or WD-40, as they can attract dirt. I applied a silicone spray to my garage door hinges and rollers, noticing an immediate improvement in movement. Regular lubrication every six months will extend the lifespan of the hardware and keep the door operating silently.
Adjust the Door Tension and Stops
If the door still jams, adjust the tension of the springs or the stops to prevent binding. Consult your manufacturer’s instructions or a professional if you’re unfamiliar with spring tension adjustments, as improper handling can be dangerous. During my last fix, I carefully loosened the tension slightly, then tested the door until it operated smoothly, avoiding excessive force.
Prevent Future Jams Through Routine Maintenance
Regularly clean and lubricate hinges and tracks, check for loose screws, and remove obstructions. I set a calendar reminder every three months to inspect my garage door hardware, which has significantly reduced sticking issues. For more innovative storage ideas to maximize your space, check out this guide.
 Many homeowners fall into common traps when designing or remodeling their kitchens, especially regarding storage solutions, custom cabinets, and built-ins. The prevailing belief that bigger is always better or that standard off-the-shelf options suffice can be misleading. In reality, understanding the nuanced needs of your space and how specific design choices behave over time offers significant advantages. For instance, customizing cabinets isn’t just about aesthetics—it’s about optimizing function, accessibility, and longevity tailored to your habits and kitchen layout. Relying solely on generic solutions often leads to wasted space or impractical configurations that become frustrating later.
Another misconception is the assumption that all built-ins are limited to traditional styles. Modern approaches have expanded these features into sleek, innovative designs that maximize storage without sacrificing style, as discussed in this guide. However, a common trap is choosing aesthetically pleasing but poorly planned storage, which leads to inefficiency. For example, installing deep cabinets without interior organization can result in lost time finding items or damaging delicate items during retrieval. An important detail often overlooked is the importance of adjustable shelving and specialized inserts that adapt over time, ensuring continued utility and preventing the costly task of future remodels.
Advanced homeowners should question the long-term implications of their choices. For example, opting for ultra-high-gloss finishes might look stunning initially, but they tend to show fingerprints and smudges more prominently, leading to increased cleaning efforts. Experts like those at this resource warn against focusing solely on style, emphasizing durability and ease of maintenance. Moreover, integrating innovative storage solutions such as hidden compartments or pull-out counters can dramatically increase functionality but requires precise planning and knowledge of cabinetry mechanics to avoid common issues like misalignment or hardware failure.
So, in your kitchen design, are you considering the hidden nuances that can make or break your space? Have you ever fallen into this trap? Let me know in the comments. Remember, the right choices today can save significant time and money in the future, transforming your kitchen into a true reflection of thoughtful design and practical excellence.
Maintaining your kitchen’s storage solutions, custom cabinets, and built-ins requires the right tools and a consistent maintenance routine. Personally, I swear by a few specific items that make upkeep straightforward and effective. First on my list is a high-quality cordless drill with adjustable torque settings—this is invaluable for tightening hinges, securing hardware, or making minor adjustments without hassle. I use the DeWalt DCD791D2 because it balances power with weight, allowing me to work for longer periods without fatigue. Its brushless motor ensures durability, which is crucial if you’re frequently adjusting or maintaining built-ins.
Next, I recommend a magnetic screwdriver set. The versatile bits, like the Wiha 26198, help me quickly swap between Phillips and flat-head screws, saving time when addressing different hardware types. These are especially useful for subtle interior shelving adjustments or replacing hardware on your custom cabinets.
When it comes to software, I rely on digital planning tools like space planning apps that allow me to simulate storage configurations before physically rearranging. This proactive approach prevents unnecessary disassembly and helps visualize long-term results, especially when scaling or adding new built-ins. Plus, investing time into a detailed plan means you can foresee potential issues and order components in advance, saving money and frustration.
Frequency of maintenance is key. I set a quarterly schedule to inspect hinges, tracks, and hardware for looseness or wear. Applying a silicone-based lubricant like Super Lube to hinges and sliding mechanisms keeps everything moving smoothly. I point out, though, that regular cleaning of the hardware is equally important—dust and grease buildup can impede operation over time. For that purpose, I keep a toothbrush and microfiber cloth handy, along with compressed air for deep cleaning inaccessible spots.
How do I maintain my storage and cabinetry over time?
Adapting a routine maintenance schedule is vital. Start by examining hinges and tracks every three to six months, cleaning and lubricating as needed. Check all hardware to ensure nothing is loose—this prevents long-term damage and expensive repairs. If you notice misalignment or hardware deterioration, replacing components promptly is more cost-effective than waiting for a complete rebuild. I’ve learned that proactive care preserves the aesthetic appeal and functional integrity of custom cabinets and built-ins for years to come. For innovative ideas on optimizing your storage, explore this detailed guide. If you’re ready to take your kitchen maintenance to the next level, try implementing a monthly check using these tools and tips—you’ll be surprised at how much longer your cabinetry and hardware will last.
What I Wish I Knew Before Going All-In on Built-Ins
One of the biggest revelations was realizing that customized storage isn’t a magic bullet; it requires thoughtful planning and ongoing maintenance. I learned the hard way that not all design choices age well without proper foresight. For instance, incorporating adjustable shelving and considering future needs can save you significant hassle down the line, a tip I found echoed in trusted resources like this comprehensive guide.
Why Trusting Expert Insights Transformed My Kitchen
Surprisingly, a few well-chosen tools and resources made all the difference. I rely on detailed space planning apps, such as those described here, to simulate storage configurations. This proactive approach helped me visualize how to maximize space effectively and avoid costly mistakes. Combining these digital tools with recommendations from seasoned professionals proved invaluable in creating a durable, functional kitchen.
Your Next Step: Embrace the Journey of Smart Kitchen Design
Remember, a well-designed kitchen is an investment in your everyday happiness and efficiency. Take inspiration from my experience and consider how detailed planning, regular upkeep, and trusted resources can elevate your space. Whether you’re remodeling or making incremental improvements, always ask yourself: ‘Am I choosing what’s best for long-term usability?’ Dive into more insights and practical tips here, and start crafting the kitchen you’ve always dreamed of. How have you tackled storage challenges in your home remodel? Share your stories below!