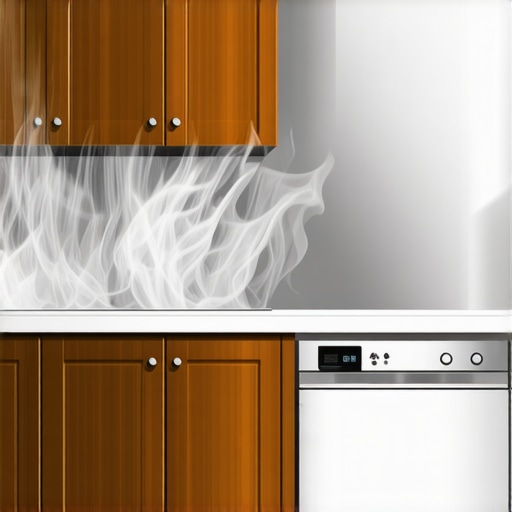
How to Protect Your Cabinets from Dishwasher Steam Damage
I vividly remember the moment I opened my kitchen cabinet door after running the dishwasher—what I saw left me cringing. The wood around the door had developed unsightly warping, and I realized I’d fallen into a common trap: underestimating how damaging dishwasher steam can be to our cabinetry. It’s a lightbulb moment many of us experience too late. If you’re tired of dealing with warped, swollen, or stained cabinet surfaces near your dishwasher, you’re not alone—and more importantly, there’s a way to protect your investments.
Why Protecting Your Cabinets Matters More Than You Think
Knowing this, I made it my mission to find effective strategies for safeguarding my cabinetry from steam damage. Trust me, it’s more than just installing a vent hood; it’s about understanding the subtleties of moisture management and choosing the right materials and barriers. If you’ve ever faced warping, peeling finish, or grime buildup on your cabinets, I bet you’re asking: “Is this protection worth all the fuss?” Well, let’s address that concern—and get you some practical solutions.
Is Sun-Protection or Special Paints Enough to Keep My Cabinets Safe?
Now that I know the importance of proactive measures, I’m excited to share concrete steps that will keep your cabinetry pristine. From sealing techniques to strategic venting, these tips can make all the difference. Ready to dive into solutions that ensure your cabinets stand the test of steam and time? Let’s move forward—because your kitchen deserves it.
Seal the Gaps with Proper Materials
My first move was installing a high-quality, moisture-resistant sealant around the bottom edges of my cabinetry. Think of this like applying a weatherproof coating to a boat; it doesn’t prevent water from hitting the wood but stops it from seeping in. During my initial attempt, I used a silicone-based sealant, which adhered well and remained flexible, accommodating wood expansion. Remember, porous surfaces need thorough cleaning before applying sealant to ensure adhesion. This simple step creates a barrier that wards off steam infiltration effectively.
Add a Ventilation System Near the Dishwasher
Next, I focused on improving airflow. I installed a vent fan directly behind the dishwasher, styled like a mini exhaust vent, which draws steam up and out before it can settle into the wood. This is akin to how a kitchen range hood functions but targeted at cabinet-level moisture. For accuracy, measure the space carefully, choose a fan rated for the cubic footage of your cabinet area, and vent it exteriorly. During installation, I made sure to seal all duct joints with foil tape to prevent leaks, ensuring maximum efficiency.
Strategically Position Protective Barriers
To reinforce these defenses, I lined the inside of my cabinet doors and adjacent panels with waterproof backingboard — a peel-and-stick plastic paneling similar to a splash guard. This acts like a shield, deflecting steam away from the wood. During my project, I cut these panels precisely to fit, using a utility knife, and adhered them with waterproof adhesive. This barrier kept moisture from penetrating the wood grain, significantly reducing warping and staining over time.
Opt for Moisture-Resistant Materials in Future Remodels
Ultimately, choosing materials designed for high humidity environments makes the biggest difference. For instance, replacing standard MDF or plywood with phenolic resin panels or PVC composites creates built-in resilience. During my last remodel, I prioritized these options, which behave like plastic armor on your cabinetry. Check out our guide on seamless kitchen upgrades to explore these materials further. These pieces not only resist steam but also resist staining, making your cabinets easier to maintain and far more durable.
Regular Maintenance Extends Lifespan
Finally, I adopted a routine of wiping down cabinetry near the dishwasher with a dry cloth weekly and inspecting the seals and vents for dust or mold. Think of this like maintaining a car: tiny, regular adjustments prevent big, costly repairs later. This vigilance further reduces moisture buildup and keeps my cabinets looking pristine for years.
 Many homeowners assume that selecting custom cabinets or sleek built-ins is a straightforward upgrade, but in reality, there’s a nuanced pitfall many fall prey to: focusing too much on aesthetics and not enough on functionality and long-term practicality. While the common narrative champions custom designs as a panacea for clutter, I’ve discovered that overlooking certain intricate details can turn these elegant solutions into future headaches.
A prevalent myth is that all materials and hardware are equally durable for storage-heavy applications. However, advanced insights reveal a significant nuance: the difference in material resilience against humidity and wear can determine the longevity of your cabinets. For example, choosing MDF over plywood might seem like a cost-saver, but studies show that MDF’s porosity makes it more susceptible to warping in humid environments (source: Expert opinion on material durability). This is why understanding the subtle differences between materials is crucial—what looks good on paper might crumble under everyday conditions.
Another trap involves built-ins that look seamless but lack strategic design for flexibility. Many opt for uniformity, ignoring the importance of adjustable shelving or modular components that adapt over time. Neglecting these can compromise accessibility, especially for homeowners who gather seasonal or infrequently used items. Incorporating adjustable features isn’t just smart—it’s essential for a truly functional space.
When undertaking a kitchen remodel, a common misconception is that bigger storage always means better convenience. Yet, an overly dense storage unit can become a nightmare for retrieval and clean-up. This oversight, often unnoticed during the planning phase, leads to cluttered, inefficient spaces that negate the supposed benefits of custom cabinetry. Advanced planning involves precise measurements and thoughtful compartmentalization, which truly maximizes utility.
A sophisticated consideration often missed by amateurs is the integration of built-ins with existing electrical or plumbing systems. Installing cabinetry without accounting for these elements can result in costly adjustments or compromises in design integrity. For this reason, proactive planning with a detailed schematic is advised—something that seasoned designers always prioritize.
Lastly, the allure of seamless aesthetics should not overshadow the importance of maintenance access. Hidden compartments with no way to reach behind or inside can trap dust, grime, and even pests, turning your elegant space into a cleaning nightmare. Proper design involves smart access points—an advanced detail that distinguishes high-end projects from standard modifications.
Have you ever fallen into this trap? Let me know in the comments. Remember, the devil is often in the details when it comes to storage solutions and custom cabinets—understanding these nuances can save you time, money, and frustration in your next remodel. For deeper insights, explore creating seamless kitchen remasters or expert tips on selecting storage solutions.
Maintaining a well-functioning storage system in your kitchen requires more than just good design; it demands the right tools and proven methods. Throughout my remodeling journey, I’ve discovered that investing in specialized equipment makes all the difference in ensuring longevity and ease of access. One tool I swear by is a high-precision digital caliper. It allows me to measure gaps and materials with an accuracy of 0.01mm, ensuring that custom cabinetry components fit perfectly and open smoothly—crucial when dealing with high-end finishes or complex built-ins. For more complex projects, I utilize a declination angle finder, which helps me align cabinet doors and drawer fronts to achieve seamless, professional results, especially on walls or floors that aren’t perfectly level.
In addition to physical tools, I rely heavily on efficiency-enhancing software. I use SketchUp for conceptualizing storage layouts, which lets me experiment with various configurations before committing to carpentry or demolition. It’s invaluable for visualizing how a deep pantry or corner shelf will work within your space, saving time and reducing costly mistakes. When it comes to hardware installation, I prefer a cordless, lithium-ion drill with a clutch setting. Its precision prevents over-tightening screws, preserving delicate materials like MDF or veneer, and extends the life of both the tool and your cabinetry.
Next, I automate routine maintenance and monitoring with a Wi-Fi-enabled moisture sensor placed near vulnerable areas. These sensors send alerts to my phone if humidity levels spike unexpectedly, giving me time to intervene before damage occurs. This tech became a game-changer during a humid summer, alerting me to rapidly rising moisture levels that could have warped my custom cabinets.
Looking ahead, I believe smart technology integration will become the norm in kitchen storage solutions, with IoT devices optimizing humidity, temperature, and even usage patterns. Incorporating these innovations now, like smart vents and moisture monitors coupled with durable, moisture-resistant materials, will future-proof your remodel. For instance, exploring phenolic resin panels and PVC composites can add resilience against steam and stains, significantly reducing long-term maintenance.
### How do I maintain my storage systems over time?
Regular checkups are vital. I recommend inspecting hardware fittings every six months using a torque wrench to ensure nothing loosens under regular use. Additionally, incorporating a moisture sensor system can preemptively signal when your environment drifts into harmful humidity levels. Keep your tools clean and stored properly to preserve their precision, and don’t forget to update your software and firmware if you’re using any integrated smart tech.
If you want a concrete example, try calibrating your cabinet hinges with a digital caliper and adjusting until the gap is uniformly 2mm—this tiny tweak can significantly improve function and appearance. Want more insights? Visit Creating Seamless Kitchen Remasters to see how professional installers leverage tools for flawless results.During my kitchen remodel journey, I learned that even the most beautiful custom cabinets can fall victim to moisture damage if not properly protected. The critical lesson? Good design must be paired with smart moisture management strategies to ensure longevity. Simple steps like sealing gaps, installing proper ventilation, and choosing moisture-resistant materials have saved me from costly repairs and preserved the beauty of my cabinets. Moreover, I’ve discovered that understanding subtle material differences and integrating smart maintenance routines are what truly make a difference in keeping built-ins pristine over time. My experience has shown me that proactive, informed choices are the secret sauce to a durable, functional, and stunning kitchen. For more tips on seamless kitchen upgrades and storage mastery, explore creating seamless kitchen remasters.
Similar Posts
The Best Way to Organize a Deep Drawer for Pots and Pans
I’ll never forget the sound of my favorite Dutch oven slamming into a pile of lids at six o’clock on a Tuesday evening. It was loud. It was frustrating. And honestly? It was the final straw. For years, I treated my deep drawers like a giant toy box for adults, just tossing everything in and…
Why Every Mudroom Needs a Dedicated Charging Drawer for Devices
I still remember the moment I realized our family’s mudroom had turned into a digital battlefield. Shoes, coats, and a chaotic jumble of charging cords sprawled across every available surface—reminding me that I was losing control of our home’s organization, not to mention patience. That lightbulb moment led me to a simple yet overlooked solution:…
How to Install a Magnetic Knife Strip Inside a Cabinet Door
It happened on a Tuesday night while I was rushing to mince garlic for a pasta sauce. I reached into that ‘everything’ drawer—you know the one—and felt the cold, sharp edge of my chef’s knife brush against my knuckles. My heart skipped. Beyond the safety hazard, my expensive blades were getting nicked and dull from…
The Walk-In Pantry Strategy: Why Open Shelving Beats Drawers
It was a typical Saturday morning when I finally looked around my cramped kitchen and realized something needed to change. My walk-in pantry, which was supposed to be a haven for organization, had become a cluttered maze of half-open boxes, mismatched containers, and a drawer system that was more frustrating than functional. Every time I…
The Charging Drawer Move: Putting an End to Countertop Cord Clutter
I remember the exact moment I stepped into my kitchen and realized my countertop looked more like a tangled web of cords than a functional workspace. Chargers, gadgets, and power strips had invaded every free surface, turning my once sleek space into a chaotic jumble I dreaded every morning. That lightbulb moment hit me hard—there…
The Spice Drawer Strategy That Ends Countertop Clutter Forever
Have you ever opened your kitchen drawer only to be greeted by a chaotic jumble of spice jars, utensils, and random odds and ends spilling onto the counter? That moment of frustration hit me hard one morning, mid-flour spill, when I realized my cluttered spice drawer was sabotaging my cooking flow. It was then I…