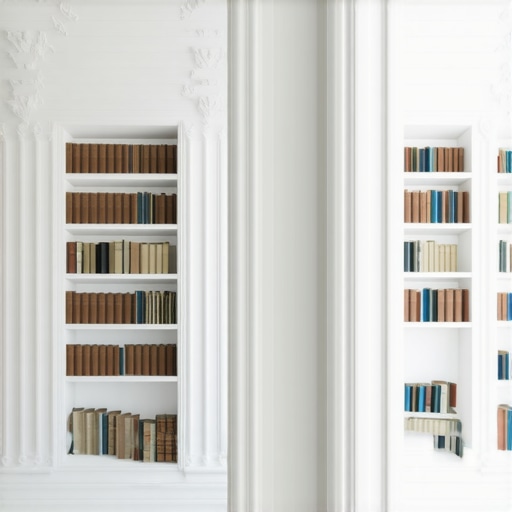
The Secret to Perfectly Flush Built-In Bookshelves in Old Homes
I remember the exact moment I realized my beloved old home, with its charming character and creaky floors, was also a nightmare when it came to built-in bookshelves. I spent hours trying to install a seemingly simple shelf, only to be met with a crooked, uneven gap that made the entire room look amateurish. That lightbulb moment hit me hard—building seamless, flush-in, built-ins isn’t as straightforward as it seems, especially in older homes with irregular walls and uneven floors.
If you’re like me, you’ve probably faced frustrations trying to create that sleek, integrated look that makes bookshelves feel like they belong, rather than awkwardly slapped onto a wall. And here’s the truth: there’s a secret to achieving a perfectly flush appearance, one that enhances your home’s character without sacrificing style or functionality.
Today, I promise to share the proven techniques I’ve learned through trial, error, and plenty of research—so you can finally get those built-ins to sit flush and look professional.
Why Old Homes Make Built-In Shelves Challenging
Older homes carry a unique charm—original moldings, thick walls, and charm that’s hard to replicate. But this charm often comes with imperfections: uneven walls, slab floors, and inconsistent framing. These quirks pose a big challenge when trying to install built-in bookshelves that are perfectly flush with the wall surface, making them look built-in rather than an afterthought. In fact, a study by the National Association of Home Builders highlights that irregular wall surfaces are among the top reasons for DIY or poorly executed built-ins that end up looking uneven or crooked.
Early on, I made the mistake of assuming that standard measurements would work without considering the specific flaws of my walls. I used generic shims and hoped for the best, but the result was a series of gaps and uneven lines that screamed
Assess Wall and Floor Irregularities Before Starting
Begin by thoroughly inspecting your walls and floors. Use a long level or a straightedge to identify high spots, dips, or bowed surfaces. For example, in my last project in my vintage kitchen, I noticed the wall bowed inward at the top, which could throw off the entire shelf alignment. Mark these imperfections clearly with a pencil to plan your corrections.
Choose the Right Support System That Accommodates Irregularities
Instead of standard support brackets, opt for adjustable built-in supports such as French cleats or custom steel supports that can be leveled individually. These systems allow for micro-adjustments, making it easier to achieve a flush finish. I used a French cleat system for my bookshelf, which adjusted smoothly on my uneven wall, resulting in a seamless appearance.
Install a Level Support Frame First
Construct a sturdy support frame or a ledger that follows the rough plane of your wall. Use shims to level the frame, ensuring it’s perfectly horizontal. Secure it firmly to the wall studs or suitable anchors. This foundation negates the wall’s imperfections, providing a flat surface for your shelving or cabinetry.
Use Custom Fillers and Shims for Fine Adjustments
Shims are your best friend when dealing with uneven walls. Cut or select shims that match the thickness needed at various points. For gaps that are large or irregular, carve custom fillers from scrap drywall, wood, or foam insulation. In a recent project, I had a gap up to ½ inch at one corner, so I layered foam shims covered with wood veneer to create a flush surface.
Scribe and Cut for a Perfect Fit
Once your frame is set and supports are adjusted, scribe the wall’s irregularities onto the material. Use a template or a flexible spline to transfer the wall’s profile onto your shelves or paneling, then cut precisely with a jigsaw or track saw. This step insures that the finished piece contours perfectly to the wall’s shape, reducing visible gaps.
Apply Seamless Finish with Proper Caulk and Paint
After installation, fill any remaining small gaps with flexible caulk, smoothing it out for a seamless look. When painting or staining, use high-quality primer and finish coats that adhere well over caulk and fillers, maintaining the flat, flush appearance. This process was vital in my kitchen remodel, where perfect finish details made the difference between a DIY look and professional quality.
Consider Hidden Support Systems for Complex Walls
If your walls are highly irregular or load-bearing, hidden support systems like steel brackets or adjustable jigs can be embedded behind panels or within cabinetry. These support supports can be leveled post-installation, ensuring that hidden supports do not compromise the visual flushness of your built-ins. For more innovative ideas, check out this guide on seamless storage solutions.
Many homeowners believe that installing built-in shelves or custom cabinets is straightforward, assuming that standard measurements and off-the-shelf solutions will ensure a perfect fit. However, this oversimplification often leads to costly mistakes and unsatisfactory results. Let’s dig deeper into the misconceptions that can trip up even experienced DIYers and professionals alike.
What Do Most People Get Wrong When Planning Built-ins?
A frequent error is underestimating the impact of wall irregularities and floor unevenness. A common myth is that shims and fillers can universally address all irregularities, but in reality, this approach can create visual inconsistencies and compromise structural integrity. For example, simply applying filler without scribing the material to match wall contours often results in noticeable gaps or warping over time. Experts suggest using flexible scribing techniques and custom fillers to achieve a seamless appearance, ensuring your built-ins look integrated rather than patched together.
Beware of Overlooking Advanced Support Systems
Another nuance many overlook involves the support infrastructure behind your cabinetry. Relying solely on visible supports like cleats or standard brackets might seem sufficient, but in complex or load-bearing applications, hidden steel supports and adjustable jigs are invaluable. These systems allow micro-adjustments during installation, preventing sagging and maintaining a flush look over uneven surfaces. Incorporating such hidden support measures dramatically elevates the finish quality, making your project appear truly professional.
Smart Storage Solutions Require Strategic Planning
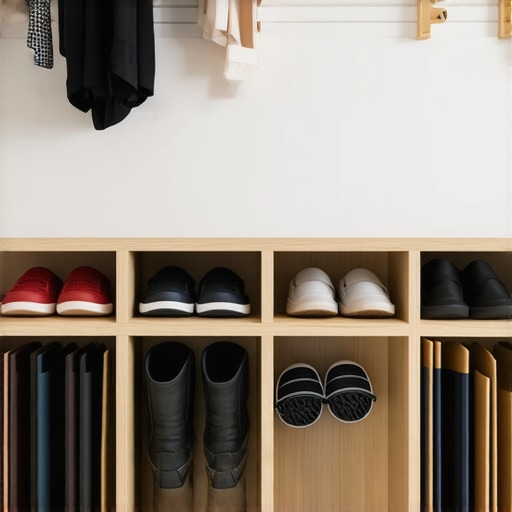
When it comes to storage, one misconception is that more space automatically equals better organization. In fact, smart storage solutions demand intentional design—such as incorporating vertical pull-outs, toe-kick drawers, or custom dividers—that optimize every inch. Integrating these features requires foresight and precise planning, ensuring they complement the wall contours and do not disrupt the aesthetic flow. I’ve found that employing a layered approach—combining open shelving with concealed compartments—maximizes usability without sacrificing style. For further inspiration, consider exploring specialized storage ideas.
The Danger of Ignoring Wall and Floor Variances
The biggest trap is neglecting to meticulously assess wall and floor irregularities before starting construction. Skipping this step often results in crooked shelves, uneven gaps, or warped panels that require expensive corrections later. Advanced techniques, such as using laser levels and scribing tools, allow for precise adaptation to imperfections, preventing costly rework. As shown in expert guides on modern kitchen remodels, addressing these nuances upfront is essential for achieving a polished, professional look. Have you ever fallen into this trap? Let me know in the comments. Engaging deeply with these hidden nuances ensures your installed built-ins and custom cabinets stand the test of time, blending form and function seamlessly.Maintaining your custom-built storage and cabinetry is essential to preserve their appearance and functionality over time. One of my go-to tools is a quality multi-bit screwdriver set, which allows me to tighten or replace hinges and handles without damaging the finish. Additionally, I rely heavily on a digital laser level, like the Bosch Cross-Line Laser, to ensure all supports and shelves remain perfectly aligned, especially after adjustments or seasonal shifts affecting wall stability. For cleaning, a microfiber cloth combined with a gentle pH-neutral cleaner keeps surfaces free of dust and grime without compromising finishes. The key is regularity—set a routine monthly check to tighten loose hardware, inspect for warping or damage, and clean surfaces thoroughly.
For software, I recommend using CAD programs like SketchUp to plan adjustments or modifications to your cabinetry before executing them. This visual planning step helps prevent costly mistakes and ensures that changes fit within your space, especially when scaling or expanding your original design. As the trend towards smart home integration progresses, consider investing in an app like HomeConnect to monitor and schedule maintenance reminders for your storage systems.
Looking ahead, innovations such as automated dust removal systems and self-adjusting support brackets could revolutionize how we care for built-ins, reducing maintenance time and preventing issues before they become noticeable. Predictive maintenance powered by sensors embedded within your cabinetry could soon be a standard feature.
How do I maintain custom cabinets and built-in storage systems over time?
Regular inspections, gentle cleaning, and timely hardware adjustments are your best allies. Don’t forget to document any changes or issues, so you can reference them later or share with a professional if needed. For example, adding a small, magnetic screw organizer on your workbench helps you keep track of hardware during adjustments and prevents loose screws from becoming a problem later. For more advanced maintenance tips tailored to modern kitchens, check out this guide on creating seamless kitchen remasters. Incorporate these practices into your routine, and you’ll extend the lifespan of your custom cabinetry while keeping it looking pristine and functioning flawlessly.
Secrets Only Experience Reveals About Flushing Built-Ins
One of the toughest lessons I learned was that even the smallest wall imperfections can sabotage the sleek look you aim for. Embracing patience and detailed assessment became my best tools, leading to a truly integrated finish that feels custom-made. I discovered that every irregularity is an opportunity to craft a tailored solution, turning flaws into features rather than flaws.
Another revelation was the importance of setting a solid, level foundation before attaching the actual shelves or cabinetry. Skipping this step cost me time and materials, but now I know that a support system that accommodates wall quirks is worth every extra minute. It’s these hidden adjustments that elevate a good project to a professional-level outcome.
Finally, paying attention to finish details like caulking and paint reveals the difference between DIY and polished craftsmanship. These finishing touches hide the gaps and contours, unifying the built-in into your space seamlessly. My advice: never underestimate the power of careful finishing—it’s the secret ingredient to high-end results.
Tools and Resources That Turn Building Challenges Into Wins
Over the years, I’ve curated a toolkit that makes addressing wall irregularities manageable: a high-quality laser level for precise alignment, adjustable French cleats for flexible support, and custom fillers that match the wall’s contour perfectly. The [smart storage solutions](https://artisancabinetworkz.com/creating-seamless-kitchen-remasters-with-built-in-storage-solutions) I found online were particularly inspiring, showing me that even complex irregularities can be approached with strategic planning.
Books like Designing Built-Ins and Custom Storage helped me understand the nuances of hidden supports and micro-adjustments. And for practical guides, I often revisit trusted blogs and forums—these platforms are gold mines for troubleshooting and new ideas. My top recommendation: invest in quality tools and leverage expert advice; they make all the difference in turning a challenging space into a showcase.
Embrace the Challenge: Your Homes’ Character Is the Real Treasure
Remember, every quirk of your old home is part of its story. The imperfections that make your charm sometimes complicate the installation of built-ins, but they offer a chance to create something uniquely yours. By addressing wall irregularities head-on with patience and precision, you turn potential frustrations into opportunities for craftsmanship excellence.
Start with thorough assessments, support your structures creatively, and pay attention to finishing details—these are the keys to a truly seamless look. Your home’s character deserves built-ins that honor its history while showcasing your style. With the right approach, your efforts will elevate your space into something both functional and beautifully integrated.
Your Creativity Knows No Limits — Take Action Today
Building seamless, flush-in built-ins in older homes is undeniably a challenge, but it’s also immensely rewarding. Trust in your process, equip yourself with quality tools, and enjoy watching your vision come to life. Your vintage home has the potential to shine brighter with every detail meticulously crafted.
Have you ever faced unexpected wall irregularities during your own projects? Share your experiences below—I’d love to hear what worked for you and inspire others on this journey.