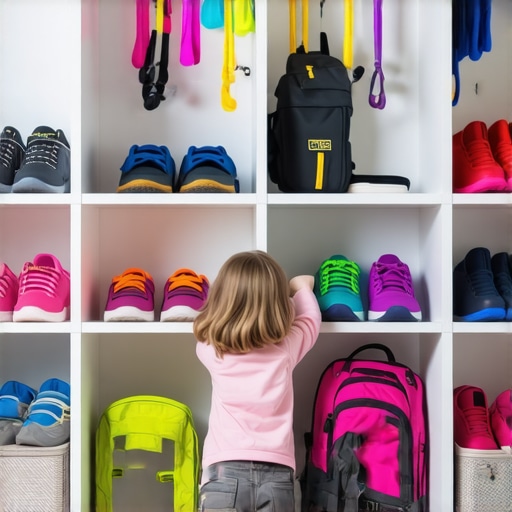
The Mudroom Bench Move: Why Open Cubbies Beat Doors for Kids
Imagine this: It’s a frantic morning. Kids are racing around, shoes are bouncing, backpacks are slamming doors, and you’re desperately trying to find the matching pair of sneakers amidst a sea of closed cabinet doors. Sound familiar? I used to think that the secret to an organized mudroom was sleek, closed cabinetry—until I experienced the chaos firsthand. I was constantly bending, reaching, and hunting through dark compartments, and it was wearing me down.
Making the Mudroom Work for Your Family
That was my lightbulb moment. I realized that the design of storage solutions directly impacts not just the aesthetics, but the daily efficiency of my household. Instead of hiding everything behind doors, I started experimenting with open cubbies—accessible, visible, and unfailingly convenient. The difference was night and day. Now, I’ll show you why open cubbies are a game-changer and how they can simplify your kid’s daily routine, too.
Is Foresight Worth the Extra Effort or Just a Trend?
Early in my journey, I made the mistake of focusing solely on looks instead of function. I believed closing doors kept the space tidy and neat—until I watched my kids struggle to find their jackets in the morning rush. This common mistake often leads homeowners to overlook the genuine needs of a busy family. According to storage expert Artisan Cabinetworkz, accessibility and visibility are key components of effective storage. And I’ve found firsthand that open cubbies promote quick access, reduce clutter, and even encourage kids to take responsibility for their belongings.
This article is about more than aesthetics; it’s about creating a functional space that adapts to your family’s rhythm. Ready to ditch the closed doors and embrace smarter storage? Let’s dive into the practical steps that helped me transform my mudroom into a lively, organized hub that kids and adults alike love to use.
Start with Clear Zones for Every Family Member
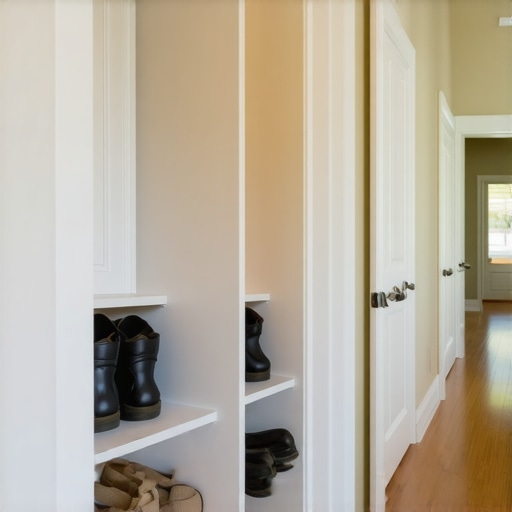
Begin by dividing your mudroom into dedicated sections for each person’s gear—shoes, backpacks, outerwear. Use open cubbies or shallow shelves at eye level to let kids easily see and access their belongings. I once organized my kids’ shoes into labeled bins within these zones, which instantly reduced the morning chaos. The visual cue made them responsible for their space, and cleanup became quicker.
Use Adjustable Shelving to Accommodate Growth and Changing Needs
Install adjustable shelving units to customize storage height as your kids grow or as seasons change. Instead of fixed shelves that become impractical, adjustable ones allow you to reposition bins and baskets. I applied this by installing wall-mounted metal brackets and swapping out shelves seasonally, which kept the space flexible and functional. Flexibility here minimizes clutter and maximizes usability.
Embrace Open Storage Instead of Traditional Doors
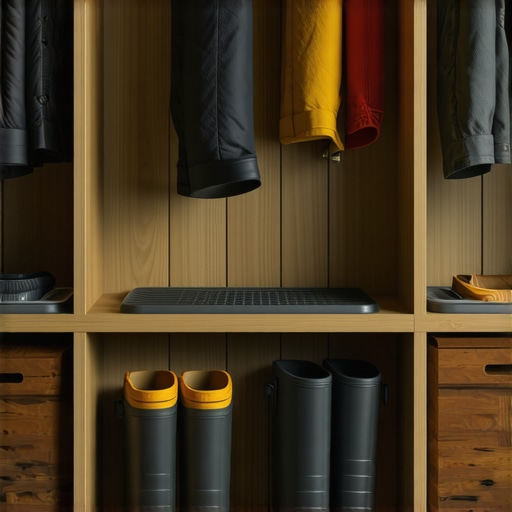
Replacing closed cabinets with open cubbies or pegboards makes items instantly visible and reachable, speeding up routines. Think of it as the difference between rummaging through a closed closet and grabbing a shirt from a well-organized open wardrobe. I took this approach and found that my kids could find their jackets faster, and I avoided opening and closing doors multiple times during busy mornings. Open storage is a game-changer for accessibility.
Add Baskets for Hidden Organization
Integrate baskets or bins within open cubbies to contain smaller items like gloves, hats, and snacks. Choose uniform baskets for a cohesive look and label them for clarity. During my project, I used colorful woven baskets, which added texture and kept small items contained, reducing visual clutter. This method ensures that everything has a designated spot, making tidying up easier.
Incorporate Hooks and Racks to Maximize Vertical Space
Utilize wall-mounted hooks for items like keys, umbrellas, or pet leashes. Racks can hold scarves and umbrellas vertically, saving precious space. I installed a series of heavy-duty hooks beside the cubbies, which quickly became the go-to place for daily essentials. This prevents piles on the bench and simplifies the process of grabbing what you need on the way out.
Prioritize Safety and Durability in Material Choices
Choose sturdy, moisture-resistant materials like melamine or sealed plywood for durability, especially in high-traffic areas prone to dirt and moisture. I avoided flimsy particleboard and opted for sealed plywood, which held up well over years of use. Additionally, soft-close hinges and tapped corners prevent injuries and prolong the life of your storage solutions. Upgrading materials pays off long-term by maintaining safety and appearance.
Finalize with Personal Touches and Maintenance Routines
Add decorative labels, mats, or a chalkboard for reminders to personalize the space. Establish a weekly tidying routine to keep the system working smoothly, like I do on Sundays for a quick reset. Regular maintenance transforms a chaotic mudroom into a well-oiled hub that serves your family efficiently and looks inviting.
Many homeowners assume that opting for custom cabinetry guarantees flawless results, but there’s a nuanced landscape that often goes unnoticed. A common myth is that bespoke solutions are inherently superior, yet without meticulous planning and expert guidance, they can lead to costly mistakes and design compromises. For instance, selecting overly intricate built-ins without considering maintenance or accessibility can result in frustration and wasted resources. According to design expert Artisan Cabinetworkz, understanding the subtleties of material choice and hardware quality is crucial for durability and function. An advanced mistake many overlook is neglecting the importance of precise measurements in complex layouts, which can cause misalignments that are visually jarring and functionally problematic. Additionally, homeowners often underestimate the impact of traffic flow when designing storage solutions, leading to crowded spaces and inefficiencies.
How can designers ensure seamless integration of built-ins that blend form and function effectively?
This involves detailed planning and collaboration with skilled craftsmen, emphasizing adjustable features and smart storage innovations, which are covered extensively in Creating Seamless Kitchen Remasters. A significant oversight is ignoring future needs; flexible designs that adapt over time save money and effort. For example, incorporating modular shelving or adjustable inserts can accommodate growth and changing tastes, avoiding premature obsolescence. The key is to balance aesthetic appeal with practical utility, an art mastered through understanding the nuanced craftsmanship that goes into every custom piece. Remember, a well-executed kitchen remodel isn’t just about appearance—it’s about crafting a space that anticipates and adapts to your family’s evolving needs. Have you ever fallen into this trap? Let me know in the comments.
Maintaining your custom cabinets and built-in storage is crucial to preserving both their appearance and functionality over the years. Investing in the right tools and adopting systematic routines can significantly extend the lifespan of these features. One of my favorite tools for routine upkeep is a high-quality microfiber cloth combined with a gentle, pH-balanced cleaner specifically designed for wood and laminate surfaces. This duo allows me to clean without risking streaks or damage, ensuring my cabinets stay looking pristine without the need for frequent professional interventions.
For deeper maintenance, especially when dealing with hinges and slides, I rely on precision screwdrivers and a set of soft-close hinge adjustment tools. I personally use the Wiha Precision Screwdriver Set, which offers the perfect grip and accuracy needed to fine-tune hinges or tighten loose hardware. Regular adjustments prevent sagging doors or misaligned drawers, which can be costly to repair if neglected. Additionally, a silicone-based lubricant spray is invaluable for ensuring smooth operation of sliding mechanisms and hinges. I swear by this specific lubricant; it penetrates well and avoids the sticky buildup common with other products.
How do I maintain built-ins and storage over time?
Being proactive is key. Every six months, I dedicate a short window to inspect all hardware, clean surfaces, and apply lubricants as needed. This routine helps catch issues early—like loose screws or sticking drawers—before they become big problems. For built-ins that feature adjustable shelves or modular components, I recommend routinely measuring and repositioning to accommodate changing needs and prevent warping or sagging. Investing in quality hardware from trusted manufacturers, like Blum or Hettich, pays off by reducing the frequency of repairs and replacements. As trends in storage evolve, smart integration of adjustable features can prepare your space for future modifications, making scaling or remodeling more manageable.
Looking ahead, the trend in cabinet maintenance and tools is pivoting toward automation and smarter hardware. For instance, next-generation hinges and slides equipped with sensors can notify homeowners of misalignments or wear—saving time and avoiding costly repairs. As technology advances, incorporating these innovations may become standard, turning routine maintenance into a more effortless, even automated, experience. For now, I encourage you to implement the tip of checking and lubricating hinges every six months; it’s a simple step that yields significant long-term benefits.
If you’re curious about more advanced storage solutions or custom cabinet recommendations, I suggest exploring this article on built-in enhancements. Remember, well-maintained cabinets aren’t just beautiful—they’re an investment that stays functional and looks great for years to come. Don’t wait until small issues turn into costly replacements—start your maintenance routine today and see the difference it makes!
What I Wish I Knew Before Rethinking My Storage Space
One of the biggest surprises in my journey was realizing that perfect-looking built-ins can hide hidden challenges. For instance, glass-front cabinets look stunning but demand internal lighting and meticulous cleaning—smarter choices that I only discovered after experiencing the inconvenience firsthand.
Integrating adjustable hardware taught me the importance of flexibility; fixed shelves quickly became obsolete. Now, I always choose adjustable options to future-proof my space and accommodate changing needs or tastes.
Another key lesson was understanding that not all materials are equal. Cheaper options may save money upfront but can lead to sagging or warping over time—investing in durable materials like sealed plywood or moisture-resistant finishes pays dividends in longevity and safety.
Tools and Resources That Made the Difference in My Projects
My go-to guide has been this resource on sleek storage hacks. Its practical insights into space optimization inspired some of my best design decisions, especially the clever use of dead space.
For hardware, I trust soft-close hinges and slide mechanisms. They ensure my cabinets operate quietly and smoothly, reducing wear and tear—and frustration.
And when it comes to maintenance, a set of precision screwdrivers and lubricants from trusted brands keeps everything aligned and functional, saving me money and stress in the long run.
This Is About More Than Just Looks—It’s Personal Growth
Embracing open storage and adjustable features wasn’t just about aesthetics; it fundamentally changed how I manage my home and prioritize family convenience. Every time I plan a remodel or upgrade, I remind myself that thoughtful design can enhance daily life, boosting confidence and satisfaction.
My advice? Don’t shy away from learning the nuances of quality hardware and materials. Small investments in knowledge and tools pay off with durable, beautiful cabinets that stand the test of time—and busy family life.
What’s the most important lesson you’ve learned from your own storage or cabinetry projects? Share your experience below—I’d love to hear how you’re transforming your space!