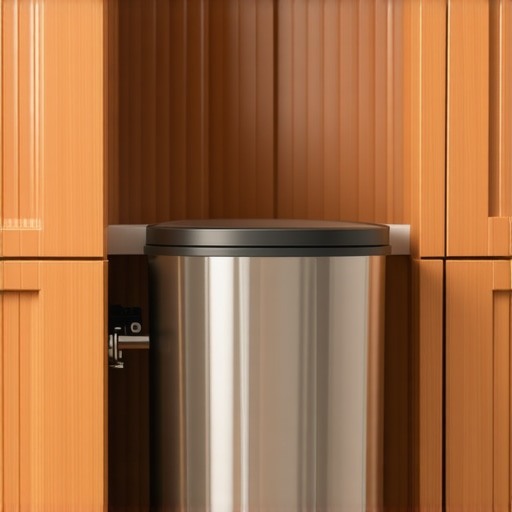
Why Your Pull-Out Trash Can Keeps Jamming and the Side-Mount Fix
It was a typical Monday morning in my kitchen when I opened the cabinet to toss out some leftovers, only to be met with the frustrating grind and jamming of my pull-out trash can. After trying to yank it free a few times, I realized I wasn’t alone—many homeowners face this pesky problem. That moment of annoyance sparked my quest to understand why my trash can kept jamming and how a simple side-mount fix could save the day.
Why Your Pull-Out Trash Can Keeps Jamming—And Why It Matters
If you’ve ever dealt with a stubborn pull-out trash can that refuses to open smoothly, you know how disruptive it can be. Beyond just the inconvenience, a jammed cabinet can indicate underlying issues that, if left unaddressed, might lead to further damage or the need for costly repairs. The good news? Many of these problems are fixable with some straightforward adjustments and understanding.
From my experience, one key reason for jamming is misaligned slides or improper mounting, which causes the trash can not to glide smoothly. Early in my remodeling project, I made the mistake of assuming all drawer slides were created equal, leading to persistent issues. As I dug deeper, I discovered that side-mount slides, when correctly installed, can dramatically improve function and durability. Studies show that proper slide installation can extend the lifespan of your cabinet hardware and prevent jams (source: HGTV).
During my experimentation, I also learned that small adjustments in mounting angles and securing the slides firmly can make a significant difference. If you’re tired of wrestling with your pull-out trash can or worried about potential damage to your cabinetry, you’re not alone—and there’s a practical fix that might just transform your kitchen experience.
In the sections ahead, I’ll guide you through the concrete steps to diagnose and resolve jamming issues, focusing on the helpful side-mount solution that I found most effective. Ready to reclaim smooth, frustration-free cabinet functionality? Let’s dive into the fix that saved my kitchen and could do the same for yours.
Assess the Slide Alignment Carefully
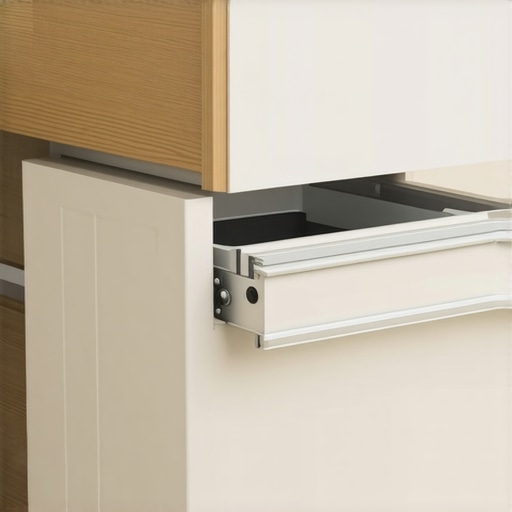
Start by removing the trash can drawer from its cabinet to inspect the side-mount slides. I vividly recall my first attempt—disassembling everything and realizing the slides were slightly off-angle, causing the jamming. Use a level or measuring tape to check if both slides are perfectly parallel. If misaligned, loosen the mounting screws and gently reposition the slides, ensuring they run straight and level. Tighten the screws securely and test the drawer. A precise alignment prevents uneven weight distribution that leads to sticking.
Clean and Lubricate the Slide Components
Next, clean all moving parts. Over time, dust and grime accumulate, which can increase friction. I grabbed a soft cloth and a mild lubricant—avoid WD-40 or heavy greases—which can attract dirt. Spray the lubricant lightly on the slide tracks and rollers, then slide back and forth to distribute it evenly. Remember, a smooth glide depends on both cleanliness and proper lubrication. Regular maintenance like this prolongs slide life and reduces jams.
Adjust the Mounting Heights and Angles
Check if the slides are mounted at the correct height and angle. The slides should tilt slightly downward toward the opening to facilitate smooth extension. My initial setup was too level, causing the trash can to tilt as I pulled it out, jamming against the cabinet frame. Slightly loosening the mounting screws and adjusting the angle with a screwdriver allowed gravity to help the drawer glide more efficiently. Tighten once the optimal position is achieved. This adjustment is crucial for preventing uneven wear and sticking.
Secure Screws Firmly to Prevent Shifts
Loose screws can cause misalignments over time—I’ve learned this the hard way. Ensure all screws securing the slides are tight using a screwdriver but avoid overtightening, which can strip the threads. Focus especially on the mounting points attaching the slides to the cabinet sides. After tightening, manually slide the trash can in and out several times to confirm smooth movement. If any wobbling persists, recheck the screw tightness and alignment.
Replace Worn-Out or Damaged Components
If after adjustments your pull-out trash can still jams, examine for broken rollers, bent slides, or rust. I faced this when a roller broke mid-way through, causing the drawer to stick. Replacing damaged parts with compatible ones from the hardware store restored function instantly. For comprehensive updates, explore innovative storage solutions that can integrate seamlessly into your cabinet system.
Test the Fix and Monitor Performance
Once you’ve performed all adjustments, fully load the trash can and slide it in and out multiple times. Observe for any sticking points or resistance. In my case, after lining up everything and applying lubricant, the drawer glided like new—less effort, no jam. Regular checks and minor tweaks can prevent future problems, saving you time and money in the long run. Remember, small details like ensuring the slides are clean, aligned, and properly secured make the biggest difference in cabinet performance.
Beyond the Basics: Common Myths About Custom Cabinets and Remodels
Many homeowners believe that opting for custom cabinets guarantees a flawless kitchen, but in reality, there are nuances that are often overlooked. Contrary to popular belief, customization isn’t merely about selecting a style—it’s about understanding the intricacies of material choices, construction techniques, and installation methods. For instance, some assume that all wood finishes age equally, but experts highlight that high-gloss paints can show fingerprints more readily, especially in households with children (source).
Advanced Mistakes: The Hidden Traps in Kitchen Remodeling
One common mistake is neglecting to consider the impact of hardware and joinery on durability. Many underestimate how soft-close hinges and dovetail joints contribute to longevity, especially in high-traffic kitchens. Installing inexpensive hardware might save money initially but leads to frequent repairs down the line. Additionally, improper door alignment can cause sticking and uneven gaps—a seemingly minor issue that whispers of poor craftsmanship. To avoid these pitfalls, it’s essential to work with experienced craftsmen who understand these nuances, as detailed in our assessment guide.
What Advanced Techniques Can Elevate a Kitchen Remodel?
For those seeking sophistication, integrating smart storage solutions like hidden drawers or toe-kick drawers can maximize space without compromising aesthetic appeal. These features often require precision installation and an understanding of cabinet framing structures—skills that transcend basic carpentry. Incorporating such innovations not only enhances functionality but also future-proofs your kitchen. Check out our smart storage ideas for inspiration.
Finally, be wary of the trap of choosing trendy finishes without considering long-term maintenance. While matte finishes hide fingerprints better, they can be more difficult to clean and prone to scratches. Consulting with experts who understand material behaviors can save you from costly regrets. Want to transform your kitchen with expert insights? Visit our contact page.
Effective maintenance and scalability of your custom cabinet system require the right tools and proven methods to ensure longevity and aesthetic appeal. One essential tool I personally swear by is the high-precision cordless rotary tool, like the Dremel 3000, which I use for detailed sanding, cleaning small hardware components, and making fine adjustments without dismantling entire units. Its versatile attachments allow me to easily remove built-up grime from hinges or refinish scratches that might compromise cabinet integrity over time. Coupled with a microfiber cleaning cloth, I routinely keep hardware and surfaces dust-free, preventing dirt accumulation that can cause premature wear. For lubricating sliding mechanisms, I prefer silicone-based spray lubricants, like the silicote 200, because they provide long-lasting lubrication without attracting dirt, unlike oil-based products. Applying this with a precision nozzle ensures even coverage on slides, keeping drawers and doors operating smoothly as I scale up projects or perform routine upkeep. When planning long-term maintenance, I rely on digital apps such as Checkmark or Todoist. On my phone, I set reminders to inspect hinges, slides, and finishes every three to six months, which helps me catch early signs of wear before costly repairs become necessary. As I grow my portfolio of custom kitchens, I ensure my workflow remains efficient by adopting software like SketchUp and Cabinet Vision for design prototyping. These tools facilitate quick model adjustments, helping me visualize scaling options or alterations without physical overhaul, thus saving time and reducing material waste. Looking ahead, the trend toward integrated smart-home technology will likely influence how we maintain and upgrade kitchens. For example, Wi-Fi-enabled hinge systems can alert homeowners about lubrication needs or misalignments remotely, streamlining upkeep further. To truly sustain and expand your kitchen remodels, I encourage you to incorporate these tools into your routine and explore their full capabilities. For instance, try integrating a micro-lubricant spray and setting regular maintenance reminders; it’s a game-changer in preventing jams and ensuring smooth operation over years of use. Want to delve deeper into optimizing your cabinet maintenance? Check out our comprehensive guide on modern kitchen remodels that incorporate smart storage and built-ins and discover practical tips to keep your kitchen working seamlessly for years to come.
What I Wish I Knew When Starting My Custom Kitchen Journey
One key insight is that every detail matters—small adjustments in slide angles or hardware placements can save you from big headaches down the line. I once ignored the importance of alignment, only to find myself battling stubborn drawers months later; now I know that patience during setup pays off and prevents future jams.
Recognizing the true longevity of quality hardware changed my perspective. Cutting corners with inexpensive slides or hinges may seem cost-effective initially, but I learned that investing in durable components reduces frustrating repairs and enhances the overall look. It’s a reminder that smart choices upfront save time and money later.
Listening to professionals and authentic sources transformed my DIY approach. From mastering precise measurements to understanding the impact of material choices, I discovered that educated decisions lead to a more satisfying remodel. Now, I advocate for thorough research before jumping into projects, which can be thanks to resources like innovative storage solutions.
Tools and Tips That Changed My Renovation Routine
Having a reliable toolkit made all the difference. A high-quality cordless rotary tool like the Dremel 3000 became my go-to for fine adjustments and cleaning hardware, preventing issues before they escalated. Combining it with a microfiber cloth and silicone-based lubricants helped me keep components smooth and long-lasting.
Setting digital reminders using apps like Todoist ensured routine inspections for wear and tear, promoting proactive maintenance. Learning to use design software such as SketchUp streamlined my planning process, saving me both time and material costs. These tools, combined with practical techniques, elevated my kitchen upgrade from a DIY frustration to an enjoyable accomplishment.
Your Turn to Create a Kitchen That Works for You
Remember, tackling small issues like drawer jamming today can lead to a flawless kitchen tomorrow. With patience and the right tools, your custom cabinets, kitchen remodel, storage solutions, and built-ins can genuinely transform your space into a beautiful, functional haven. Don’t be afraid to start—your dream kitchen awaits!