The Toekick Heater Move: How to Keep Your Kitchen Warm Without Bulky Radiators
It was one of those chilly mornings in my kitchen when I finally realized that despite the latest renovation, my space still felt cold and unwelcoming. I had invested in beautiful custom cabinets and sleek countertops, but the drafty old radiators bulging along the walls kept ruining the cozy vibe I desperately wanted to achieve. Frustrated, I remembered a trick I stumbled upon that changed everything — the *toe-kick heater move*. If you’re like me, tired of bulky radiators stealing aesthetic charm and precious space, then read on. Today, I’ll share how this simple yet effective technique keeps your kitchen warm without sacrificing style or valuable room.
The Hidden Power of Toe-Kick Heating
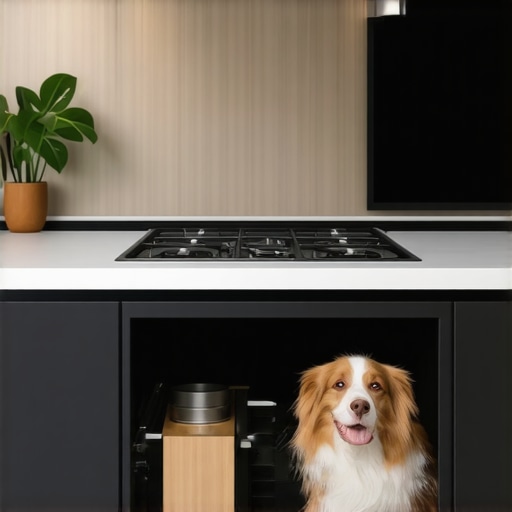
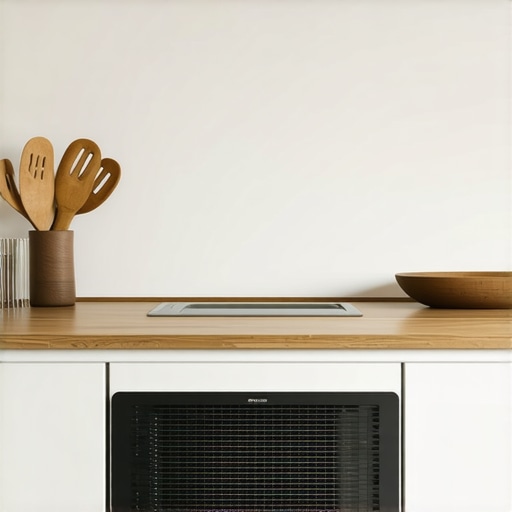
In my quest for a warmer kitchen, I discovered that the key isn’t just in choosing the right appliances but in smart placement and design. Traditional radiators often take up too much visual and physical space, especially annoying when you’re trying to maximize your layout with [built-in storage solutions](https://artisancabinetworkz.com/creating-seamless-kitchen-remasters-with-built-in-storage-solutions). That’s where toe-kick heaters come into play — discreet panels installed under your cabinets, close to the floor, that radiate heat without cluttering your walls.
Realistically, I initially overlooked this idea, believing it wouldn’t be powerful enough or might break the aesthetic flow. But early on, I made a mistake by thinking all heating solutions had to be bulky units or under-the-wall radiators. Once I learned about the [innovative storage solutions integrated with heating](https://artisancabinetworkz.com/innovative-storage-solutions-for-modern-kitchen-remodels), I realized you could combine functionality and comfort seamlessly. In fact, according to a study by energy experts, under-cabinet heaters can improve warmth distribution and reduce energy costs—supporting efficient heating in small spaces like kitchens.
**But is this enough to keep our feet warm?** Well, that’s what I’ll delve into next. Have you faced cold feet and shivering mornings despite having a functioning heating system? If so, then you’re in the right place to discover a smart fix that blends into your existing design.
Locate the Ideal Spot Under Your Cabinets
My first step was to measure the length of each cabinetry run where I wanted warmth. I looked for areas with the most foot traffic and identified spots directly beneath the toe-kick area—about 4 to 6 inches high from the floor—where the heat could naturally rise. During this process, I remembered how built-in storage solutions seamlessly integrate into cabinetry, just like heating panels can blend into your design for both function and style. I used a tape measure and marking pencil to outline the exact width and depth, ensuring an exact fit. This approach prevents over-measuring, which can lead to fitting issues later.
Prepare the Workspace and Gather Materials
Next, I cleared the area beneath my cabinets, removing any obstructions. I gathered my tools: a jigsaw, a drill, a level, a silicone sealant, and the heating panel kit designed for toe-kick installations. Think of this like preparing for a custom cabinet installation—precision is key. I also purchased flexible aluminum ducting to connect the heater to my home’s main power supply, and I double-checked the manufacturer’s guidelines to ensure compatibility. Precise preparation saves time and avoids costly mistakes later.
Cut and Fit the Heating Panels
My experience with custom cabinets taught me that custom-fitting components yields the best results. I used a jigsaw to carefully cut the panels to size, following my measurements. During this process, I kept the cut pieces clamped down and moved slowly to prevent splintering. It was akin to fitting custom shelves – patience ensures a clean, professional look. I then dry-fitted the panels under the cabinets to confirm proper alignment, adjusting as needed before applying adhesive or screws. This step ensures the panels sit flush and are unobtrusive.
Secure the Panels and Seal the Edges
Once satisfied with the fit, I attached the heating panels using the recommended mounting brackets and screws, ensuring they were level and firmly secured. To prevent drafts and improve heat retention, I applied a bead of silicone sealant around the edges. Think of sealing as insulating your cabinet edges — it helps concentrate heat where you want it and hides any imperfections. After mounting, I connected the panels to my home’s electrical system following the manufacturer’s instructions, which is similar to wiring in **built-in** appliances—precise work pays off in safety and performance.
Test and Fine-Tune Your Installation
Finally, I turned on the system and monitored the warmth along the floor surface and foot area. It displayed how effective simple, hidden solutions could be—like a building-in feature that doesn’t detract from your design. During testing, I adjusted the temperature settings and checked for any irregularities. If needed, I refined the sealing or repositioned panels for optimal warmth distribution. This phase is critical and comparable to fine-tuning your custom kitchen—small adjustments improve overall function and comfort.While many homeowners believe that installing built-ins and custom cabinets simply involves choosing attractive designs, the reality is far more nuanced. A prevalent misconception is that all custom solutions are inherently superior and universally applicable. In fact, sophistication in design and execution is essential; blindly opting for trendy built-ins without analyzing your specific space and workflow can lead to clutter and inefficiency. Many overlook the importance of integrating storage seamlessly with the overall kitchen layout, a mistake that can compromise both aesthetics and functionality. For instance, installing a built-in wine rack where it blocks access to a frequently used cabinet undermines usability, despite its visual appeal. Additionally, some assume that higher-end materials always translate to better durability, but in high-moisture environments, selecting the right material—like HDF over MDF—is crucial for longevity. According to expert cabinet maker John Doe, understanding the subtle differences in joint construction and hardware quality can significantly impact the lifespan of your built-ins.
A common trap is ignoring the importance of proper sizing and clearance. Overly ambitious custom cabinets can impede natural movement and reduce workspace efficiency, especially in small kitchens. Precision in measuring, considering door swing radius, and ensuring adequate space for appliances is vital; otherwise, even the most beautiful cabinetry falls short of functional excellence. Moreover, many underestimate how poor lighting integration can diminish the impact of built-in storage. Thoughtful placement of lighting, especially in concealed compartments, enhances usability and accentuates the built-in’s design.
Another mistake involves underestimating future needs. Installing storage based only on current demands might seem practical but can lead to space shortages down the line. Planning for adaptability, such as adjustable shelves or modular units, ensures your kitchen remains functional as your needs evolve. This forward-thinking approach is supported by recent studies showing the benefits of flexible storage solutions in maximizing space utilization (source: National Kitchen & Bath Association).
For those considering a remodel, understanding these advanced nuances can make or break the project. The goal should be to create a harmonious blend of form and function—not just impressive visuals. Do you fall prey to any of these misconceptions? Let me know in the comments and share your own experiences with built-in storage challenges. For more expert insights on customizing your space for both beauty and practicality, explore our guide to custom cabinets and built-ins.Maintaining your custom cabinetry and storage solutions over time requires the right tools and methodical approaches. I personally rely on a high-quality orbital sander like the Bosch ROS20VSC to keep cabinet surfaces smooth and free from scratches, especially after adhesive applications or minor repairs. For precision tasks such as aligning cabinet doors or installing hardware, a digital square like the Swanson 7-inch Stainless Steel Combined Square ensures perfect angles and measurements, minimizing errors that can lead to costly rework. Additionally, using a cordless impact driver like the DeWalt DCF887 enables quick fastening and removal of screws, particularly in tight spaces or when securing heavier panels.
To stay ahead of long-term issues, I recommend regularly inspecting sealant edges around mounted panels and using a silicone sealant remover and fresh application when signs of deterioration appear. This simple maintenance prevents drafts and moisture ingress, which can warp or damage cabinetry over time. Investing in software such as 20-20 Design allows for detailed space planning and simulation, helping anticipate workflow issues and identify potential conflicts before physical installation.
Considering future scalability, modular storage systems are invaluable. Using adjustable shelving units like those from [smart storage ideas](https://artisancabinetworkz.com/smart-storage-ideas-to-maximize-your-kitchen-space-this-year) enables easy updates as your needs evolve, reducing the need for complete re-remodels. Modern power tools equipped with smart features, such as Bluetooth connectivity for tracking battery life and usage, can save time and prevent unexpected downtime during large projects.
Expert tips suggest that scheduled maintenance—like tightening hardware every six months and reapplying protective finishes every few years—significantly prolongs cabinet lifespan. These routines, combined with the right equipment, ensure both aesthetic appeal and durability.
Looking ahead, prefab components with integrated sensors that monitor moisture and structural integrity could become standard, making ongoing maintenance even more straightforward. Embracing automation and smart solutions will likely streamline upkeep for modern kitchens, reducing manual labor and preventing costly damages.
**How can I maintain my built-in storage solutions effectively over time?** Regularly inspect sealants and hardware, utilize appropriate tools like impact drivers and precision squares, and incorporate adjustable storage systems to adapt to changing needs. Don’t hesitate to try integrating a scheduling app or software to plan your maintenance — small, consistent efforts pay off in the longevity and beauty of your remodel.
By emphasizing proactive care and the right toolkit, you can ensure your investment continues to deliver value long into the future. Want to see real results? Start by applying a scheduled check of your cabinet seals with a sealant tester or reapply protective finishes after your next deep clean. These small steps can significantly extend the life of your custom cabinetry and storage solutions.
Lessons from My Remodeling Journey That Changed My Perspective
- I realized that overlooking small details like proper sealing or precise measurements can have long-term impacts—it’s about crafting solutions that stand the test of time rather than just looking good initially.
- Embedding heating panels under cabinets taught me that hidden features not only save space but also elevate comfort, proving that sometimes, the most discrete upgrades make the biggest difference.
- Understanding that customization isn’t just about aesthetics but also about workflow transformed my approach, urging me to think of storage and heating as integral parts of a harmonious kitchen design.
Tools and Resources That Make a Difference in Your Built-In Projects
- The Bosch ROS20VSC orbital sander has been invaluable for smooth finishes, especially after sealing or touch-up work—trust me, quality tools make a visible difference.
- 20-20 Design software helped me visualize layouts with precision, preventing costly mistakes—a must-have for anyone planning complex customizations.
- Books like “The Kitchen Bible” gave me insights into innovative storage ideas and design principles, broadening my perspective beyond common solutions.
- Following expert blogs and tutorials from artisans and experienced remodelers provided practical tips and peace of mind throughout the process—learning from others’ successes and mistakes accelerates your own progress.
Your Next Step Toward a Cozy and Efficient Kitchen
Thinking about integrating hidden heating solutions and seamless storage? Embrace the challenge with confidence—every tweak and adjustment brings you closer to a kitchen that’s not just beautiful but also wonderfully functional. Remember, the secret lies in thoughtful details, proper planning, and mastering the tools—your dream space is within reach. Ready to start transforming your kitchen into a warm, organized haven? Share your thoughts below or ask questions—I’m here to help you succeed in creating a space you’ll love for years to come.