Why Most Under-Cabinet Lighting Looks Cheap and the Correct Way to Hide LEDs
I vividly remember the weekend I decided to upgrade my kitchen lighting, thinking it would be a quick DIY project. But as I sat back to admire my handiwork, I couldn’t help but feel disappointed. The under-cabinet LEDs—those sleek, modern fixtures I’d ordered—looked… well, cheap. The glow was uneven, the hotspots glaring, and the faux ambiance I hoped for was nowhere in sight. It was a lightbulb moment for me—literally.
Too often, I see homeowners and even seasoned DIYers falling into the trap of installing under-cabinet lighting without fully understanding what makes some setups look high-end—and others look just plain tacky.
Transform Your Space by Avoiding Rookie Mistakes in LED Placement and Concealment
Is Your Under-Cabinet Lighting Costing You Style Points?
One of the biggest missteps early on was my assumption that more LEDs or brighter bulbs would automatically create a luxurious look. But in reality, the way you hide those LEDs makes all the difference. I learned this the hard way—by installing them visibly, creating glare and uneven illumination, which made my kitchen look more like a hardware store display than a stylish chef’s haven.
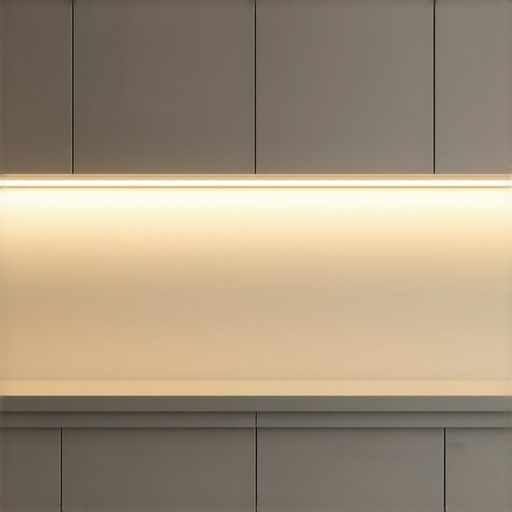
Reflecting on that mistake, I realize that what separates a high-end kitchen from a budget-looking one isn’t just the fixtures themselves, but how seamlessly they blend into the space. Proper concealment requires understanding the nuances of LED strip placement, the types of diffusers, and strategic detailing. Doing it right is a game-changer. A 2019 study by the Architectural Digest found that lighting plays a crucial role in perceived quality—better lighting instantly elevates a space’s ambiance and perceived value.
Now, I’m here to share what I wish I had known from the start—techniques and tips that will help you get that sleek, sophisticated glow without the cheap-looking hot spots. If you’re tired of feeling disappointed every time you turn on your under-cabinet lights, stay with me. We’re about to demystify how to hide LEDs like a pro, so your kitchen can truly shine without sacrificing style.
Ready to dive into the proven methods that turn a basic setup into a show-stopping feature? Let’s get started with how to avoid the most common pitfalls that make under-cabinet lighting look budget—and how to fix them once and for all.
,
Plan Your Layout Before Installing
Start by mapping out where your LEDs will go to ensure even distribution. Think of it as designing a lighting symphony—each note (or LED) must harmonize to create a seamless glow. I once used painter’s tape to outline where the strips would sit, which helped me visualize hotspots versus uniform illumination. This simple step saved me from costly repositioning later, ensuring my setup looked professional from the start.
Choose the Right Diffusers and Accessories
Diffusers act like sunglasses for your LEDs, softening the harsh light and hiding individual diodes. During my project, I opted for frosted acrylic diffusers, which evenly dispersed light and eliminated glare. Make sure to select diffusers compatible with your LED strips, and consider whether aluminum profiles might add structure and concealment. Investing in quality accessories ensures your under-cabinet lighting looks polished, not makeshift.
Conceal Wiring Effectively
Wiring can be the Achilles’ heel of a sleek installation. I recommend running wires behind the cabinets or through pre-existing channels. During my installation, I drilled small holes at the back of the cabinets to hide wires inside, then used cable clips to secure everything neatly. This approach prevents dangling cables and maintains a clean aesthetic. Remember, planning your wire routes during the cabinet design phase can streamline this process.
Install LEDs with Precision and Care
Position your LED strips close to the front edge of the cabinet underside, about 1-2 inches in, to hide the strip itself. I held the strips in place with mounting clips, pressing firmly to ensure adhesion. Avoid placing individual LEDs directly in your line of sight; instead, aim for the strips to be parallel to the surface for a diffuse glow. Once installed, test the lights at various angles to verify even illumination and no hotspots, adjusting as needed.
Use Proper Dimmer Switches
A dimmer adds flexibility and elevates the ambiance. I installed compatible dimmers during my project, which allowed me to fine-tune the brightness—crucial for achieving that high-end look. Test the dimmer’s range to confirm smoothness, and set your preferred brightness during different times of the day. Proper dimming can make your kitchen feel warmer and more inviting, similar to a cozy restaurant.
Final Touches for a Professional Finish
After installation, inspect the entire setup. Use paintable caulk or trim covers to hide any visible gaps or wiring. I painted the profiles to match my cabinets, which made the fixtures virtually disappear. Also, consider adding a slight tilt to the strips to avoid direct glare. These finishing touches make all the difference, transforming a DIY project into a custom, high-end feature that elevates your entire kitchen aesthetic.
With careful planning, select quality accessories, and attention to detail, you can achieve a seamless, luxurious under-cabinet lighting setup. Remember, every step in concealment contributes to the overall ambiance, making your kitchen not just brighter, but more sophisticated.
 Many homeowners believe that selecting high-quality materials or trendy finishes guarantees a luxurious look, but in my experience, the real secret lies in thoughtful execution and nuanced details. One common myth is that bigger or more elaborate cabinets automatically elevate a space; however, poorly planned storage solutions can lead to cluttered, dysfunctional kitchens instead of streamlined sanctuaries. The subtlety often overlooked is how the internal organization, hardware placement, and joint finishes contribute significantly to perceived quality and longevity.
A frequent mistake is underestimating the importance of precise measurements and adherence to the latest ergonomic insights. According to a 2022 study by the Kitchen & Bath Design Association, optimizing cabinet heights and depths isn’t just about space but about user comfort and workflow efficiency. Cutting corners here results in cabinetry that looks good but feels awkward in daily use.
One advanced nuance worth highlighting is the integration of built-in storage with structural elements like support beams or irregular wall features. Many fail to account for these variables, leading to gaps or awkward elbows in cabinet lines. Doing thorough site measurements and collaborating closely with skilled craftsmen can prevent these issues, which often emerge only after the installation is complete.
For example, concealed compartments or integrated appliance garages can be designed to seamlessly blend with the surrounding cabinetry, preserving sleek aesthetics while enhancing functionality. Interestingly, installing intelligent storage elements—such as shallow pull-outs for small goods or custom vertical dividers—can drastically improve accessibility without adding clutter, a technique detailed in this resource.
But beware the trap of choosing generic hardware or superficial finishes. While they might seem cost-effective, they often fail to withstand everyday use, leading to early wear and unsightly repairs. Investing in high-quality hardware, properly aligned hinges, and durable finishes ensures that your cabinets hold up over the years, maintaining their aesthetic appeal. As expert tips suggest, understanding the materials’ compatibility and maintenance requirements is essential for long-term satisfaction.
A crucial advanced step that many overlook is planning for future expansion and adaptation. Incorporating modular elements or adjustable shelving can accommodate changing needs, whether adding new appliances or shifting storage priorities. This foresight transforms a static design into a flexible, enduring investment.
Have you ever fallen into this trap? Let me know in the comments. Mastering these nuanced aspects can elevate your kitchen from a basic remodel to a custom masterpiece that truly reflects craftsmanship and forethought.
Invest in Quality Hand Tools for Precision and Longevity
When working on custom cabinets and built-in storage, having reliable hand tools is non-negotiable. I personally swear by a high-quality bevel-ended screwdriver set, which allows me to make precise adjustments and fine-tune hardware without damaging delicate finishes. A sturdy spirit level, especially a magnetic one with a long reach, is invaluable for ensuring perfect alignments and level surfaces. Investing in these tools upfront saves time, reduces errors, and ensures your work stands the test of time.
Power Tools That Make Long-Term Maintenance Easier
For larger projects and ongoing adjustments, owning a versatile cordless drill with variable speed settings is crucial. I prefer one with a brushless motor, as it offers greater durability and battery life. An oscillating multi-tool is another game-changer; it’s perfect for trimming, sanding, or making detailed cuts without creating a mess. These power tools streamline the process of tightening loose joints or replacing hardware during routine upkeep, helping your cabinets look pristine years down the line.
Use Specialized Software to Manage Your Projects and Maintenance Schedule
Digital organization is often overlooked but can vastly improve your ability to care for your kitchen. I rely on project management apps like Trello or Notion to keep track of maintenance intervals, hardware replacements, and upcoming upgrades. Setting reminders for cleaning hinges or reapplying lubricants extends the lifespan of your built-ins and keeps everything functioning smoothly. Plus, storing digital copies of your cabinet plans and hardware specifications makes future repairs more straightforward.
How do I maintain my custom cabinets over time?
One effective strategy is to incorporate regular inspections into your routine. For example, checking and tightening soft-close hinges every six months prevents sagging or misalignment. Applying a high-quality furniture wax or oil periodically preserves wood finishes and prevents drying or cracking. It’s also wise to clean surfaces with gentle, non-abrasive cleaners to avoid damage. Keeping hinges, pulls, and tracks well-lubricated reduces wear and tear, ensuring your storage solutions stay functional for years to come. I recommend using silicone-based lubricants, which resist dust accumulation and don’t attract dirt—making routine maintenance less of a chore. For an in-depth guide on storage enhancement and maintenance, check out this resource to learn about how to care for and prolong the life of your custom cabinetry.
Stay Ahead by Planning for Scaling and Upgrades
Your kitchen’s needs will evolve, and so should your storage. Modular components and adjustable shelves are excellent for future-proofing. Incorporating smart-locking systems on shelves allows for quick reconfiguration without damaging finishes. As trends shift towards integrated technology, I foresee a rising need for built-ins that accommodate charging stations and smart devices—deploying these features now keeps your space current without costly retrofits.
Try adopting a maintenance schedule that fits your routine, and prioritize quality tools that will serve you for years to come. These investments not only keep your kitchen looking impeccable but also safeguard your long-term remodel results. For ongoing inspiration and expert tips, explore this guide on selecting durable storage solutions—your future self will thank you.
Lessons No One Tells You About Custom Cabinets and Storage
One of the most eye-opening lessons I learned was the importance of intentional planning over impulsive decisions. I once thought that choosing trendy finishes was enough, but I quickly realized that subtle details—like aligning grain patterns or ensuring seamless panel joints—can make or break the perceived quality of a kitchen. It’s in these small, often overlooked details that true craftsmanship shines, and understanding them transformed my approach to remodeling.
Another lightbulb moment was realizing that DIY isn’t always equivalent to professional results. I assumed that with a little research, I could replicate expert techniques. However, mastering precise scribing, accurate hardware placement, and strategic concealment requires experience and patience. Recognizing my limits pushed me to collaborate with skilled artisans, ultimately leading to a more polished and durable finish that I couldn’t have achieved alone.
Lastly, I learned that investing in high-quality hardware and accessories pays dividends in longevity and aesthetic appeal. Cheap hinges and pulls not only look inferior but are more prone to malfunctions. Prioritizing durable, smooth-operating components elevated my cabinetry’s performance and retention of its visual charm, confirming that sometimes, paying a bit more upfront saves stress and money long-term.
Tools and Resources That Changed My Game
Switching to trusted brands like Festool for power tools was a revelation. Their precision and durability minimized errors and made complex installations smoother. I also leaned heavily on resources like this guide for built-in solutions, which helped me visualize innovative storage options that maximize space without sacrificing style. Books such as The Complete Kitchen Cabinet Book offered timeless principles and inspiring ideas I couldn’t find elsewhere. Lastly, consulting online forums and local craftspeople provided real-world insights that no manual could deliver, reminding me that community knowledge is invaluable when tackling complex remodels.
Transform Your Approach and Make It Last
The most compelling part of this journey is realizing that your kitchen’s beauty isn’t just about aesthetics; it’s about creating a space that’s as functional as it is stunning. Embrace continuous learning, pay attention to those nuanced details, and don’t shy away from seeking expert input when needed. With patience and precision, your custom cabinets and built-in storage can become a craft that lasts a lifetime, turning your kitchen into a true masterpiece.
What’s one small detail you’re eager to perfect in your kitchen remodel? Share your thoughts below—I’d love to hear your plan to elevate your space!