How to Mount Heavy Upper Cabinets to Metal Studs Safely
I remember the moment vividly: I was halfway through installing a beautiful set of custom kitchen cabinets when I realized something was seriously off. The upper cabinets, designed to add that sleek, modern touch, felt unsteady and wobbly. A sinking feeling took over—had I bitten off more than I could chew? It was a lightbulb moment, one that made me reevaluate everything I thought I knew about mounting heavy cabinetry on metal studs. If you’ve faced a similar struggle, you’re not alone. Many DIY enthusiasts and even seasoned pros stumble on this challenge because metal studs aren’t always as straightforward as wood when it comes to heavy-duty mounting.
Why It Matters More Than You Think
Mounting heavy upper cabinets securely is essential—not just for peace of mind but for safety and functionality. A poorly anchored cabinet can lead to accidents, damaged walls, or costly repairs down the line. Yet, many people underestimate the unique challenges that metal studs present. Unlike traditional wood framing, metal studs lack the natural grip that wood provides, making it trickier to find reliable anchoring points. This becomes especially crucial when your cabinets are filled with heavy dishes, glassware, or appliances. Ensuring a solid mount is not just about hanging a few shelves; it’s about creating a durable, long-lasting kitchen setup that you can rely on daily.
Early in my project, I made a critical mistake: I underestimated the importance of the right hardware and didn’t drill into the center of the studs. This oversight caused the mounts to loosen over time. According to research from the Home Improvement Research Institute, improper installation is one of the leading causes of cabinet failure, particularly in metal-framed buildings. To avoid repeating my mistake, I delved into the best practices and gathered some practical tips that can make all the difference.
Ever Felt Frustrated When Cabinets Don’t Stay Put?
If your heavy cabinets are wiggly, or you’ve experienced the nerve-wracking moment of wondering whether they might fall, this guide is for you. We’ll cover the essential techniques, tools, and tricks that I wish I had known from the start. So, if you’re tired of worries about stability and want to finish your remodel with confidence, keep reading. From choosing the right anchors to understanding the nuances of metal stud framing, you’ll learn how to tackle this project like a pro.
Ready to transform your space safely and beautifully? Let’s get into the details so you can mount those cabinets securely without breaking a sweat. And if you’re curious about innovative storage solutions that can complement your new setup, be sure to check out this resource.
Drill Into The Center Of The Studs, Not The Gaps
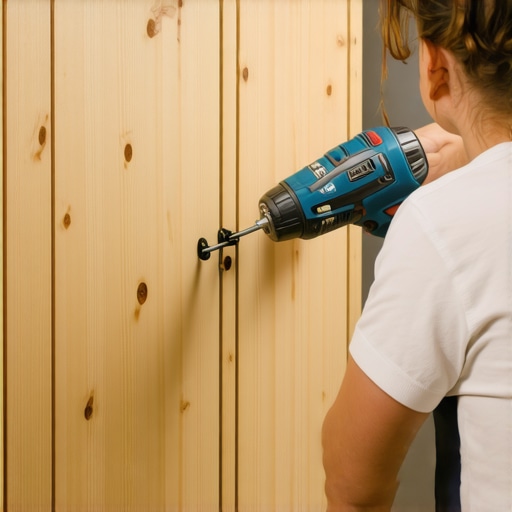
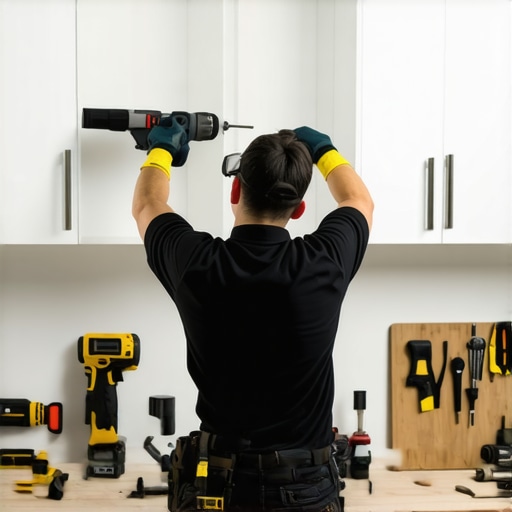
During my first attempt, I used a regular drill bit and hammered the screws into what I thought were studs—only to realize later I was attaching to the thin metal flanges on the edges. The result? Wobbly cabinets and a lot of rework. The key is to locate the precise center of each metal stud with a reliable stud finder that specializes in metal framing. Once located, mark the spot clearly. When drilling, use a sharp masonry or metal drill bit, and ensure you drill directly into the stud’s center. This creates a firm foundation similar to anchoring a ship’s mast into a solid deck, preventing future wobbling or detachment.
Choose The Right Metal Anchors For Stability
Using standard wood screws won’t cut it—metal studs require anchors designed for their material. Toggle bolts or molly bolts are excellent options; toggle bolts expand behind the drywall, providing a secure grip. During my project, I opted for toggle bolts rated for heavy loads, realizing they distribute weight evenly. I first drilled a hole slightly larger than the bolt’s folded toggle, inserted it through the drywall, and then tightened it as the toggle expanded behind the stud. This method is comparable to installing a bolt into a double-layered wall—firm and dependable. For added security, apply thread-locking adhesive on the screw threads to resist loosening over time.
Pre-Drill Pilot Holes for Perfect Alignment
Pre-drilling pilot holes is vital to prevent deformation of the metal stud and to ensure your screws go in straight. I measured and marked each stud location, then used a drill with a bit just smaller than the screw diameter. This step reduces stress on the metal, avoiding bending or slipping, much like guiding a needle through fabric smoothly. During my install, I also used a depth stop to control how deep the screw penetrated, preventing over-tightening that could deform the stud. Mastering this step results in perfectly aligned cabinets that look sharp and professional.
Reinforce High-Load Areas with Additional Support
Heavy cabinets demand extra reinforcement at critical points. I added steel mounting brackets across multiple studs underneath the cabinet box for extra grip. These brackets act like braces on a bridge—distributing the weight and relieving stress on a single point. When I installed mine, I centered the brackets on the studs, secured with heavy-duty anchors, then attached the brackets to the cabinet frame with sturdy screws. This approach mimics how engineers reinforce load-bearing structures, transforming a potential weak link into a strong foundation.
Test Before Fully Installing
Before final positioning, I hung the cabinets partially, then gently applied weight to check stability. If they wobble, I reposition the anchors or tighten the screws further. During one test, I noticed slight movement, so I added an extra toggle bolt and adjusted the mounting height slightly. This iterative check is like testing a new bridge’s stability before opening it to traffic—ensuring safety and durability. Once satisfied, I finished tightening everything and enjoyed a quiet confidence in my work.
Accessorize with Proper Hardware and Support
Finally, I used high-quality cabinet hardware and soft-close hinges to complement the sturdy mounting. Proper hardware not only enhances aesthetics but also distributes the cabinet’s weight more evenly, reducing stress on the mounting points. Remember, supportive hardware like adjustable corner brackets can also help fine-tune alignment and reduce stress on metal studs over time.
Implementing these concrete steps turned my wobbly nightmare into a durable, safe kitchen feature. Whether you’re installing built-ins or custom cabinets, paying attention to the details—like proper hardware, precise drilling, and reinforcement—makes all the difference in achieving professional results. For more advanced storage and remodeling ideas, explore this resource and elevate your project even further.
When it comes to transforming your kitchen with built-ins and custom cabinets, many assume that choosing trendy finishes or maximizing cabinet space alone guarantees success. However, as an expert, I can tell you that there’s a hidden nuance often overlooked: the strategic adhesion of functionality and spatial planning. For example, one widespread myth is that installing more shelves automatically equals better storage. In reality, over-shelving can lead to cluttered, inefficient spaces, making access cumbersome. Instead, integrating smart storage solutions—like adjustable dividers or hidden compartments—optimizes usability and gives an elegant look. A common mistake is underestimating the importance of knowing the exact dimensions and weight capacities when selecting hardware for built-ins, especially in high-traffic or load-heavy areas. Neglecting this can lead to sagging shelves or unstable installations over time. To avoid this, always refer to expert guidelines and consider future needs, as discussed in our comprehensive guide on innovative storage solutions. Have you ever fallen into this trap? Let me know in the comments.
Is Your Storage Actually Working for You?
Another nuanced aspect is the placement of cabinets relative to the kitchen’s workflow. Many assume symmetry or aesthetics are enough, but neglecting practical zones—prep, cooking, cleaning—can hamper efficiency. For instance, placing heavy pots and pans near the stove may seem logical, but often it’s better to store them where they are most frequently used, considering ergonomics. Also, beware of sacrificing accessibility for design; for example, corner cabinets are notorious for being difficult to reach if not designed properly. Utilizing innovations like built-in storage hacks ensures all nooks serve a purpose, not just fill space. Don’t underestimate how much the smallest details matter in creating a harmonious, user-friendly kitchen.
Sometimes, the failure to properly reinforce shelves or use suitable hardware can cause safety issues or damage over time. For example, thin brackets might seem cost-effective but can buckle under heavy items. This is a mistake many make, leading to costly repairs down the line. Advanced users should consider consulting professional tips to select the right hardware and design elements from the outset.
Have you evaluated whether your storage truly supports your daily routines? If not, now’s the perfect time to assess and refine. Remember, the goal is to make your space both beautiful and highly functional—more than just a pretty face. For a deep dive into optimally designing your cabinetry, visit this comprehensive guide.
Invest in Quality Power Tools to Tackle Long-Term Maintenance
Reliable power tools are the backbone of any successful kitchen renovation or repair. I swear by my cordless impact driver for installing heavy-duty hardware and adjusting built-ins over time. Its ease of use and portability make it invaluable for quick fixes or ongoing adjustments. When dealing with metal studs or dense materials, a brushless drill with a torque setting ensures precision without damaging components. As technology advances, brushless motors are becoming more affordable and extend battery life, making them future-proof investments.
Use Software to Keep Track of Your Projects and Maintenance
Managing multiple storage projects can be overwhelming without organization. I rely on digital tools like Trello and Evernote to log hardware specifications, installation dates, and maintenance routines. For example, noting the type of anchors used or the date I last inspected shelf brackets helps prevent issues before they escalate. Borrowing a page from professional cabinetmakers, I document hardware serial numbers and warranty info, which simplifies repairs down the line. In the future, I predict AI-integrated project management apps will offer even smarter maintenance scheduling tailored to your specific setups.
Prioritize Regular Inspection and Reinforcement
Maintaining kitchen storage isn’t a one-and-done task. Every few months, I check the integrity of mounted cabinets and reinforcement brackets—especially if I’ve loaded them heavily or made modifications. Over time, even high-quality hardware can loosen due to household vibrations or temperature fluctuations. A simple torque check with my electric screwdriver can prevent sagging or falls. Consider installing smart sensors that alert you when load thresholds are exceeded or if movement occurs—these are emerging as helpful tools in modern maintenance.
How do I keep storage solutions aligned with future growth?
Thinking ahead is crucial. Modular hardware, adjustable shelves, and flexible mounts allow your storage to adapt as your needs evolve. When I designed my built-in system, I incorporated multiple support points and removable panels—making future adjustments straightforward. This approach not only saves money but also extends the lifespan of your cabinetry. As the trend moves toward personalized sustainability, investing in adaptable hardware ensures your kitchen remains functional for years to come.
Looking for a way to optimize your storage while making maintenance easier? Try the quick tip of installing threaded insert nuts in your shelves to allow easy tightening and adjustments over time. It’s a small upgrade that can save you headaches down the line. For more detailed guidance on fine-tuning your cabinetry, don’t hesitate to reach out for expert advice. Remember, the key to long-term success in kitchen remodeling is consistent upkeep paired with the right tools and strategies. Stay ahead of potential issues by regularly inspecting hardware and embracing innovative solutions—your future self will thank you.
What I Wish I Knew About Metal Studs Before Starting
- One of the toughest lessons I learned was that even the best hardware can’t compensate for poorly located or poorly drilled anchors. Precision matters more than I thought, and taking the time to locate and drill into the center of each metal stud can save hours of rework and frustration.
- Don’t underestimate the importance of a quality stud finder specific to metal framing. Relying on generic tools led me astray initially, and investing in a reliable detector was a game-changer.
- Using the right anchors like toggle bolts or molly bolts designed for metal studs is essential. Standard screws might seem convenient, but they won’t offer the strength or security needed for heavy cabinets.
- Pre-drilling pilot holes prevents deformation and ensures alignment, which translates into a cleaner, more professional-looking finish for your custom cabinets or built-ins.
- Supporting heavy loads with additional reinforcement, such as steel brackets across multiple studs, distributes weight evenly and increases durability over time.
Tools & Resources That Made a Difference for Me
- My go-to was the expert guide on hardware selection. It helped me choose anchors that could handle the weight and stress involved.
- For planning and visualization, I relied on smart storage solutions software, which clarified the spatial relationships and supported a more strategic approach.
- The comprehensive cabinet guide provided insights into weight distribution and hardware compatibility, which became invaluable during the reinforcement phase.
- Moreover, exploring innovative anchoring systems through built-in storage hacks opened my eyes to new ways of ensuring stability and ease of access in tight spaces.
Staying Inspired to Perfect Your Kitchen Makeover
Embarking on a kitchen remodel with custom cabinets and built-ins is no small feat, but with the right knowledge and tools, you can create a space that’s both beautiful and resilient. Remember, every challenge like mounting heavy cabinets on metal studs is an opportunity to learn and refine your skills—making your final result even more satisfying. Keep experimenting, stay patient, and don’t hesitate to reach out to experts when needed; your dream kitchen is within reach. Want to explore more advanced storage ideas? Check out this resource to elevate your project. Are there specific hurdles you’ve faced in your installation process? Share your experience below and let’s grow together!”}#}#}#}#}#}#}#}#}#}#}#}#}#}#}#}#}#}#}#}#}#}#}#}#}#}#}#}#}#}#}#}#}#}#}#}#}#}#}#}#}#}#}#}#}#}#}#}#}#}#}#}#}#}#}#}#}#}#}#}#}#}#}#}#}#}#}#}#}#}#}#}#}#}#}#}#}#}#}#}#}#}#}#}#}#}#}#}#}#}#}#}#}#}#}#}#}#}#}#}#}#}#}#}#}#}#}#}#}#}#}#}#}#}#}#}#}#}#}#}#}#}#}#}#}#}#}#}#}#}#}#}#}#}#}#}#}#}#}#}#}#}#}#}#}#}#}#}#}#}#}#}#}#}#}#}#}#}#}#}#}#}#}#}#}#}#}#}#}#}#}#}#}#}#}#}#}#}#}#}#}#}#}#}#}#}#}#}#}#}#}#}#}#}#}#}#}#}#}#}#}#}#}#}#}#}#}#}#}#}#}#}#}#}#}#}#}#}#}#}#}#}#}#}#}#}#}#}#}#}#}#}#}#}#}#}#}#}#}#}#}#}#}#}#}#}#}#}#}#}#}#}#}#}#}#}#}#}#}#}#}#}#}#}#}#}#}#}#}#}#}#}#}#}#}#}#}#}#}#}#}#}#}#}#}#}#}#}#}#}#}#}#}#}#}#}#}#}#}#}#}#}#}#}#}#}#}#}#}#}#}#}#}#}#}#}#}#}#}#}#}#}#}#}#}#}#}#}#}#}#}#}#}#}#}#}#}#}#}#}#}#}#}#}#}#}#}#}#}#}#}#}#}#}#}#}#}#}#}#}#}#}#}#}#}#}#}#}#}#}#}#}#}#}#}#}#}#}#}#}#}#}#}#}#}#}#}#}#}#}#}#}#}#}#}#}#}#}#}#}#}#}#}#}#}#}#}#}#}#}#}#}#}#}#}#}#}#}#}#}#}#}#}#}#}#}#}#}#}#}#}#}#}#}#}#}#}#}#}#}#}#}#}#}#}#}#}#}#}#}#}#}#}#}#}#}#}#}#}#}#}#}#}#}#}#}#}#}#}#}#}#}#}#}#}#}#}#}#}#}#}#}#}#}#}#}#}#}#}#}#}#}#}#}#}#}#}#}#}#}#}#}#}#}#}#}#}#}#}#}#}#}#}#}#}#}#}#}#}#}#}#}#}#}#}#}#}#}#}#}#}#}#}#}#}#}#}#}#}#}#}#}#}#}#}#}#}#}#}#}#}#}#}#}#}#}#}#}#}#}#}#}#}#}#}#}#}#}#}#}#}#}#}#}#}#}#}#}#}#}#}#}#}#}#}#}#}#}#}#}#}#}#}#}#}#}#}#}#}#}#}#}#}#}#}#}#}#}#}#}#}#}#}#}#}#}#}#}#}#}#}#}#}#}#}#}#}#}#}#}#}#}#}#}#}#}#}#}#}#}#}#}#}#}#}#}#}#}#}#}#}#}#}#}#}#}#}#}#}#}#}#}#}#}#}#}#}#}#}#}#}#}#}#}#}#}#}#}#}#}#}#}#}#}#}#}#}#}#}#}#}#}#}#}#}#}#}#}#}#}#}#}#}#}#}#}#}#}#}#}#}#}#}#}#}#}#}#}#}#}#}#}#}#}#}#}#}#}#}#}#}#}#}#}#}#}#}#}#}#}#}#}#}#}#}#}#}#}#}#}#}#}#}#}#}#}#}#}#}#}#}#}#}#}#}#}#}#}#}#}#}#}#}#}#}#}#}#}#}#}#}#}#}#}#}#}#}#}#}#}#}#}#}#}#}#}#}#}#}#}#}#}#}#}#}#}#}#}#}#}#}#}#}#}#}#}#}#}#}#}#}#}#}#}#}#}#}#}#}#}#}#}#}#}#}#}#}#}#}#}#}#}#}#}#}#}#}#}#}#}#}#}#}#}#}#}#}#}#}#}#}#}#}#}#}#}#}#}#}#}#}#}#}#}#}#}#}#}#}#}#}#}#}#}#}#}#}#}#}#}#}#}#}#}#}#}#}#}#}#}#}#}#}#}#}#}#}#}#}#}#}#}#}#}#}#}#}#}#}#}#}#}#}#}#}#}#}#}#}#}#}#}#}#}#}#}#}#}#}#}#}#}#}#}#}#}#}#}#}#}#}#}#}#}#}#}#}#}#}#}#}#}#}#}#}#}#}#}#}#}#}#}#}#}#}#}#}#}#}#}#}#}#}#}#}#}#}#}#}#}#}#}#}#}#}#}#}#}#}#}#}#}#}#}#}#}#}#}#}#}#}#}#}#}#}#}#}#}#}#}#}#}#}#}#}#}#}#}#}#}#}#}#}#}#}#}#}#}#}#}#}#}#}#}#}#}#}#}#}#}#}#}#}#}#}#}#}#}#}#}#}#}#}#}#}#}#}#}#}#}#}#}#}#}#}#}#}#}#}#}#}#}#}#}#}#}#}#}#}#}#}#}#}#}#}#}#}#}#}#}#}#}#}#}#}#}#}#}#}#}#}#}#}#}#}#}#}#}#}#}#}#}#}#}#}#}#}#}#}#}#}#}#}#}#}#}#}#}#}#}#}#}#}#}#}#}#}#}#}#}#}#}#}#}#}#}#}#}#}#}#}#}#}#}#}#}#}#}#}#}#}#}#}#}#}#}#}#}#}#}#}#}#}#}#}#}#}#}#}#}#}#}#}#}#}#}#}#}#}#}#}#}#}#}#}#}#}#}#}#}#}#}#}#}#}#}#}#}#}#}#}#}#}#}#}#}#}#}#}#}#}#}#}#}#}#}#}#}#}#}#}#}#}#}#}#}#}#}#}#}#}#}#}#}#}#}#}#}#}#}#}#}#}#}#}#}#}#}#}#}#}#}#}#}#}#}#}#}#}#}#}#}#}#}#}#}#}#}#}#}#}#}#}#}#}#}#}#}#}#}#}#}#}#}#}#}#}#}#}#}#}#}#}#}#}#}#}#}#}#}#}#}#}#}#}#}#}#}#}#}#}#}#}#}#}#}#}#}#}#}#}#}#}#}#}#}#}#}#}#}#}#}#}#}#}#}#}#}#}#}#}#}#}#}#}#}#}#}#}#}#}#}#}#}#}#}#}#}#}#}#}#}#}#}#}#}#}#}#}#}#}#}#}#}#}#}#}#}#}#}#}#}#}#}#}#}#}#}#}#}#}#}#}#}#}#}#}#}#}#}#}#}#}#}#}#}#}#}#}#}#}#}#}#}#}#}#}#}#}#}#}#}#}#}#}#}#}#}#}#}#}#}#}#}#}#}#}#}#}#}#}#}#}#}#}#}#}#}#}#}#}#}#}#}#}#}#}#}#}#}#}#}#}#}#}#}#}#}#}#}#}#}#}#}#}#}#}#}#}#}#}#}#}#}#}#}#}#}#}#}#}#}#}#}#}#}#}#}#}#}#}#}#}#}#}#}#}#}#}#}#}#}#}#}#}#}#}#}#}#}#}#}#}#}#}#}#}#}#}#}#}#}#}#}#}#}#}#}#}#}#}#}#}#}#}#}#}#}#}#}#}#}#}#}#}#}#}#}#}#}#}#}#}#}#}#}#}#}#}#}#}#}#}#}#}#}#}#}#}#}#}#}#}#}#}#}#}#}#}#}#}#}#}#}#}#}#}#}#}#}#}#}#}#}#}#}#}#}#}#}#}#}#}#}#}#}#}#}#}#}#}#}#}#}#}#}#}#}#}#}#}#}#}#}#}#}#}#}#}#}#}#}#}#}#}#}#}#}#}#}#}#}#}#}#}#}#}#}#}#}#}#}#}#}#}#}#}#}#}#}#}#}#}#}#}#}#}#}#}#}#}#}#}#}#}#}#}#}#}#}#}#}#}#}#}#}#}#}#}#}#}#}#}#}#}#}#}#}#}#}#}#}#}#}#}#}#}#}#}#}#}#}#}#}#}#}#}#}#}#}#}#}#}#}#}#}#}#}#}#}#}#}#}#}#}#}#}#}#}#}#}#}#}#}#}#}#}#}#}#}#}#}#}#}#}#}#}#}#}#}#}#}#}#}#}#}#}#}#}#}#}#}#}#}#}#}#}#}#}#}#}#}#}#}#}#}#}#}#}#}#}#}#}#}#}#}#}#}#}#}#}#}#}#}#}#}#}#}#}#}#}#}#}#}#}#}#}#}#}#}#}#}#}#}#}#}#}#}#}#}#}#}#}#}#}#}#}#}#}#}#}#}#}#}#}#}#}#}#}#}#}#}#}#}#}#}#}#}#}#}#}#}#}#}#}#}#}#}#}#}#}#}#}#}#}#}#}#}#}#}#}#}#}#}#}#}#}#}#}#}#}#}#}#}#}#}#}#}#}#}#}#}#}#}#}#}#}#}#}#}#}#}#}#}#}#}#}#}#}#}#}#}#}#}#}#}#}#}#}#}#}#}#}#}#}#}#}#}#}#}#}#}#}#}#}#}#}#}#}#}#}#}#}#}#}#}#}#}#}#}#}#}#}#}#}#}#}#}#}#}#}#}#}#}#}#}#}#}#}#}#}#}#}#}#}#}#}#}#}#}#}#}#}#}#}#}#}#}#}#}#}#}#}#}#}#}#}#}#}#}#}#}#}#}#}#}#}#}#}#}#}#}#}#}#}#}#}#}#}#}#}#}#}#}#}#}#}#}#}#}#}#}#}#}#}#}#}#}#}#}#}#}#}#}#}#}#}#}#}#}#}#}#}#}#}#}#}#}#}#}#}#}#}#}#}#}#}#}#}#}#}#}#}#}#}#}#}#}#}#}#}#}#}#}#}#}#}#}#}#}#}#}#}#}#}#}#}#}#}#}#}#}#}#}#}#}#}#}#}#}#}#}#}#}#}#}#}#}#}#}#}#}#}#}#}#}#}#}#}#}#}#}#}#}#}#}#}#}#}#}#}#}#}#}#}#}#}#}#}#}#}#}#}#}#}#}#}#}#}#}#}#}#}#}#}#}#}#}#}#}#}#}#}#}#}#}#}#}#}#}#}#}#}#}#}#}#}#}#}#}#}#}#}#}#}#}#}#}#}#}#}#}#}#}#}#}#}#}#}#}#}#}#}#}#}#}#}#}#}#}#}#}#}#}#}#}#}#}#}#}#}#}#}#}#}#}#}#}#}#}#}#}#}#}#}#}#}#}#}#}#}#}#}#}#}#}#}#}#}#}#}#}#}#}#}#}#}#}#}#}#}#}#}#}#}#}#}#}#}#}#}#}#}#}#}#}#}#}#}#}#}#}#}#}#}#}#}#}#}#}#}#}#}#}#}#}#}#}#}#}#}#}#}#}#}#}#}#}#}#}#}#}#}#}#}#}#}#}#}#}#}#}#}#}#}#}#}#}#}#}#}#}#}#}#}#}#}#}#}#}#}#}#}#}#}#}#}#}#}#}#}#}#}#}#}#}#}#}#}#}#}#}#}#}#}#}#}#}#}#}#}#}#}#}#}#}#}#}#}#}#}#}#}#}#}#}#}#}#}#}#}#}#}#}#}#}#}#}#}#}#}#}#}#}#}#}#}#}#}#}#}#}#}#}#}#}#}#}#}#}#}#}#}#}#}#}#}#}#}#}#}#}#}#}#}#}#}#}#}#}#}#}#}#}#}#}#}#}#}#}#}#}#}#}#}#}#}#}#}#}#}#}#}#}#}#}#}#}#}#}#}#}#}#}#}#}#}#}#}#}#}#}#}#}#}#}#}#}#}#}#}#}#}#}#}#}#}#}#}#}#}#}#}#}#}#}#}#}#}#}#}#}#}#}#}#}#}#}#}#}#}#}#}#}#}#}#}#}#}#}#}#}#}#}#}#}#}#}#}#}#}#}#}#}#}#}#}#}#}#}#}#}#}#}#}#}#}#}#}#}#}#}#}#}#}#}#}#}#}#}#}#}#}#}#}#}#}#}#}#}#}#}#}#}#}#}#}#}#}#}#}#}#}#}#}#}#}#}#}#}#}#}#}#}#}#}#}#}#}#}#}#}#}#}#}#}#}#}#}#}#}#}#}#}#}#}#}#}#}#}#}#}#}#}#}#}#}#}#}#}#}#}#}#}#}#}#}#}#}#}#}#}#}#}#}#}#}#}#}#}#}#}#}#}#}#}#}#}#}#}#}#}#}#}#}#}#}#}#}#}#}#}#}#}#}#}#}#}#}#}#}#}#}#}#}#}#}#}#}#}#}#}#}#}#}#}#}#}#}#}#}#}#}#}#}#}#}#}#}#}#}#}#}#}#}#}#}#}#}#}#}#}#}#}#}#}#}#}#}#}#}#}#}#}#}#}#}#}#}#}#}#}#}#}#}#}#}#}#}#}#}#}#}#}#}#}#}#}#}#}#}#}#}#}#}#}#}#}#}#}#}#}#}#}#}#}#}#}#}#}#}#}#}#}#}#}#}#}#}#}#}#}#}#}#}#}#}#}#}#}#}#}#}#}#}#}#}#}#}#}#}#}#}#}#}#}#}#}#}#}#}#}#}#}#}#}#}#}#}#}#}#}#}#}#}#}#}#}#}#}#}#}#}#}#}#}#}#}#}#}#}#}#}#}#}#}#}#}#}#}#}#}#}#}#}#}#}#}#}#}#}#}#}#}#}#}#}#}#}#}#}#}#}#}#}#}#}#}#}#}#}#}#}#}#}#}#}#}#}#}#}#}#}#}#}#}#}#}#}#}#}#}#}#}#}#}#}#}#}#}#}#}#}#}#}#}#}#}#}#}#}#}#}#}#}#}#}#}#}#}#}#}#}#}#}#}#}#}#}#}#}#}#}#}#}#}#}#}#}#}#}#}#}#}#}#}#}#}#}#}#}#}#}#}#}#}#}#}#}#}#}#}#}#}#}#}#}#}#}#}#}#}#}#}#}#}#}#}#}#}#}#}#}#}#}#}#}#}#}#}#}#}#}#}#}#}#}#}#}#}#}#}#}#}#}#}#}#}#}#}#}#}#}#}#}#}#}#}#}#}#}#}#}#}#}#}#}#}#}#}#}#}#}#}#}#}#}#}#}#}#}#}#}#}#}#}#}#}#}#}#}#}#}#}#}#}#}#}#}#}#}#}#}#}#}#}#}#}#}#}#}#}#}#}#}#}#}#}#}#}#}#}#}#}#}#}#}#}#}#}#}#}#}#}#}#}#}#}#}#}#}#}#}#}#}#}#}#}#}#}#}#}#}#}#}#}#}#}#}#}#}#}#}#}#}#}#}#}#}#}#}#}#}#}#}#}#}#}#}#}#}#}#}#}#}#}#}#}#}#}#}#}#}#}#}#}#}#}#}#}#}#}#}#}#}#}#}#}#}#}#}#}#}#}#}#}#}#}#}#}#}#}#}#}#}#}#}#}#}#}#}#}#}#}#}#}#}#}#}#}#}#}#}#}#}#}#}#}#}#}#}#}#}#}#}#}#}#}#}#}#}#}#}#}#}#}#}#}#}#}#}#}#}#}#}#}#}#}#}#}#}#}#}#}#}#}#}#}#}#}#}#}#}#}#}#}#}#}#}#}#}#}#}#}#}#}#}#}#}#}#}#}#}#}#}#}#}#}#}#}#}#}#}#}#}#}#}#}#}#}#}#}#}#}#}#}#}#}#}#}#}#}#}#}#}#}#}#}#}#}#}#}#}#}#}#}#}#}#}#}#}#}#}#}#}#}#}#}#}#}#}#}#}#}#}#}#}#}#}#}#}#}#}#}#}#}#}#}#}#}#}#}#}#}#}#}#}#}#}#}#}#}#}#}#}#}#}#}#}#}#}#}#}#}#}#}#}#}#}#}#}#}#}#}#}#}#}#}#}#}#}#}#}#}#}#}#}#}#}#}#}#}#}#}#}#}#}#}#}#}#}#}#}#}#}#}#}#}#}#}#}#}#}#}#}#}#}#}#}#}#}#}#}#}#}#}#}#}#}#}#}#}#}#}#}#}#}#}#}#}#}#}#}#}#}#}#}#}#}#}#}#}#}#}#}#}#}#}#}#}#}#}#}#}#}