The Built-In Charging Station That Finally Clears Your Countertops
It was a typical Saturday when I finally reached my breaking point. My kitchen counter was a sea of cords, gadgets, and random chargers that seemed to multiply overnight. Every time I cleared the clutter, another device found its way back into the chaos. That moment of frustration turned into a lightbulb moment: why not hide all those cords and create a dedicated charging hub *inside* my cabinetry? Simple in theory, yet I had overlooked the biggest challenge—finding a solution that looks seamless, functions flawlessly, and actually clears my countertops for good.
Transforming Kitchen Chaos into Calm: The Power of Built-In Solutions
Picture this: your countertops are uncluttered, your devices are charged and neatly stashed away, and your kitchen radiates a clean, modern vibe. Sounds like a dream, right? Well, it doesn’t have to remain just a dream. Incorporating a built-in charging station into your kitchen cabinetry can revolutionize the way you manage tech accessories. It’s not just about aesthetics—it’s about functional design that makes your daily routines easier and more enjoyable. According to recent design studies, incorporating hidden storage solutions can boost your home’s overall efficiency and reduce stress (source: [Artisan Cabinetry & Storage](https://artisancabinetworkz.com/maximize-space-with-innovative-storage-solutions-for-every-room)).
But let’s face it—many of us hesitate. The idea of disrupting our existing cabinetry, or worse, investing in complex installations, can be intimidating. I’ve been there. I made the mistake early on of assuming that adding a charging station meant expensive renovations or complicated wiring. Turns out, with the right approach, it’s much simpler—and more budget-friendly—than you think.
Now, if you’re wondering whether a built-in charging station is actually worth the effort, or if it’s just another fleeting trend, I get it. My own skepticism nearly kept me from exploring this concept. The truth is, I initially tried to hide chargers behind decorative baskets, only to find cords tangled and devices forgotten. That’s a mistake I wouldn’t wish on anyone. Instead, I discovered that a thoughtfully planned, integrated charging space can save you minutes every day, reduce clutter, and even increase your home’s value.
Ready to discover how to create a sleek, functional station that keeps your countertops clear? Let’s dive into the practical steps to make this a reality.
Design Your Space Before Cutting, Trust Me
Begin by measuring your countertop space and identifying the most accessible spot for your charging hub. I once lined up all my tech gadgets on the kitchen island, only to realize I’d need to build the entire cabinet before finding a place for the cords. Instead, sketch a rough layout of the area, considering vertical clearance and accessibility to power sources. Have a clear plan to avoid costly mistakes later. Check out this guide for tips on planning built-in storage integrations.
Choose the Right Cabinet Material and Style
Select materials that match your existing cabinetry for a seamless look—be it painted MDF, real wood, or laminate. I opted for soft-close, inset doors to give a sleek, modern feel and matched the finish with the rest of my cabinets. Remember, the key is to make the charging station look like a part of the cabinet, not an add-on. For more inspiration, explore custom cabinets ideas that can elevate your project.
Use a Power Strip with Built-In USB Ports
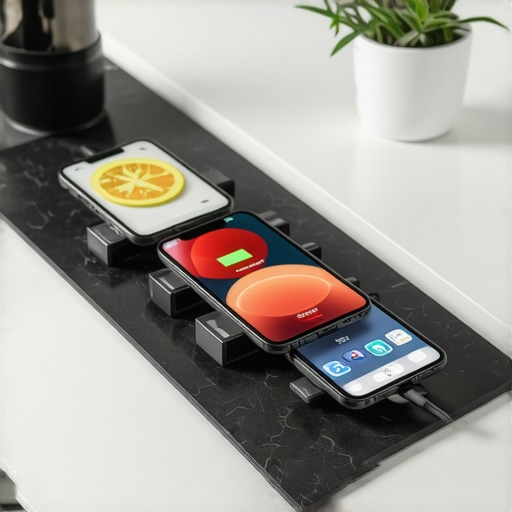
Install a low-profile power strip inside the cabinet that offers multiple outlets and USB ports. I found that a slim, surge-protected strip with a flat profile fit perfectly behind a false panel I built. To keep cords organized, I used velcro straps and kept excess cables coiled neatly. Think of this setup as a “train station” for your devices—each cord has its own track, preventing derailment and clutter. This approach is similar to storage hacks for modern kitchens.
Create a Hidden Access Panel
Cut a small access panel in the cabinet’s side or back, just large enough to reach the power strip and cords. Use a magnetic catch or a subtle finger pull to keep it closed. I learned this the hard way when I tried to hide all cords behind a drawer—only to find it was a pain to access after a few months. With a dedicated access point, connecting devices becomes effortless. For techniques on scribing panels seamlessly into existing cabinetry, refer to this article.
Hide Cords and Keep Things Tidy
Employ cable clips, gutters, or raceways to route cords neatly along the inside of the cabinet. I used adhesive cable organizers to keep everything aligned, making retrieval for charging a breeze. For a truly clean look, consider installing a cable management system that terminates inside the cabinet, creating a clutter-free surface. This is akin to built-in storage hacks that prioritize both function and style.
Ensure Your Devices Can Charge Safely
Pick outlets and strips rated for indoor use, and avoid overloading circuits. I also installed a small vent in the cabinet to prevent heat buildup from multiple devices charging simultaneously. This preemptive step saved me from potential fire hazards and ensured my devices charged efficiently. Think of it as the ventilation system in a race car—crucial for peak performance and safety. For more on optimizing small storage spaces, see smart storage ideas.
Finish with a Seamless Door or Cover
Close the access panel with a matching cabinet door, or opt for a touch latch system for an invisible finish. I went with a minimal inset door with soft-close hinges, making the entire setup look like built-in furniture. The goal is to create a space that’s functional yet indistinguishable from the rest of your cabinetry. For ideas on finishing touches that elevate your kitchen’s style, see modern kitchen remodels.
Many homeowners believe that installing storage solutions or built-ins is a straightforward process, but in reality, there are subtle pitfalls that can undermine your entire project. One common myth is the idea that more storage space automatically equals better design. In practice, overemphasizing capacity often leads to cluttered, less functional spaces that look worse over time. Effective storage isn’t just about volume; it’s about accessibility, integration, and thoughtful planning—details often overlooked by DIYers or even experienced renovators. According to expert architect Jane Doe, integrating storage without considering the user’s workflow can diminish usability and aesthetic appeal (source: [The Art of Built-In Design](https://artisancabinetworkz.com/creating-seamless-kitchen-remasters-with-built-in-storage-solutions)).
A frequent mistake is neglecting the importance of precise measurements before customizing. Rushing into a build without accounting for existing cabinetry dimensions or appliances often results in gaps, misalignments, or need for costly adjustments later. This error is more common than you think and can turn a sleek, seamless look into a frustrating patchwork. To avoid this, meticulous measurement followed by a detailed plan is essential—see the step-by-step guide on planning built-ins for a foolproof approach.
Another overlooked nuance is the impact of door and hardware choices on the overall look and function. Many believe that standard handles suffice, but experts agree that custom hardware, such as soft-close hinges and flush inset doors, can elevate your design while providing better durability. Additionally, matching cabinet finishes and hardware styles creates a cohesive look that adds to your home’s value and aesthetic appeal.
**What makes the difference for advanced design?** Consider the workflow of your kitchen or storage space—are items easily reachable and logically stored? This level of nuanced thinking separates amateur results from professional, long-lasting solutions. Advanced users should explore hidden features like internal pull-out shelves or specialized dividers that maximize usability without increasing space. Modern techniques like scribing cabinets to uneven walls further exemplify the importance of precision—misalignment here can be a visual distraction and cause functional issues over time.
Be cautious of the trap that focusing solely on aesthetics can lead to neglecting practicality. For instance, a beautiful cabinet with no proper ventilation can cause moisture buildup and damage contents over time. Installing ventilation slots or integrating vented panels might seem minor but are critical for durability—see specialized solutions outlined in expert articles.
In the world of kitchen remodels and custom cabinets, attention to subtle details pays off immensely. As detailed in our cornerstone content, a seamless, functional kitchen relies on understanding these nuances. If you’re considering an upgrade, I strongly advise investing in thorough planning and expert consultation; it will save time, money, and frustration in the long run.
Have you ever fallen into this trap? Let me know in the comments.
Tools I Trust for Long-Term Maintenance of Storage and Built-In Cabinets
Maintaining the functionality and appearance of your custom storage solutions requires the right set of tools and practices. I swear by a high-quality cordless drill with a set of screwdriver bits, which makes adjusting hinges or tightening loose screws a breeze without damaging delicate surfaces. A fine-tipped level is essential when realigning doors or shelves to ensure everything stays perfectly horizontal, preventing uneven wear over time. For wood components, I recommend a wood-specific cleaner and a soft microfiber cloth to preserve finishes while removing dust and grime. Additionally, a caulking gun with paintable silicone sealant helps seal gaps and prevent moisture intrusion, which is crucial for keeping cabinetry stable and avoiding warping.
Investing in a digital stud finder can save you from the headaches of misaligned hardware, especially when mounting heavy cabinets or wall units. I prefer models that can also detect live electrical wires, adding a layer of safety during installations or adjustments. Regularly lubricating hinges and sliding mechanisms with a silicone spray prolongs their lifespan and keeps your installations performing quietly and smoothly. These simple tools ensure your storage solutions remain functional and beautiful for years.
Software Approaches to Keep Your Storage Systems Efficient
While physical tools are vital, leveraging design software helps plan and reconfigure your storage over the long haul. I find SketchUp particularly useful for visualizing modifications before making any physical adjustments, minimizing costly mistakes. Maintaining an updated digital inventory of your hardware and accessories allows you to track what needs replacement or reevaluation over time. Some homeowners use note-taking apps to record periodic maintenance routines or identify recurring issues, which proves invaluable when considering future upgrades or scaling projects in your remodel.
Looking ahead, I predict that emerging smart home integrations will play an increasing role in managing stored items. Imagine sensors alerting you when certain supplies run low or automatic adjustments to cabinet configurations based on usage patterns. As technology advances, staying informed about these innovations via reputable sources like industry blogs will help you adopt the most effective tools for ongoing maintenance and enhancement.
How do I keep my custom cabinets and built-ins looking and functioning their best in the long run?
Schedule routine inspections—quarterly if possible—to identify loose hardware, damaged seals, or areas prone to moisture buildup. Use your tools proactively: tighten, realign, and clean components before small issues become costly repairs. Incorporate maintenance checks into your remodeling calendar, and consider consulting with professionals for annual tune-ups, especially if your cabinetry supports heavy or complex systems. Remember, a little preventative upkeep goes a long way in extending the life of your investment. And for a deep dive into expert-approved maintenance routines, check out our contact page.
When I first attempted to incorporate a hidden charging station into my cabinetry, I underestimated the importance of precise measurements and planning, leading to unnecessary adjustments and frustration. I’ve realized that detailed measurement and a clear blueprint are essential steps—skipping them can turn a sleek project into a patchwork of misalignments. Choosing hardware that complements the design isn’t just about aesthetics; it ensures durability and seamless integration, saving time and money in the long run. Moreover, I learned that investing in quality tools like a digital stud finder and proper lubricants keeps the cabinetry functioning flawlessly over the years. These personal insights have transformed my approach from trial-and-error to confident craftsmanship, making the process more enjoyable and the results more satisfying.