
Why Your Sink Cabinet Needs a Drip Tray Right Now
The smell hit me before the sight did—that damp, earthy musk that screams trouble in a kitchen. I reached for the dish soap under my beautiful farmhouse sink, only to find my hand submerged in a cold, slimy puddle. My custom plywood baseboard was already starting to warp and delaminate. It was a classic “I’ll fix it tomorrow” mistake with a tiny P-trap drip that turned into a three-hundred-dollar headache. If I had simply installed a $30 drip tray, my afternoon would have been spent drinking coffee instead of scrubbing mold. Today, I’m going to show you how to bulletproof your cabinetry from the inevitable leaks that every homeowner eventually faces. [image_placeholder_1]
Stop the Rot Before It Starts
I used to think that because I had high-quality storage solutions, I was somehow immune to water damage. I was wrong. Water is patient, and it is persistent. Whether it’s a slow leak from a loose compression nut or a spill from an overturned bottle of bleach, your cabinet floor is under constant siege. In fact, according to data from the Insurance Information Institute, water damage and freezing are the second most common home insurance claims, with an average claim cost exceeding $11,000. While you’re focusing on organizing your cleaning supplies, that moisture is quietly rotting the core of your kitchen. A drip tray isn’t just an accessory; it’s an insurance policy for your investment. It catches the mess, keeps the wood dry, and alerts you to a problem before the floorboards start to sag.
Is a simple tray really worth the hype?
You might be thinking that a tray is just more plastic clutter or that you’d notice a leak right away. I thought the same thing until I realized that many leaks occur at the back of the cabinet, hidden behind a mountain of sponges or a poorly installed reverse osmosis system. By the time you see water on your kitchen floor, the damage inside the box is usually done. Have you ever opened your sink cabinet only to be greeted by a suspicious “musty” odor? That’s your signal to act. This minor cabinet modification saves your peace of mind and keeps your kitchen smelling fresh. It is the single most important step for preserving your cabinetry long-term.
Clear the Deck and Measure Twice
The first thing you need to do is get everything out of there. I mean everything. You can’t protect what you can’t see. While you’re at it, this is the perfect time to look into smart storage solutions for small kitchens in 2025 so you don’t end up with a cluttered mess again. Measure the interior width and depth of your cabinet floor meticulously. Don’t just rely on the standard 24-inch or 36-inch dimensions because your custom cabinets might have thicker walls or unique internal bracing that eats into your clearance. If your measurement is off by even a quarter inch, a rigid tray won’t sit flush, and you’ll end up with water bypassing the protection entirely.
Pick a Material That Won’t Fail
You have two main choices: flexible silicone or rigid plastic. I prefer silicone because it’s like a giant rubber gasket for your cabinet. It’s significantly easier to wedge into tight spots than a stiff plastic tray that might crack if you force it. If you’re going for a total built-in and storage hack look, you want something that looks intentional. A heavy-duty mat with a 1-inch raised lip is the gold standard because it can actually hold several gallons of water. I once saw a cheap thin liner fail because the water weight caused the edges to collapse, letting the flood-run right underneath it. Spend the extra ten dollars on the thick stuff; it’s the difference between a minor cleanup and a full cabinet replacement.
Cut Your Way Around the Plumbing
This is where most people get intimidated. Rarely is a sink cabinet floor a perfect, unobstructed rectangle. You’ll likely have supply lines or a drain pipe coming up through the bottom. If you are using a flexible mat, you can carefully notch it with a utility knife. I remember helping a neighbor with a particularly cramped sink base reinforcement. We had to cut the tray in three places to fit around her massive disposal and water filter system. It looked like a jigsaw puzzle when we were done, but the next time her 6-stage reverse osmosis system leaked, that notched tray caught every single drop. 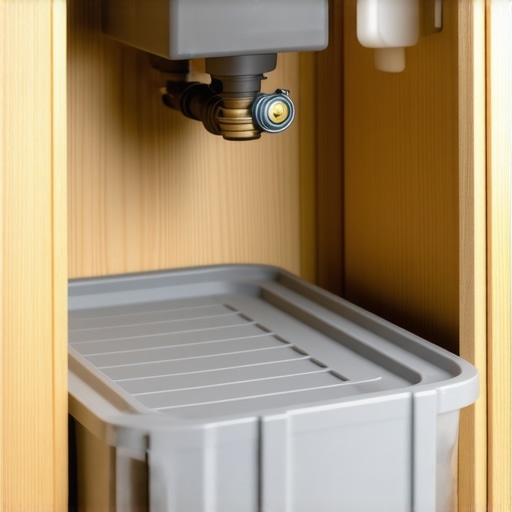
Seal the Perimeter for Extra Credit
Once the tray is in, you want to make sure it stays put. A loose tray is just a trip hazard for your cleaning bottles and can shift away from the back wall where most leaks start. While you’re at it, consider the best way to seal the gap between your cabinet and the floor to ensure no moisture from the kitchen floor migrates underneath the cabinet box itself. This is a critical cabinet modification that makes future repairs significantly easier. When I did my own kitchen, I applied a thin bead of removable caulk around the edge of the tray. Six months later, a small leak from the sprayer hose filled the back of the tray. Because of that seal, the water didn’t seep under the tray where it could have caused hidden mold. I just wiped it up with a towel, tightened the hose, and went back to my day.
Stop Trusting the ‘Waterproof’ Label
Most homeowners believe that if they invested in high-end custom cabinets, the materials are naturally more resilient to water. I hate to be the bearer of bad news, but even the best storage solutions are built on a foundation of wood products that obey the laws of physics. A common myth is that ‘water-resistant’ plywood is essentially a submarine hull. In reality, water-resistance usually refers only to the glue used between the layers, not the wood itself. If a leak persists, the wood fibers will swell and the plys will eventually delaminate regardless of the brand name. When planning a sleek and functional kitchen, you have to assume that the ‘waterproof’ marketing is just a safety net, not a complete solution. In my experience, the only way to truly protect your investment is to create a physical barrier that prevents moisture from ever touching the raw wood.
The Back-Panel Trap You Probably Missed
The ‘oops’ factor I see most often happens during the installation of protective mats. You buy a high-quality silicone tray, you slide it in, and you think you’re done. But there is a fatal flaw: the back panel. Most drip trays have a lip that is only an inch high, while your plumbing enters through the back wall or the floor higher up. If a pipe at the back starts to weep, the water can run down the wall, bypass the tray’s lip, and get trapped underneath the mat. This creates a dark, damp microclimate where mold thrives undetected for months.  This is exacerbated by the way panels are finished. As discussed in the truth about pre-finished plywood vs on-site staining, the factory finish protects the face of the board, but the edges—where the holes are drilled for your pipes—are often raw, exposed wood. This raw edge acts like a straw, sucking moisture deep into the core of the cabinet. Have you ever fallen into this trap? Let me know in the comments.
Can your cabinet handle a slow leak for a week?
To answer this professionally, we have to look at the science of wood decay. According to research from the USDA Forest Products Laboratory, wood-decay fungi can begin to colonize whenever the moisture content of wood exceeds 20% for an extended period. A hidden slow drip from a sprayer hose can push a cabinet floor to this saturation point in less than 48 hours. By the time you notice a smell or a stain, the structural integrity of the base may already be compromised. This is why I always recommend the cabinet backing move that involves sealing those raw plumbing cutouts with a high-grade silicone sealant before installing your tray. It is a small nuance that separates a DIY project from an expert installation. If you are serious about your kitchen’s longevity, don’t just throw a mat on the floor and call it a day. Seal the entry points, overlap the edges, and treat your sink base like a wet zone. What is the one thing you’re still worried about protecting in your remodel? Reach out or let me know below.If you want to move beyond just surviving a leak and start mastering your kitchen’s environment, you need to stop guessing. I do not rely on my eyes alone anymore. I carry a pinless moisture meter—specifically the Wagner Orion 950—because it lets me scan my custom cabinets without leaving a single mark. If I see a reading above 12% in a dry kitchen, I know there is a slow weep somewhere before the wood even begins to swell. This is the level of precision you need for expert storage solutions that actually last a lifetime. 
Invest in a Good Laser Level
Most people think a level is just for the initial install, but I use my Bosch GLL3-330CG to check my built-ins and storage hacks every few years. Houses settle, especially in regions with heavy clay soil. If your laser line shows a 1/8-inch dip across a six-foot run of cabinets, your doors will eventually start to bind. According to Blum’s technical specifications for their TANDEMBOX systems, even a minor misalignment can increase friction and prematurely wear out the integrated soft-close mechanisms. This is why I always check the plumb of my boxes during my annual deep clean.
How do I keep my custom cabinets looking new for decades?
Maintenance is not a weekend-long chore; it is a series of five-minute check-ins. Every six months, I do a ‘hinge sweep.’ I take a PoziDriv screwdriver—not a standard Phillips, which can strip cabinet hardware—and give every screw a quarter-turn. If you find a cabinet hinge that squeaks every time, do not just spray WD-40 on it; clean the gunk out of the pivot points first. For modern kitchen remodels, I also suggest checking the tension on your lift-up cabinet doors, as the internal springs can lose their ‘oomph’ over several thousand cycles.
Watch out for the winter slow-down
You will eventually notice the real reason your soft-close drawers are sluggish in winter is often the viscosity of the hydraulic fluid inside the dampers. It is not a sign of failure, but it is a reminder that your kitchen is a living, breathing ecosystem. I predict that within the next five years, we will not just be talking about manual checks; we will see smart storage solutions for small kitchens that include built-in hygrometers and leak sensors connected directly to your smartphone. For now, your best defense is a proactive set of eyes and a few specialized tools. Try this: tonight, take a flashlight and look at the very top of your sink’s P-trap. If you see even a single salt-like crust forming on the pipe, you have caught a leak in its infancy. Go tighten that nut before it costs you a baseboard.
The Hard Truth About My Three-Hundred-Dollar Drip
Looking back at my own flooded kitchen floor, I realized that we often over-invest in the aesthetics of a kitchen remodel while neglecting the functional defenses that keep those materials alive. One major lightbulb moment for me was discovering that even high-end custom cabinets are not invincible; they are organic materials that react to their environment every single day. I also learned that “water-resistant” is often just a marketing term, not a physical shield—only a high-walled physical tray and proper sealant can truly stop the rot before it reaches the core. Finally, the biggest lesson: a five-minute inspection today is worth five thousand dollars in repairs next year. Don’t wait for a smell to tell you there’s a problem.
The Defensive Toolkit I Swear By
If you want to maintain your investment like a pro, you need more than just a roll of paper towels. I personally trust the Wagner Orion 950 moisture meter because it catches hidden dampness deep inside the wood before the surface even starts to warp. For keeping your layout perfectly aligned as your house settles, a Bosch GLL3-330CG laser level is indispensable. Lastly, never underestimate the power of a PoziDriv screwdriver; it’s the only way to tighten modern innovative storage solutions without stripping the hardware. These aren’t just gadgets; they are the guardians of your cabinetry’s longevity and structural integrity.
Building a Kitchen That Stands the Test of Time
Your home is your sanctuary, and the kitchen is its heartbeat. By taking these small, proactive steps—installing trays, sealing gaps, and checking hardware—you aren’t just fixing a sink; you are ensuring that your vision for an expert guide for 2025 lifestyle becomes a lasting reality. Don’t let a tiny leak dampen the joy of your beautiful space. If you ever feel overwhelmed by the technical side of protecting your cabinetry, feel free to reach out to us for expert guidance. You’ve got the tools and the knowledge; now it’s time to bulletproof your home. Have you ever discovered a hidden leak that almost ruined your cabinetry? Let me know in the comments below!