The Sink Base Secret: 4 Waterproof Trays That Save Your Custom Cabinets
Have you ever opened your kitchen cabinet under the sink and been greeted by a small flood of water, whether from a leak or accidental spill? I remember the first time it happened to me; I was frantic, fumbling to soak up the mess before it damaged my beautiful custom cabinetry. That lightbulb moment made me realize there’s a smarter way to protect these investments—something I wish I had known sooner.
Why Protecting Your Custom Cabinets Should Be a Top Priority
Custom kitchen cabinets can be a significant investment, often costing thousands of dollars, especially when made from high-end materials designed to last decades. But many homeowners overlook one of the most vulnerable spots in their kitchens—the sink base. Water leaks, spills, and condensation can seep into the cabinet’s structure, leading to warping, mold, and even costly repairs. It’s not just about aesthetics; it’s about preserving the integrity and functionality of your entire kitchen.
Early in my remodeling journey, I made the mistake of sealing my cabinets poorly around the sink area. The result? Weeks of stress and the realization that I needed a more robust solution. According to the National Kitchen and Bath Association, water damage accounts for nearly 30% of kitchen cabinet replacements.
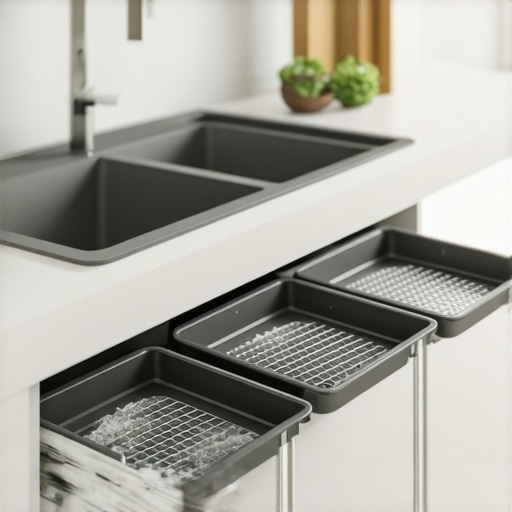
This spurred me to dig into practical solutions, and I discovered a game-changer: waterproof trays designed specifically for sink bases. These trays act as a secondary barrier, catching any leaks or drips before reaching the cabinet’s core. Not only do they protect your investment, but they also make cleanup easier and help maintain a hygienic environment.
Addressing Common Concerns
Perhaps you’re wondering if installing waterproof trays is worth the effort or if it will ruin the sleek look of your custom cabinetry. I get it—good design matters. That’s why these trays are typically slim, discreet, and can be customized to match your cabinet interiors seamlessly. Plus, implementing this simple fix can save you from hundreds or even thousands in future repairs.
If you’re tired of that sinking feeling every time you open your under-sink cabinet or have faced the chaos of water damage before, you’re not alone. Many homeowners hesitate at first, but trust me, taking proactive steps now is far better than dealing with costly repairs later.
Ready to learn about the specific waterproof trays that can safeguard your cabinets? Next, we’ll explore how to choose the right one and install it correctly, turning your kitchen into a resilient, protected space.
Select the Right Waterproof Tray for Your Sink Base
Start by measuring your sink base accurately; use a tape measure to note width, depth, and height. I once fitted a tray without double-checking dimensions—resulted in a tight squeeze and constant adjustments. Now, I measure twice and cut once, ensuring a snug fit that prevents leaks from escaping. Choose a tray material like high-quality polypropylene that resists moisture and is easy to clean. Look for trays with raised edges to contain spills effectively. To visualize this, imagine your sink base as a castle moat; the tray is the protective barrier guarding your investment.
Prepare Your Cabinet and Surroundings
Remove all items from under the sink to create a clean workspace. Wipe down surfaces to remove dust and debris, which could interfere with the tray’s adhesion if you plan to seal edges. Turn off water supply lines to prevent accidental leaks during installation. I once started installing a tray with the water still connected—messy and unnecessary. Consider installing a small, removable panel adjacent to the tray for easy access to piping and traps, similar to adding a hidden hatch for maintenance without disturbing the entire setup.
Install the Waterproof Tray Correctly
Lay the tray carefully inside the cabinet, aligning it with the measurements taken. Use a level to ensure it sits flat; tilting can cause water to pool and bypass the barrier. Secure the tray’s edges with waterproof sealant, applying a bead along the perimeter where it contacts the cabinet walls—think of this as caulking a bathtub to keep water in. I once skipped sealing, and water seeped between the tray and cabinet, leading to mold—a costly mistake avoided with simple sealing. Pay close attention to the drain opening; ensure it aligns perfectly with the sink drain for seamless operation. For guidance, see how a properly installed tray acts like a dam, holding back potential water surges and protecting your cabinetry’s core.
Seal and Customize for Seamless Integration
After installing the tray, apply a matching cabinet liner or paint to aesthetic match or seal exposed edges. This not only enhances appearance but prevents moisture infiltration behind the tray. If your cabinetry has unusual shapes, consider custom-cut trays or using flexible, waterproof mats that conform to contours. I once combined a rigid tray with a flexible liner to cover an awkward corner—it turned a potential weak point into a fortress of protection. For extra security, tape down edges with waterproof masking tape. Think of this step as setting the final mortar in a brick wall—ensuring everything stays secure over time and resists the wear of everyday kitchen life.
Test and Maintain Your Installation
Turn the water supply back on and run water into the sink, observing any leaks or pooling. Check under the tray for signs of moisture after a few hours. I once noticed a small puddle after a leak developed—drained and resealed, preventing significant damage. Regularly inspect the tray and edges for cracks or gaps, especially after heavy use or cleaning. Clearing debris and reapplying sealant every couple of years keeps the barrier functioning like new. Think of maintenance as grooming your garden: it keeps everything healthy and avoids bigger problems down the line. For further ideas on customizing your space, visit https://artisancabinetworkz.com/custom-cabinets-ideas-that-transform-your-homes-style or explore innovative storage solutions at https://artisancabinetworkz.com/maximize-space-with-innovative-storage-solutions-for-every-room.While many homeowners believe that simple shelving or standard cabinetry suffices, the real nuance lies in understanding **the overlooked intricacies that can make or break a kitchen’s functionality**. For instance, a common myth is that all storage solutions are universally effective; in reality, what works brilliantly in one layout might be a disaster in another, especially when considering unique space constraints or high-traffic zones. Advanced homeowners often fall into the trap of choosing trendy looks over practical, durable materials—leading to premature wear and the need for costly renovations.
Why do so many clever storage ideas backfire in actual use?
Studies from the National Kitchen and Bath Association reveal that 40% of homeowners are dissatisfied with their storage within five years because they overlooked essential factors like weight capacity, ease of access, and moisture resistance. True expertise involves not just selecting custom cabinets or built-ins but understanding **the nuanced design principles** that ensure longevity and convenience. For example, installing shallow drawers for spices might seem efficient until you realize that deep cabinets are better suited for bulky appliances—saving time and reducing clutter.
Furthermore, many assume that expanding storage always translates to more space, but over-customization can lead to crowded, difficult-to-navigate areas. Precision in planning, including clear zoning and ergonomic placement, **prevents the common mistake of sacrificing usability for aesthetics**. If you’re considering a remodel, it’s prudent to explore insights on how to maximize space without clutter by visiting this resource on innovative storage ideas.
Another nuance that often eludes DIY enthusiasts is the importance of moisture management. Without proper sealing or selection of moisture-resistant materials, even the most stylish cabinets can warp or develop mold over time. Choosing **the right kind of cabinetry material**, such as bio-resin infused options, can dramatically extend the lifespan of your remodel—learn more about durable finishes at this detailed guide. Remember, understanding **these subtle, yet impactful details** ensures your investment pays off in both form and function. Have you ever fallen into this trap? Let me know in the comments.
Keep Your Storage Systems Running Smoothly
Maintaining your custom cabinets, built-ins, and storage solutions is crucial to ensuring they serve you well for years to come. Regular upkeep prevents small issues from escalating into costly repairs, keeping your space functional and beautiful. Over the years, I’ve refined my toolkit and approach, leaning on specific tools and methods that deliver reliably excellent results.
One of my go-to gadgets is a high-quality digital moisture meter. Moisture levels are a silent killer for wood and composite cabinetry materials. Using a reliable moisture meter, such as the
Another essential is a good precision electric drill with an array of bits. I prefer models with variable speed control and a comfortable grip, like the
For cleaning and touch-ups, I rely on microfiber cleaning cloths and gentle, non-abrasive cleaners. Keeping the surfaces dust-free prolongs the aesthetic appeal and prevents scratches. If I notice small chips or scratches, I use a
Investing in dust extractors or vacuums with HEPA filters aids in maintaining a dust-free environment around your cabinetry—especially important in the era of growing allergy sensitivities. Regular cleaning not only preserves the appearance but also protects the hardware mechanisms, like soft-close hinges and drawer slides, from debris that can impede smooth operation.
How do I maintain built-ins over time?
Consistent checkups are key. Every few months, I inspect hinges, slides, and seals, applying lubricant where needed. For example, I favor a silicone-based spray for hinges, which prevents squeaking and corrosion without attracting dust. For deep cleaning, I periodically remove drawers or shelves and clean the tracks thoroughly, ensuring everything glides seamlessly. This routine prolongs the life of hardware and maintains the effortless feel of your custom storage solutions.
Drawing from industry insights, professional cabinetmakers recommend reviewing hardware specifications regularly, especially after seasonal humidity shifts. Replacing worn-out seals or lubricating hinges not only enhances functionality but also prevents moisture ingress that can cause swelling or warping. Moreover, employing a dehumidifier in rooms with high humidity can dramatically improve the longevity of your cabinetry.
Implementing a regular maintenance routine, supported by the right tools, makes a significant difference. My top recommendation? Invest in a digital moisture meter and keep it handy during seasonal changes. It’s a small investment that pays dividends in preserving your cabinetry’s pristine condition over time.
Want to improve your storage spaces further? Explore innovative solutions like these smart storage ideas to maximize your home’s potential. Remember, consistent care today guarantees long-term satisfaction tomorrow!
Lessons That Changed My Approach to Kitchen Storage
- Never underestimate the importance of pre-measurement—mistakes here can lead to costly adjustments or gaps that compromise water protection.
- Choosing versatile, high-quality materials for trays and sealants makes ongoing maintenance simpler and more effective, extending your cabinetry’s lifespan.
- Regular inspections and proactive care, like moisturizing hinges and sealing edges, can prevent small issues from turning into major repairs.
- Understanding that installation is just the beginning—proper sealing, sealing, and customizing are key to full protection and a seamless look.
Tools and Resources That Became My Kitchen Allies
- Digital moisture meter: Essential for early detection of humidity issues that threaten cabinetry integrity. I trust the models that offer quick readings and durability, like the MoistureScan Pro.
- Flexible, waterproof trays: My go-to for custom fit and resilience. For guidance, I often refer to resources at this site, where practical advice is plentiful.
- Sealant and weatherproofing tape: Guarantee a water-tight barrier. I favor brands with proven adhesion and flexibility, making reapplications effortless.
- Maintenance checklist: Routine checks for moisture, cracks, and hardware health keep my cabinets looking and functioning like new. Staying disciplined here saves money long-term.
Your Next Step Toward a Resilient Kitchen
Taking these insights and tools seriously can transform your kitchen from a potential water hazard into a showcase of durability and style. Remember, the effort you invest today in proper waterproofing and maintenance not only protects your custom cabinets but also elevates your entire space’s functionality and beauty. Dive deeper into clever storage solutions and upgrades that complement your investment by exploring these smart ideas. Your kitchen’s resilience starts with informed decisions—make them now, and enjoy a stunning, trouble-free space for years to come!