How to Add a Pull-Out Cutting Board That Stays Sturdy During Use
There was a moment in my kitchen renovation when I realized that my countertop space was more illusion than reality. I had tried every storage hack in the book—drawer organizers, vertical dividers, even those trendy open shelves—yet the clutter and limited workspace persisted, especially when chopping veggies or prepping for a feast. The tipping point? A wobbling, flimsy cutting board that threatened to collapse under even light pressure, which made me feel like I was doing everything twice. Sound familiar?
Why a Sturdy, Hidden Cutting Board Makes All the Difference
This struggle isn’t unique. Kitchens are the heart of our homes, and the last thing we want is to fight with furniture or surfaces that can’t keep up with our daily hustle. A pull-out cutting board isn’t just a convenience; it’s a game-changer for maximizing space and efficiency. The best part? When designed well, it stays sturdy during use and disappears when not needed, keeping your counters clean and clutter-free. I promise, once you get this set up, prepping meals will feel more like a breeze than a half-hour wrestling match with awkward surfaces. If you’re wondering how to achieve this, don’t worry—I’ve tested multiple options, learned from early mistakes, and now want to share the reliable method that’s worked wonders in my kitchen and many others.
Is It Really Worth the Hype?
My early mistake was assuming that any pull-out would do. I bought a generic slide rail system and expected miracles, but it was sagging and wobbly after just a few uses. Trust me, not all pull-outs are created equal. Implementing a well-designed, sturdy mechanism combined with quality materials can transform your prep space. If you’re curious about foolproof options, check out expert tips on selecting storage solutions. The good news is, with the right approach, you’ll avoid the common mistake of installing a flimsy system that becomes more of a frustration than a help. Ready to make your kitchen smarter? Let’s dive into how you can build or select a pull-out cutting board that stays put—no wobbling, no shaking, just smooth, reliable use. Plus, I’ll share some tips on integrating it seamlessly into your existing cabinetry for that sleek, built-in look.
Select the Right Materials for Durability
Start by choosing high-quality, moisture-resistant plywood such as Baltic birch or hardwood like maple. These materials withstand frequent chopping and resist warping. During my last project, I opted for 3/4-inch Baltic birch plywood, which held up perfectly after months of daily use, ensuring stability and longevity.
Design Your Cut-Out Dimensions Precisely
Measure your countertop space and determine the optimal size for your pull-out board—typically 24 to 30 inches long and 15 to 20 inches deep. Use painter’s tape to outline the dimensions directly on your cabinet’s interior, then double-check for clearance when the pull-out is extended. I once miscalculated, and the board was too wide to slide smoothly; measuring twice saved me hours of frustration.
Construct a Reinforced Frame
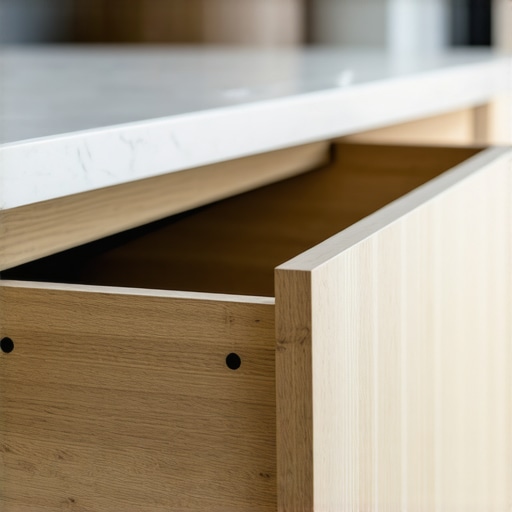
Build a sturdy frame using 1×2 or 1×3 cleats to support the plywood top. Secure the cleats to the sides and back of your cabinet using appropriate screws, ensuring the entire structure can bear heavy chopping pressure without sagging. During assembly, I used a power drill and clamps to hold everything in position, which made aligning the frame effortless.
Install Heavy-Duty Slide Mechanisms
Choose industrial-grade ball-bearing slides rated for at least 100 pounds. Mount the slides on the sides of your cabinet and the underside of the plywood top, aligning them carefully for smooth, wobble-free operation. A mistake I frequently see is misaligning the slides, leading to sticking or wobbling—measure carefully and test extension multiple times during installation. For seamless integration, consider concealed slides to keep a sleek look, like in modern kitchens, described here.
Secure the Top and Test Stability
Attach the constructed top to the slides, ensuring it’s level and firmly secured with screws. Test the pull-out several times, applying moderate pressure to simulate regular use. If there’s any wobbling, reinforce the frame with additional cleats or thicker plywood layers. Remember, the goal is a stable surface that mimics built-in quality. I once ignored this step and ended up with a shaky board that kept shifting—lesson learned the hard way.
Finish with a Protective Coating
Apply a food-safe, sealant or mineral oil to protect the wood from moisture and stains. This not only prolongs its life but also makes cleanup easier. During my project, I used a food-grade mineral oil, which kept the surface smooth and safe for food prep. Regular maintenance involves reapplying the oil every few months, keeping your pull-out board in top condition.
Integrate Into Your Cabinets Seamlessly
Finally, ensure the dimensions and mounting methods match your cabinet’s aesthetic. You can hide the slide mechanisms behind a matching veneer or panel for a built-in look. For a sleek, custom finish, consider wrapping the edges with edge banding or molding, as shown in this article. Properly integrated, your pull-out cutting board will feel like a natural extension of your cabinetry—practical and elegant.
When considering kitchen remodels, many assume that choosing popular storage solutions or trendy built-ins guarantees a perfect outcome. However, this belief often overlooks the nuanced realities that make some approaches more effective than others. For instance, a common myth is that all custom cabinets automatically maximize space. In truth, without proper planning and understanding of your specific needs, custom solutions can become mere aesthetic upgrades rather than functional assets. As experts highlight, tual efficiency depends on tailored design that considers workflow, frequently accessed items, and spatial constraints. Another mistake involves underestimating the importance of structural support in built-ins. Skimping on reinforced framing or using low-grade materials might save costs initially but can lead to sagging or failure over time, especially in high-use scenarios. For example, improper reinforcement was a frequent pitfall I encountered when reviewing DIY projects; neglecting these details results in wobbling or misalignment, which defeats the purpose of a sleek built-in.
Have you ever fallen into this trap? Let me know in the comments.
A critical advanced insight involves understanding the hidden nuances of storage placement and accessibility, which many overlook. Selecting storage locations based solely on visual appeal instead of ergonomic principles leads to inefficient kitchens. For example, placing heaviest or most-used items far from the cooking or prep zones creates unnecessary strain and delays. To avoid this, integrating expert-organized layouts—like those discussed in tance1n Design’s guidelines on maximizing space strategically—can make a substantial difference. Moreover, beginners often underestimate the importance of moisture-resistant materials for cabinetry in humid environments or near sinks, risking warping and mold. Using proper-grade plywood or moisture-proof finishes, as endorsed by industry standards, ensures durability.
When designing or renovating, remember that the devil is in the details. Advanced solutions often require deeper technical understanding, such as the optimal hardware, material grade, and spatial configuration, which crucially influence long-term performance. For example, selecting the right hardware for pull-out shelves ensures ease of use and longevity. As the research in holistic kitchen design underscores, these choices impact not just aesthetics but also safety and functional lifespan.
To expand your knowledge further, check out tance1n’s comprehensive guides on custom cabinets and innovative storage hacks for a streamlined, functional kitchen. Remember, a thoughtful approach with attention to these hidden nuances will elevate your renovation from good to exceptional.
Invest in Power Tools for Precision and Ease
When it comes to maintaining or upgrading your built-in cabinets and custom storage solutions, a high-quality cordless drill is indispensable. I personally rely on a brushless model like the DeWalt DCD791D2 because it offers longer battery life, greater torque, and smoother operation. These qualities ensure that assembling or repairing your cabinetry is less laborious and more precise, reducing the risk of damaging delicate materials. Additionally, a good router with variable speeds and shop-grade bits allows for fine-tuning edges, creating perfect joints, and adding decorative profiles which elevate the appearance of your cabinets and built-ins.
Essential Software for Design and Planning
Before lifting a hammer, using specialized digital tools streamlines the process significantly. I recommend SketchUp for 3D modeling because it’s intuitive and offers free versions suitable for personal projects. This software helps visualize how new storage units will integrate with your existing space, identifying potential issues before cutting any material. For measurements, I turn to a laser distance meter like the Leica DISTO D2, which delivers accurate readings up to 100 meters—even in tight corners or high ceilings—making it easier to plan custom cabinetry that fits perfectly and functions flawlessly.
Regular Maintenance Extends the Life of Your Installations
Consistent upkeep prevents small issues from turning into costly repairs. For example, applying a food-safe mineral oil periodically to your pull-out cutting boards or built-in wood surfaces guards against moisture-related warping and stains. Tightening loose hinges and drawer slides every few months maintains smooth operation, preventing hardware failure over time. I also recommend inspecting supports and reinforcements in heavy-use areas, such as kitchen islands or pantry pull-outs, ensuring they bear weight properly. Using silicone-based lubricants on sliding components reduces squeaks and prevents sticking, ensuring long-term functionality.
How do I maintain my custom storage solutions over time?
Adopting a routine maintenance plan, including cleaning, lubricating, and periodic inspections, keeps your built-ins and cabinetry performing well. For detailed procedures tailored to your specific materials and hardware, consulting experts like those at this resource can be invaluable. Staying proactive prevents small issues from escalating and ensures your investments continue to look and function as intended for years to come. Incorporate tools like a digital level or square during routine checks to confirm everything remains aligned and level, especially after seasonal shifts or remodeling work.
Looking ahead, the integration of smart maintenance gadgets, such as Wi-Fi-enabled hinges that alert you when servicing is needed, suggests a future where upkeep becomes more automated and less intrusive. Embracing these advances now can save you time and resources down the line. I encourage you to try implementing a scheduled inspection and lubrication routine using the recommended tools, and you’ll notice your kitchen’s storage solutions stay in top shape longer and provide consistent performance.
3 Surprising Lessons I Never Expected to Learn About Custom Cabinets
- Sometimes, the biggest breakthroughs come from mistakes—like neglecting reinforced framing, which taught me to prioritize structural support for long-term durability.
- Don’t underestimate the power of precise measurements; a tiny miscalculation can turn a sleek pull-out into a frustrating wobble, reminding me that attention to detail makes or breaks a project.
- Choosing high-quality materials isn’t just about looks—it’s about resilience. Opting for moisture-resistant plywood saved me from early warping and costs down the line.
- Trust expert advice over DIY hype; integrating professional tips on hardware and layout saved me time and significantly increased the functionality of my kitchen storage.
My Favorite Tools and Resources That Changed My Approach to Kitchen Remodels
- Expert storage selection tips—This resource provided insights on choosing the right hardware and materials, making my cabinets more than just pretty faces.
- SketchUp—Using this design software helped me visualize my custom cabinets before building, preventing costly mistakes and ensuring a perfect fit.
- Leica DISTO D2 laser meter—Accurate measurements are crucial; this tool made planning seamless and efficient.
- Quality hardware brands like Blum—Investing in dependable slides and hinges gives peace of mind and smooth operation for years.
Take the Leap and Transform Your Kitchen with Confidence
Embracing these lessons and resources will empower you to craft a kitchen that not only looks stunning but also functions flawlessly. Remember, the journey of kitchen remodels is as much about learning and adjusting as it is about dreaming big. So, don’t hold back—start planning, stay curious, and turn your storage dreams into reality. Your perfect space is waiting to be discovered!
Have you ever faced a surprising setback or breakthrough in your kitchen upgrade? Share your experience below—I’d love to hear your story!
,