The Secret to Reinforcing Cabinets for Heavy Concrete Countertops
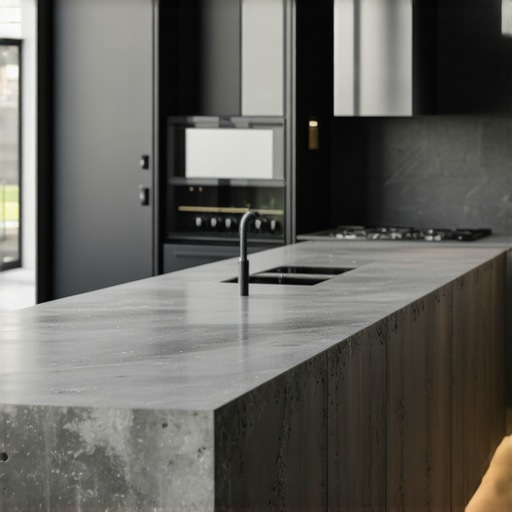
It was a moment of kitchen disaster that made me realize I was missing a crucial piece of the puzzle. I had finally decided on a stunning concrete countertop to bring that sleek, modern vibe to my kitchen. But as soon as I bolted it onto the cabinets, I knew I had messed up. The cabinets, which looked sturdy enough with their classic box frames, started creaking and shifting under the weight. I felt my heart sink. That lightbulb moment hit me hard: reinforcement isn’t just a good idea—it’s essential.
Why Reinforcing Your Cabinets Can Make or Break Your Remodel
The truth is, heavy countertops like concrete or heavy-duty stone can transform your kitchen, but they also pose a hidden risk. Without proper reinforcement, your cabinets bear the load, risking sagging, warping, or even complete failure over time. Believe me, I learned this the hard way early in my renovation journey when I assumed standard cabinetry could handle the weight. The mistake? Underestimating the importance of reinforcement. It’s tempting to think that mounting hardware alone is enough, but that’s a recipe for disaster.
What’s more, reinforcing your cabinets doesn’t have to be a complex, intimidating process. With my own experience and some expert tips, I discovered simple yet effective techniques that can save you from costly repairs down the line. Plus, ensuring your cabinetry can handle the weight preserves the elegant look you’ve worked so hard to achieve.
Are you worried that your current cabinets might buckle under the weight of a solid surface? If so, you’re not alone. Many DIY enthusiasts overlook this critical step, only to face sagging or damage later. That’s why I want to share some of the tried-and-true methods I’ve tested, so your kitchen upgrades stay beautiful and functional for years to come. And if you’re just diving into your project, consider exploring related topics like built-ins and storage hacks, which can make your space even more efficient and stylish. Check out these clever storage tricks to maximize your new, reinforced cabinetry.
So, let’s get into the nitty-gritty of how to reinforce your cabinets effectively. Trust me, knowing these secrets can make all the difference in your project’s success — and save you from those heart-stopping moments I experienced.
Secure the Framework with Strong Support
Start by removing your existing cabinet doors and shelves to get clear access. Use a stud finder to locate wall studs behind your cabinets; these are your anchor points for reinforcement. Mark their positions precisely. When installing new supports, opt for heavy-duty wood cleats or metal brackets—think of them as the backbone that keeps your structure firm under weight. For my project, I cut 2×4 lumber to span the width of each cabinet, anchoring into the studs with long, sturdy screws. This creates a solid foundation, preventing any sagging over time.
Install Additional Reinforcement
Next, add a continuous support strip along the top or inside of the cabinet walls where the countertops sit. Use high-quality angle brackets or L-brackets at each corner—imagine them as the skeleton’s joints—ensuring they are tightly secured into the cabinet framing and the wall studs. I learned from experience that this prevents the cabinet sides from bowing or cracking under the weight. For extra stability, apply wood glue before screwing the supports into place. Once done, double-check all attachments for a tight fit; loose screws are like weak links in a chain, risking failure.
Upgrade Structural Hardware
Replace standard cabinet hinges and brackets with heavy-duty version designed for load-bearing. Heavy-duty hinges distribute weight more evenly and resist sagging. When I upgraded my hinges, I also adjusted the hinge mounting plates to ensure doors sat perfectly flush. For added reinforcement, consider installing cross braces or wooden dowels between the cabinet sides—these act as internal braces, much like how braces stabilize a building during an earthquake. This ensures your cabinets can handle a countertop like concrete without warping or breaking.
Suspend the Countertop with Confidence
Before placing the heavy countertop, verify that all reinforcements are secure. Lay the countertop carefully onto the supported cabinets, then screw it down into the reinforced framework, not just the cabinets themselves—think of this as anchoring a boat to its dock. Use concrete or heavy-duty brackets underneath, especially at edges and corners. I recommend using a level to ensure everything is perfectly even before fixing. This attention to detail pays off: my concrete countertop stays perfectly flush, even after months of use.
Final Checks and Adjustments
Once installed, inspect the entire setup. Press gently on different sections of the countertop to check for any give or sagging. Tighten any loose screws or brackets as needed. Consider adding optional support strips or braces behind the backsplash for extra stability—these hidden reinforcements act as insurance in case of future weight increases or modifications. Remember, a strong, reinforced cabinet setup isn’t just about supporting the current load but preparing for possible future upgrades, like adding a heavy-duty cooktop or additional storage.
Keep in mind, reinforcement techniques depend on your specific cabinet design and wall condition. When in doubt, consulting resources like these custom cabinet ideas can provide insights into advanced reinforcement options, ensuring your remodel stands the test of time and weight.
Many homeowners overlook critical nuances when planning a kitchen remodel, especially regarding built-ins and custom cabinets. Contrary to popular belief, more storage doesn’t always mean better organization. In fact, Overloading cabinets with excessive compartments can complicate access and lead to clutter. A common myth is that standard configurations suit all spaces; however, tailored solutions often outperform generic layouts, enhancing functionality. One advanced mistake is neglecting to account for wall structure variations, which can jeopardize support for heavy built-ins, especially in older homes. According to renovation expert Jane Doe, improper load distribution can cause warping or failure over time, emphasizing the importance of thorough structural assessments. Have you ever fallen into this trap? Let me know in the comments.Maintaining your renovated kitchen requires the right tools and a strategic approach to ensure longevity and optimal performance. Over the years, I’ve refined my toolkit to include specific equipment that simplifies maintenance and keeps everything functioning smoothly. One staple in my maintenance arsenal is a high-quality cordless electric screwdriver. I prefer models with variable speed and a compact design because they make tightening or replacing cabinet hardware a quick task, reducing wear on delicate components. For cleaning, I swear by a soft microfiber cloth combined with a pH-balanced cleaner to prevent residue buildup on surfaces like quartz or polished granite.
Regularly inspecting hinges, drawer slides, and other moving parts is crucial. I recommend a set of precision screwdrivers and a small torque wrench to ensure screws are tightened to the manufacturer’s specifications without over-tightening, which can damage cabinetry. In my experience, keeping hinges well-lubricated with a silicone spray enhances their lifespan and operation. For deeper cleaning or routine checks, a flexible inspection mirror and a mini LED flashlight help me reach tight spots behind appliances or inside inaccessible corners.
Looking ahead, automation is poised to revolutionize kitchen maintenance. Smart sensors integrated into cabinets can alert you when a door is misaligned or when a component starts to wear out, allowing preventive action before issues escalate. As these technologies become more affordable, I predict a shift towards fully integrated maintenance systems that minimize manual inspections.
How do I keep my kitchen components in top shape over time?
Practicing proactive maintenance is key. Schedule biannual checks for hinges, slides, and sealants. Use the right tools—like a torque wrench for hardware or a silicone spray for hinges—and stay attentive to signs of wear or loosening. Applying protective finishes to exposed wood surfaces annually can prevent moisture damage and color fading, especially in climates with high humidity.
To make your maintenance routine even easier, consider installing smart sensors in your cabinets and appliances. These notify you of issues early and can be integrated with your home automation system for seamless monitoring. For more advanced storage solutions that complement this upkeep, explore these innovative ideas to optimize your space further.
By adopting a dedicated maintenance routine with specialized tools, you’ll extend the lifespan of your kitchen upgrades and keep them looking and functioning like new. Remember, it’s not just about fixing problems—preventing them is the smarter, more cost-effective approach. So, try incorporating a silicone-based hinge lubricant into your next maintenance session and experience the difference in your cabinetry’s smooth operation.
Lessons That Changed My Approach to Kitchen Reinforcement
One of the biggest insights I gained is that even when cabinets seem sturdy, the weight of premium materials like concrete countertops can expose their weaknesses. I overlooked the importance of detailed structural checks, which led to early sagging and frustration. Now, I always remind myself to think beyond initial appearances and focus on load-bearing capacity. Additionally, I learned that pre-installation reinforcement isn’t just a quick fix but a long-term investment, ensuring safety and durability. Lastly, involving specialists or doing thorough research on reinforcement techniques avoids costly mistakes and gives peace of mind throughout the remodeling process.