How to Fix a Sagging Cabinet Bottom Without Replacing the Unit
One chaotic Saturday, I reached into my kitchen cabinet to grab a pot, only to feel the entire bottom panel wobbling precariously. My heart sank. That familiar sinking feeling of realizing a beloved piece of furniture is collapsing, seemingly beyond repair. I had always thought replacing the entire cabinet was the only option, but then I had a lightbulb moment — maybe I could fix it myself. That moment of DIY frustration turned into a satisfying success, saving both money and my sanity.
The Real Cost of Ignoring a Sagging Cabinet
Sagging cabinets are more than just an annoyance; they can compromise the stability of your entire storage solution. Over time, a sagging bottom can lead to further damage, such as splitting or warping, which might eventually require a full replacement. But here’s the kicker: many folks overlook this issue until it’s too late, thinking it’s an insurmountable problem. Fortunately, I’ve learned through my experiments that a sagging bottom is often fixable with just a few tools and a bit of know-how. And I want to help you avoid the unnecessary expense of replacement, which could run into hundreds or even thousands of dollars.
What’s Behind the Sag? Common Causes and My Mistake
Early on, I made the mistake of assuming heavy use alone caused the sagging. Turns out, poor support and subpar materials are bigger culprits. When I first started researching, I realized that many cabinets are built with particleboard, which isn’t as durable as plywood or solid wood, especially when exposed to moisture or heavy weight. What I initially underestimated was the importance of proper support brackets and reinforcement. If only I had known earlier about the significance of sturdy frame construction and reinforcement techniques. For more insights, I often refer to resources like this guide on heavy-duty cabinet support.
So, why does this matter now? Because fixing a sagging cabinet is more accessible than you think, and postponing repairs can lead to costly replacements. If you’ve ever faced a similar dilemma—your cabinet bottom hanging dangerously low, or worse, collapsing—you know how frustrating and urgent this issue can be. Trust me, there’s a way to save your cabinet and extend its life without breaking the bank.
Ready to dive into the simple step-by-step solution I used? Let’s turn that sag into a thing of the past and restore your cabinets’ strength with minimal fuss.
Remove the Damaged Panel and Prepare for Reinforcement
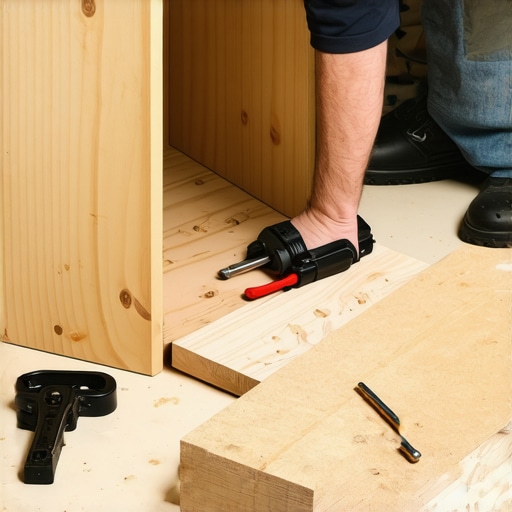
Start by carefully unscrewing or prying out the sagging bottom panel using a flat-head screwdriver or drill. During my own repair, I laid a drop cloth to catch dust and debris to prevent messes. Once removed, inspect the frame for any looseness or cracks. It’s like peeling back the layers of an onion—each step reveals where support is lacking. Removing the panel gives you clear access to the framing and support structures, setting the stage for a sturdy fix.
Assess and Reinforce the Frame Support
Check whether the cabinet’s frame is sagging or warped. If support brackets or cleats are missing or loose, tighten or add new ones. For my cabinet, I used L-brackets and screws, anchoring them into the side walls and bottom frame for extra support. Think of this as installing steel beams in a building—adding reinforcement where it’s weak. Using a level, ensure everything is flush; a misaligned frame can cause future issues. This reinforcement prevents the panel from sagging again and extends the cabinet’s lifespan.
Install a Support Brace or Reinforcement Strips
Measure the width beneath the panel and cut a piece of sturdy plywood or solid wood to size. I opted for a ¾-inch plywood strip, matching the thickness of the original panel. Secure it horizontally to the interior sides of the cabinet using screws and wood glue if necessary. This brace acts as an internal backbone, distributing weight evenly. Consider using pocket-hole screws for a flush finish. Structural support like this is akin to a backbone—important for maintaining stability under weight.
Replace or Reattach the Bottom Panel Securely
If the original panel is salvageable, clean any loose debris and apply wood glue along the edges before reattaching. Otherwise, cut a new panel from matching material. Secure it with countersunk screws from the inside to hide hardware. During my repair, I found that adding a few screws along the perimeter and into the reinforcement strips prevented future wobbling. Think of this step as tightening the bones of a body—firm attachment ensures strength and durability. Be careful to avoid overtightening, which can cause cracks or warping.
Finish the Repair with Sealant and Adjustments
Once the panel is in place, fill any screw holes with wood filler and sand smooth. Apply matching paint or finish to blend the repair seamlessly. Reinstall any removed hardware or trim. I noticed that a fresh coat of paint and some touch-up made the repair look almost invisible, restoring the cabinet’s aesthetics. This final step seals the fix, protecting it from future moisture or wear. A properly reinforced and sealed cabinet can easily support heavier items and last for years to come.
Leverage Support-as-a-Service for Bigger Projects
If your cabinet repair feels overwhelming or your project involves multiple units, reaching out to experts can save time and ensure quality. Visit this contact page to connect with professionals who specialize in custom cabinet fixes and renovations. Whether it’s reinforcing a single cabinet or designing a new built-in, professional support can optimize your renovation process, giving you peace of mind and a lasting result.
In the world of home remodeling, there’s a pervasive misconception that custom cabinets and built-in storage are simply about choosing your favorite wood or hardware. However, as an expert in cabinet design and installation, I’ve observed that many homeowners overlook the nuanced complexities that differentiate a truly functional custom solution from an average one. A common myth is that bigger, more elaborate storage equals better organization, but in reality, smart planning and an understanding of advanced construction techniques make all the difference.
One critical trap many fall into involves assuming that standard framing techniques suffice for all built-ins. They don’t—particularly when dealing with heavier materials like quartz or dense hardwoods. For example, not reinforcing support brackets in the framing can lead to sagging over time, especially in larger units or those supporting heavy appliances. Recognizing the importance of proper structural support is essential; otherwise, you risk costly corrections down the line.
Another overlooked nuance is the significance of moisture-resistant materials. Many assume that choosing the right finish is enough to prevent warping or mold, but the substrate itself plays a vital role. High-quality engineered plywood or HMR (High Moisture Resistant) MDF prevents warping and maintains structural integrity, especially in kitchen environments where humidity fluctuates. Ignoring this leads to premature deterioration—a mistake that experts caution against. For a comprehensive understanding of materials, I recommend reviewing industry standards detailed in studies like those from the National Kitchen & Bath Association.
Why do so many custom storage solutions fail to meet expectations?
One reason is overlooking the importance of strategic planning for future needs. For instance, installing a deep pantry without considering adjustable shelving or vertical dividers can result in wasted space and reduced accessibility over time. Incorporating features like vertical sheet pan dividers or modular pull-outs ensures your storage adapts as your needs evolve. It’s a small detail that makes a big difference in usability.
And here’s an advanced tip: aligning your cabinetry with electrical and plumbing plans during the design phase prevents costly retrofits. Hidden wiring or pipes can obstruct drawer slide installation or limit reinforcements. Planning ahead offers a smoother build process and longer-lasting results. If you’re interested in elevating your home’s functionality through innovative storage, explore how custom cabinets ideas that transform your home’s style can streamline your space solutions.
Be cautious of the trap of opting for low-cost, off-the-shelf solutions for what should be a permanent investment. Cheap materials and hardware may seem attractive initially but compromise long-term durability and aesthetic appeal. As I advise clients, selecting high-quality, purpose-built components ensures your storage works seamlessly for years. For in-depth guidance, I suggest checking out resources on maximizing space with innovative storage solutions for every room.
So, next time you’re planning a kitchen remodel or considering built-ins, remember that meticulous attention to detail and advanced construction practices are what truly set apart exceptional projects from average ones. Don’t settle for quick fixes—invest in expert advice and craftsmanship to guarantee your home not only looks good but functions flawlessly.
Ensuring your custom cabinets remain functional and beautiful over the years requires the right tools and a proactive maintenance routine. Personally, I rely on a combination of precise measuring instruments, specialized hardware, and software to keep my projects on track and maintain their quality long-term.
Essential Tools for Maintenance and Repairs
One of my go-to tools is a digital angle finder. It allows me to check door and drawer alignments quickly, ensuring they stay flush and operate smoothly. I personally prefer the Bosch Digital Angle Finder because of its accuracy and ease of use. For tracking and planning, I use Asana to organize routine maintenance tasks and project timelines, preventing issues before they escalate.
When it comes to component replacement or reinforcement, I always keep a selection of high-quality screwdrivers, including a Phillips and flat-head, specifically designed for woodworking. For hidden fasteners, I’ve found Kreg pocket-hole jigs invaluable; they allow me to reinforce frames and support braces discreetly, which is crucial for maintaining the aesthetic integrity of built-ins.
The Power of Software and Planning
Design and planning software like SketchUp helps me visualize repairs and modifications before physically making changes, saving time and reducing errors. I especially appreciate the ability to simulate reinforcement strategies, ensuring support brackets and braces are correctly positioned. This foresight is vital when scaling up projects or implementing sustainable, long-term solutions such as replacing particleboard with engineered plywood, which industry standards highlight as more durable for moisture-heavy environments.
Future Trends in Cabinet Maintenance
Looking ahead, I believe maintenance will increasingly incorporate smart sensors that monitor cabinet stability and detect early signs of sagging or warping. Integrating IoT devices into cabinetry could be a game-changer, alerting homeowners to issues before they become visible or costly to fix. Although this is still emerging technology, the trend points toward more connected, self-monitoring storage solutions.
How do I keep my cabinets working without constant fuss?
My best tip is to develop a regular inspection schedule—every six months, I check the hinges, fasteners, and door alignments using my digital angle finder. Additionally, investing in quality hardware like soft-close hinges and heavy-duty slides ensures durability. Remember, small adjustments now can prevent major repairs later. For more ideas on making your storage smarter and more resilient, take a look at this article on built-ins that elevate your living rooms.A practical step is to try resetting your hinges and checking for loose screws regularly—it’s a simple, effective way to extend your cabinets’ lifespan without major overhaul. Don’t wait until a wobbling door ruins your day; with periodic maintenance and the right tools, your custom cabinetry can serve you reliably for decades.
Over the years, I’ve learned that the true secret to durable and functional custom cabinets lies in mastery—understanding the subtleties behind support, materials, and maintenance. These lessons, often born from personal mishaps, reveal that investing in quality and attention to detail pays off immensely. By embracing a proactive approach rather than reactive fixes, homeowners can transform their spaces into ones that both impress and endure.
The Hardest Lesson I Learned About Built-Ins: Don’t Skip Reinforcement
Initially, I believed that well-chosen materials alone would safeguard my cabinets. However, I discovered that even the most beautiful veneer can fail if support isn’t properly reinforced. It became clear that support brackets, cleats, and internal braces are the unsung heroes of a lasting built-in. My lightbulb moment was realizing that every heavy panel or appliance necessitates a supportive backbone—an insight I wish I’d known from the start.
3 Myths About Custom Storage Solutions That Cost You Time and Money
One myth is that larger, more elaborate cabinets automatically mean better organization. Reality check? Without strategic planning and internal dividers, space often goes to waste. Another misconception is that standard framing techniques suffice for heavy-duty storage—my experience showed that custom reinforcement makes all the difference. Lastly, many assume low-cost materials are adequate; but that often leads to early failures, especially in humid environments where moisture-resistant substrates outperform traditional options. Recognizing these myths empowers you to make smarter choices in your remodel projects.
What Experts Won’t Tell You About Efficient Kitchen Remodels and Built-Ins
Many overlook the importance of detailed planning for electrical, plumbing, and future upgrades. Integrating these considerations during the initial design phase prevents costly retrofits down the line. Also, selecting moisture-resistant materials like engineered plywood ensures longevity, especially in humid kitchens. I’ve found that innovative support strategies, such as steel brackets for heavy overhangs, aren’t just theoretical—they are essential for safe, lasting installations. Being aware of these nuances can elevate your project from average to exceptional, ensuring your custom cabinets serve for decades.
Unlocking Hidden Design Secrets for Flawless Custom Cabinets
Little details—like concealed support braces or adjustable hinges—can dramatically improve functionality and appearance. For instance, adding vertical dividers in deep drawers not only organizes utensils but prevents jams. Aligning your cabinetry with electrical plans ensures seamless integration of lighting and outlets, saving future headaches. The key is to think beyond aesthetics and focus on smart support and planning, transforming your space into a harmonious blend of beauty and resilience. And if you’re considering a complete overhaul, exploring ideas that redefine your home’s style can spark inspiration.
Insights That Elevate Your Storage Game for Good
Through countless projects, I’ve realized that choosing the right hardware, like self-healing finishes and heavy-duty hinges, greatly extends cabinet lifespan. Regular inspections—using tools like a digital angle finder—prevent minor misalignments from turning into major repairs. Moreover, embracing innovative solutions, such as smart sensor hinges or hidden appliance garages, not only improves usability but future-proofs your remodel. Ultimately, the secret to lasting custom cabinets is a combination of quality materials, strategic reinforcement, and ongoing care—making your investment truly worthwhile.
Your Turn to Elevate Your Built-In World
Now that I’ve shared these insights, I encourage you to look at your current or upcoming projects through a new lens—focusing on reinforcement, support, and thoughtful planning. Remember, the difference between a good and a great custom cabinet lies in the details—details that ensure durability, efficiency, and beauty for years to come. Take the proactive steps today, and your home will thank you for decades of reliable service.
What’s the biggest challenge you’ve faced when planning your custom cabinets or built-ins? Drop a comment below—I’d love to hear your story and help you troubleshoot!
,