How to Fix a Stripped Hinge Hole in Particle Board Cabinets
Ever tightened a cabinet hinge screw only to feel it spin helplessly, leaving you with a loose door and a sinking feeling of frustration? I vividly remember the moment I realized my kitchen cabinet hinge was stripped, and no matter how many times I tightened that screw, it just wouldn’t grip anymore. It’s a small problem, but for anyone with built-in cabinets or a kitchen remodel in progress, it can feel like a major setback, disrupting your workflow and making everything finish feel amateurish. Remember, you’re not alone in this—stripped hinges are a common headache, especially with particle board, which isn’t exactly known for its resilience.
Why Fixing Stripped Hinge Holes Is More Than Just a Tiny Repair
Dealing with a stripped hinge hole might seem like a minor annoyance, but it actually impacts the longevity and safety of your cabinets. Loose hinges cause doors to sag, misalign, or even fall off—definitely not the aesthetic or functional outcome you want, especially in a busy kitchen or a home with kids. Plus, if you ignore it, that damage can worsen, turning what’s fixable into a costly replacement project. Many DIY lovers underestimate how crucial it is to repair these holes properly, risking further damage and more expensive fixes down the line. And trust me, ignoring the problem won’t make it go away; it will only get worse over time.
One eye-opening fact I discovered early on is that particle board, though affordable and common, is inherently fragile when it comes to screw retention. A study by the U.S. Forest Service highlights that particle board’s layered structure causes screws to easily loosen or strip when overtightened or repeated often. That’s why an initial mistake I made—using regular screws without considering the material—led to more damage, turning a seemingly simple fix into a nightmare. Fortunately, with some tailored techniques, you can repair and even strengthen those compromised holes, restoring your cabinet’s functionality and appearance.
Have you faced this problem before? Or are you worried it might happen during your renovation?
In this post, I’ll walk you through practical, proven methods to fix a stripped hinge hole in particle board, so your cabinets stay sturdy and beautiful for years to come. We’ll cover everything from DIY tricks to more advanced solutions—no need to replace entire cabinets or hire costly specialists. Ready to save your project and your sanity? Let’s dive into the how-to that made me feel confident working with my DIY kitchen project. And if you want to explore more about maximizing space with storage, check out innovative storage solutions to make your home both beautiful and functional.
Reinforce the Damaged Hole with a Wooden Plug
My first attempt involved filling the stripped hole with a wooden dowel. I selected a slightly larger dowel than the original screw size, coated it with wood glue, and carefully hammered it into the hole. Once dry, I trimmed the excess flush with the surface using a sharp knife. This process effectively created a fresh substrate, providing a solid base for the new screw, which significantly increased holding power and eliminated the wobble once tightened.
Prepare the Surface Before Reinforcement
Clean out any loose debris or dust from the original hole using a vacuum or compressed air. Seal the perimeter around the hole with a bit of painter’s or wood glue to prevent moisture ingress. These steps ensure a secure bond between the dowel and the particle board, preventing future loosening.
Create a New Thread with a Longer Screw
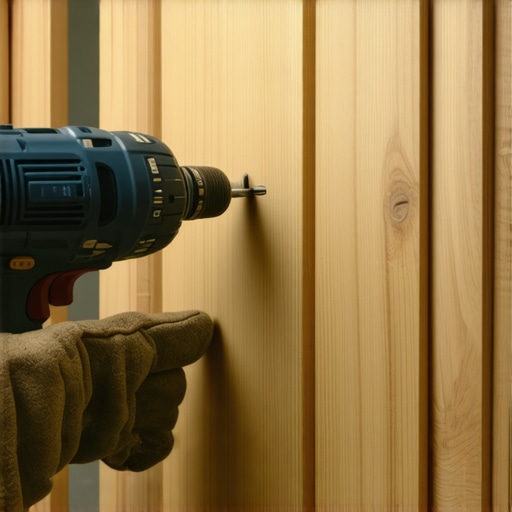
Now that the hole is reinforced, I selected a screw that was 1/4 inch longer than the original. Using a drill with a screwdriver bit, I carefully drove the screw into the repaired hole, feeling for resistance. The new, longer screw engages more material and grips into the solid wood plug, providing enhanced stability. I avoid overtightening to prevent damaging the particle board again. For best results, choose screws made of hardened steel with fine threads designed for wood applications.
Adjust Screw Torque for Maximum Grip
Utilize a torque-limiting screwdriver if available, setting it to apply steady, moderate pressure. Too much force risks stripping the new thread, while too little won’t secure the hinge properly. Tighten until you sense resistance, then back off slightly to avoid overtightening—this balance keeps the screw engaged without further damaging the particle board.
Update and Secure the Hinge
Position the hinge back onto the mounting plate and align the screw holes. Drill pilot holes through the hinge into the reinforced area to ensure accurate screw placement. Drive the screws firmly but with control—this ensures a tight fit without risking new damage. Testing the door’s movement after tightening confirms the repair’s success; a properly secured hinge should swing smoothly without sagging.
Optional: Use Furniture Bonding and Repair Kits for Extra Strength
If the damage was extensive, I considered using a furniture repair kit with epoxy resin and filler designed for particle board. I mixed the components per instructions, applied the mixture into the hole, and inserted the dowel or screw. Once cured, this provides additional structural reinforcement—especially useful for heavy-use doors or frequently moved cabinets.
Prevent Future Stripping with Proper Hardware and Techniques
During the repair, I realized the importance of selecting the right screws and applying appropriate torque. Using specialized cabinet screws with deeper threads and avoiding overtightening preserves the integrity of particle board. Also, spreading the load across multiple screw points reduces stress on each hole, prolonging the lifespan of your cabinet hardware.
If you’re interested in more advanced storage and built-in solutions that stand up to daily wear and tear, explore built-ins that elevate your living room to learn how custom design can provide both beauty and durability. For tips on optimizing kitchen storage, visit maximize space with innovative storage solutions.
Many homeowners believe they understand the basics of custom cabinets and kitchen remodeling, but in reality, there’s a wealth of nuanced factors often overlooked. One common mistake is assuming that matching cabinet styles or finishes is all that matters; however, the real longevity and functionality depend on precise calculations for space, load-bearing capacity, and material selection. For example, many get it wrong by choosing standard plywood or particle board without considering moisture resistance or structural strength, leading to costly repairs down the line. A frequent misconception is that built-ins automatically increase storage without planning for accessibility or future modifications. Advanced homeowners know that integrating smart storage solutions tailored to the specific dimensions and usage patterns significantly improves functionality.
A hidden nuance lies in the importance of proper hardware installation and material compatibility. Poorly aligned hinges or mismatched finishes can quickly diminish a high-end appearance, and these issues often stem from neglecting detailed specifications during the design process. Moreover, the industry’s focus on initial aesthetics sometimes masks underlying issues like thermal expansion or humidity effects that can cause warping or delamination over time. A seasoned expert understands that choosing quality hardware and materials designed for specific environmental conditions can prevent these problems.
How can understanding material science prevent costly cabinetry mistakes?
Research by cabinet industry experts indicates that selecting materials with appropriate grain directions, vapour barriers, and stabilizers enhances durability and aesthetic consistency. Ignoring these details might save money upfront but leads to frequent repairs or replacements, eroding the initial investment. Remember, the subtle art of customization isn’t just about design—it’s about engineering for life. Always consider consulting with specialists, especially when planning complex built-ins or high-traffic kitchens. They can offer insights that go beyond superficial choices and help tailor your project to your home’s unique environment. Want to explore more about designing built-ins that truly stand the test of time? Check out built-ins that elevate your living room for inspiration.
Another overlooked aspect involves the strategic placement of electrical outlets and ventilation. Integrating these during the initial design phase prevents retrofit errors that compromise aesthetics or functionality later. For example, hiding outlets behind floating shelves or within customized drawers maintains a clean look while preserving convenience. Such details are often underestimated but are vital for seamless operation. For an in-depth guide on routing power into cabinetry, visit hidden charging stations. Remember, true craftsmanship is about anticipating future needs and designing for adaptability. Do you have specific concerns about material longevity or layout flexibility? Reach out via contact page for personalized advice.
In conclusion, the secret to avoiding pitfalls in custom cabinetry and kitchen renovation isn’t just in the visible design but in the meticulous attention to nuanced, often overlooked details. Moving beyond superficial aesthetics to understand the science and logistics involved will significantly enhance your project’s success. So, have you ever fallen into this trap? Let me know in the comments.Maintaining your custom cabinets and built-in storage solutions is vital for ensuring long-term durability and beauty. I recommend investing in a high-quality digital angle gauge, such as the iGaging Absolute Digital Angle Gauge, to check and maintain proper cabinet door alignments over time. This tool helps prevent misalignments that can lead to sagging or sticking doors, especially in kitchens with high humidity or frequent use.
Another essential tool is a cordless drill with variable speed settings. Personally, I rely on the Milwaukee M18 Fuel Cordless Drill, which offers precise control for tightening screws without overdriving, thereby avoiding damage to particle board and softwood components. Regularly using this drill allows me to easily perform routine adjustments—tightening loose hinges or installing new apparatus—keeping my cabinets functioning smoothly.
How do I maintain my kitchen hardware long-term?
Consistent cleaning with a gentle microfiber cloth and a mild, non-abrasive cleaner preserves hardware finishes. Applying a thin layer of mineral oil or furniture wax on hinges and drawer slides every few months also prevents rust and buildup. Additionally, lubricate moving parts with silicone spray to ensure smooth operation and minimize wear.
As the trend toward smart home integration grows, I foresee the incorporation of sensor-enabled locks and lighting systems that can be monitored via apps. These innovations will require ongoing firmware updates and maintenance routines with specialized software—making digital tools even more critical for longevity.
For example, using the software suite from warrants like Cabinet Vision can help plan maintenance schedules and visualize potential wear-and-tear issues before they become costly repairs. Implementing such proactive measures will keep your cabinetry in excellent shape for years to come.

The image showcases a professional-grade digital angle finder in use during cabinet adjustments, illustrating the importance of precise measurements for long-term durability.
Lastly, establishing a regular maintenance schedule—checking hinges, drawer slides, and finishes—is a small step that makes a big difference. In my experience, diligent upkeep combined with the right tools extends the lifespan of your investment, saving you time and money in the long run. Need personalized advice on maintaining your custom cabinetry? Reach out through our contact page.
Lessons I Wish I Learned the First Time
- Never underestimate the power of a properly fitted wooden dowel—what seems like a simple fill can dramatically extend your cabinet’s lifespan. My mistake was trying quick fixes without considering material compatibility, which only led to repeated repairs.
- Patience beats haste. Rushing to tighten a screw might seem efficient, but taking the time to reinforce and carefully drill pilot holes actually saves you from future headaches and costs.
- Choosing the right hardware makes all the difference. Investing in high-quality, hardened steel screws with the correct threading saved my hinges from stripping again, especially on particle board surfaces that are unforgiving.
- Don’t ignore the environment. Humidity and temperature swings impact particle board more than you’d think—this knowledge helped me plan better storage and cabinet placement in my remodel.
- Sometimes, a proactive approach, like using a torque-limited screwdriver, prevents overtightening, thus preserving the integrity of the repair and protecting your investment long-term.
Tools and Resources That Changed My Approach
- The modern kitchen remodels guide taught me the importance of material choice and environmental considerations, which are crucial for durability.
- The smart storage solutions resources offered innovative ideas to optimize space, reducing stress on cabinet hardware and preventing future damage.
- Using a power routing guide helped me plan for built-in electrical needs, avoiding unnecessary post-installation modifications that can weaken structures.
- My trusted toolkit, including a digital angle gauge and the Milwaukee M18 drill, provided the precise control needed for careful reinforcement and alignment—saving time and effort.
Keep Building and Innovating with Confidence
Every repair taught me more about the intricate dance of craftsmanship, materials, and patience necessary for lasting cabinetry work. Remember, your ability to troubleshoot and adapt is what turns a simple fix into a skill that elevates your entire project. Don’t hold back—embrace the challenges and turn them into opportunities for learning and growth. The future of custom cabinets and kitchen remodels depends on your willingness to master these subtle yet vital details.
What unexpected lessons have you learned while working on your cabinets or renovation projects? Share your stories below—I love hearing real-world insights that make us all better builders and homeowners.