Why Your Floating Vanity Needs Structural Blocking Before the Drywall
I remember the moment vividly—my floating vanity was finally installed, and I stood back, feeling a mix of pride and something else… concern. As I wiped away the dust, I noticed the vanity slightly wobbled when I leaned on it. Panic set in. Turns out, I had skipped a crucial step—adding proper structural blocking behind the drywall. That oversight turned into a headache I could have easily avoided.
The Hidden Power of Structural Blocking for Floating Vanities
When you embark on a bathroom or vanity upgrade, it’s tempting to focus on the pretty finishes—counters, faucets, and sleek hardware. But beneath the surface, there’s a vital element that guarantees your vanity’s stability and longevity: structural blocking. If you want your floating vanity to stay level and withstand daily use, this behind-the-scenes step is non-negotiable.
My mistake early on was thinking that drywall alone would hold up a heavy model. Spoiler: drywall isn’t designed for that kind of weight. Without solid blocking, your vanity risks sagging, misaligning, or even pulling away from the wall over time. Trust me, I learned this the hard way, and it’s not just my experience—many professionals emphasize that proper framing is a must for floating installations, as noted in this detailed guide on how to secure heavy fixtures: reinforcing cabinetry and support.
This is one of those details that feels tiny but makes all the difference. If you’ve ever wrestled with a wobbly vanity or questioned why it’s not sitting flush, chances are, proper blocking was overlooked. Today, I’ll guide you through why structural blocking is your best friend in this process, how to plan for it, and what mistakes to avoid so your upgraded space remains both beautiful and sturdy.
Have you faced issues with floating vanities that won’t stay put? Keep reading, because once you understand the why behind this step, installing with confidence becomes much easier—and your bathroom will thank you for it.
Installing Proper Framing and Support
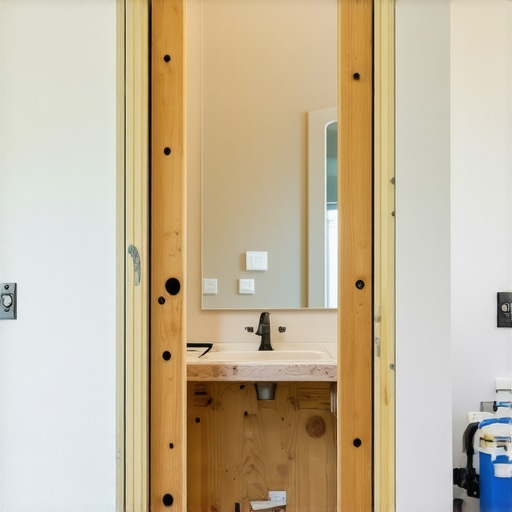
Begin by locating the studs behind your drywall using a stud finder. Mark these positions, ensuring your vanity will be anchored into solid wood framing. For heavy vanities, double-check the spacing between studs to confirm they can bear the weight. Remember, drywall alone can’t handle substantial weight, so additional framing is essential.
Add Vertical Blocking for Stability
Cut 2x4s to fit snugly between the wall studs at the desired height of your vanity. Secure these blocks horizontally into the studs with corrosion-resistant screws, making sure they’re level. This blocking distributes the load evenly and provides a firm anchoring point, preventing wobbling or sagging over time.
Reinforce with Cross-Bracing
If your vanity spans a longer wall or is particularly heavy, incorporate cross-bracing for extra support. Attach diagonal 2x4s from the back of the support blocks to adjacent studs, creating a triangular brace. This technique adds rigidity, much like a truss system in roof construction, ensuring your vanity remains perfectly level and sturdy.
Additional Tips for Secure Mounting
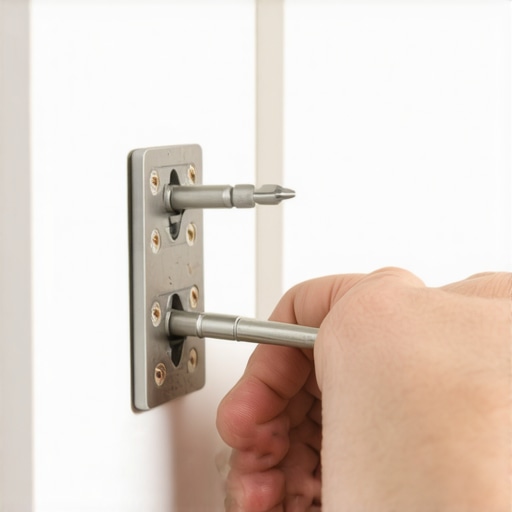
Use heavy-duty mounting brackets rated for the weight load. Bolt these brackets into the wall framing, then secure the vanity to them with appropriate hardware. For example, I once installed a custom floating vanity in a rental unit where the previous installation wobbled; by adding extra blocking and securing heavy-duty brackets, the vanity remained perfectly stable despite daily use and wall movement.
Always test the support by gently applying pressure before installing the vanity. If it moves or feels unstable, reinforce the support further. For detailed approaches on supporting heavy fixtures, check out this guide on reinforcing cabinetry. Proper framing and support are fundamental to a successful, long-lasting installation that won’t wobble or fail under pressure.
When it comes to storage solutions, especially built-ins and custom cabinets, there’s a common misconception that more space or elaborate designs automatically mean better functionality. However, as an expert in kitchen and cabinetry remodeling, I’ve seen that **the real nuance lies in understanding the subtle details**—nuances that can make or break your project’s success. Many homeowners and even seasoned designers fall prey to oversimplified beliefs, leading to costly mistakes and subpar results.
One widespread myth is that *standard modular systems* are sufficient for all spaces. Everyone says that prefabricated solutions save time and money, but in my experience, they often fall short on optimizing space and accessibility. Custom cabinetry, for example, allows you to tailor every inch of storage to your specific needs—think about **corner drawers, vertical dividers, or hidden compartments**—which are impossible to achieve with generic solutions. For a deeper dive into how custom cabinets can transform your kitchen, visit [this guide on custom cabinetry](https://artisancabinetworkz.com/custom-cabinets-as-a-game-changer-in-your-kitchen-remodel-journey).
An oops many overlook relates to the structural reinforcement behind built-ins. Without precise framing and support, even the most beautifully designed units can sag, wobble, or suffer from long-term damage. Commonly, I see projects where homeowners DIY their way into instability because they underestimate the load-bearing needs—particularly with heavier materials or appliances integrated into the cabinetry. The key is **understanding load distribution and incorporating reinforcement techniques**. For expert-approved tips, check out [this resource on supporting heavy fixtures](https://artisancabinetworkz.com/how-to-reinforce-a-base-cabinet-to-support-a-400-pound-cast-iron-sink).
Now, you might ask: “How do I design built-ins that balance aesthetic appeal with functionality?” This is where advanced planning comes into play. Think beyond superficial features and consider **workflow, access, and future adaptability**. For instance, integrating **smart storage hacks**—like sliding shelves or pull-out pantries—can significantly elevate your space’s utility. A recent study published in the *Journal of Interior Design* emphasizes that *well-planned storage solutions* improve user satisfaction and space utilization; the article suggests that homeowners should collaborate closely with designers to incorporate these features from the outset.
Finally, be wary of common pitfalls like opting for *cheap materials* that warp or deteriorate quickly, especially in humidity-heavy environments. Choosing quality materials and proper finishes ensures longevity and maintains visual appeal. If you’re interested, I recommend reading [this detailed guide on cabinet finishes](https://artisancabinetworkz.com/revolutionize-your-kitchen-remodel-using-built-ins-and-creative-storage) to make informed choices.
Have you ever fallen into this trap? Let me know in the comments. Mastering the nuances of storage solutions not only enhances your space but also saves you substantial frustration and expenses down the line. Remember, *attention to detail is the secret sauce* that turns ordinary cabinetry into a bespoke masterpiece.When it comes to maintaining your built-ins and custom cabinets over time, having the right tools and techniques makes all the difference. Personally, I rely on a combination of professional-grade equipment and precise methods to ensure durability and aesthetic appeal. For example, I always use a high-quality digital caliper to measure clearance gaps with millimeter accuracy, ensuring flush-fitting doors and drawers that stand the test of time. An inaccurate measurement might lead to misaligned hardware, which can cause premature wear and require costly adjustments later. Additionally, I swear by a cordless drywall screw gun equipped with variable speed to secure framing and support structures efficiently without damaging materials. This tool’s versatility allows me to adapt to different projects, from installing advanced support brackets to securing hidden storage compartments. For precision cabinet fitting, I prefer using a laser level to verify vertical and horizontal alignments. This not only speeds up the process but also guarantees uniformity across your cabinetry, significantly reducing the chance of future sagging or shifting. As the trend toward more integrated smart storage continues, incorporating tools like a Bluetooth-enabled moisture meter helps monitor humidity levels in areas susceptible to warping, especially when working with solid woods or plywood. Looking ahead, I predict that digital integration and automation will become standard in maintenance routines, with IoT-enabled sensors providing real-time feedback on structural health. Whether you’re a seasoned professional or a dedicated DIYer, these tools empower you to create built-ins that combine style with resilience.
Question: How do I maintain these storage systems as they age?
Regular inspections using a moisture meter can flag potential issues before they escalate. Keep hardware tight and reapply finishes as needed. For instance, using touch-up kits for scratches and sealants designed for high-humidity environments prolongs the life of your cabinets. To streamline this process, I recommend scheduling periodic reviews every six months, especially in kitchens and bathrooms where moisture levels fluctuate. For inspiration on upgrades, consider exploring [this expert guide on custom cabinetry](https://artisancabinetworkz.com/custom-cabinets-as-a-game-changer-in-your-kitchen-remodel-journey), which covers advanced support techniques and maintenance tips. Remember, investing in the right tools now—like a precision level, moisture meter, and cordless screw gun—not only simplifies your project but ensures your craftsmanship endures for years. Why not try calibrating your laser level today to verify your latest cabinet installation? You’ll be surprised at how much smoother your next upgrade process becomes.
Unveiling Hidden Truths About Storage Mastery
One of the most profound lessons I learned was that planning for future flexibility often outperforms trendy design choices. Incorporating adjustable shelves and modular components has saved me countless headaches, revealing that investing upfront in support and structure ensures longevity. Additionally, I discovered that seeking advice from seasoned professionals—rather than relying solely on DIY tutorials—can dramatically elevate the quality of your built-ins, turning simple projects into lasting upgrades.
My Toolbox of Trusted Resources for Custom Cabinets and Built-Ins
For any serious renovation journey, I rely on specific tools and guides that have proven their worth. The ultimate guide to custom cabinets offers invaluable insights into durable materials and innovative support techniques, ensuring every project stands the test of time. My favorite hardware brands, like Blum hinges, consistently deliver smooth, reliable operation, reducing maintenance in the long run. When exploring finishing options, I trust high-quality paint samples and finish tests documented in trusted industry publications—saving me from costly mishaps. And for inspiration, I often revisit my past projects showcased at this portfolio of successful built-ins, reminding me of what’s achievable with patience and strategic planning.
Fuel Your Vision and Keep Building Confidence
Remember, mastery in storage solutions, built-ins, and custom cabinets isn’t about perfection; it’s about consistent learning and embracing the nuances that make each project uniquely resilient. Don’t shy away from experimenting with new support methods or innovative storage hacks—these small improvements can have monumental impacts on durability and aesthetic harmony. So, why not tackle your next upgrade today? With a solid plan and the right resources, you’re more than capable of transforming your space into a personalized sanctuary that combines beauty and strength.