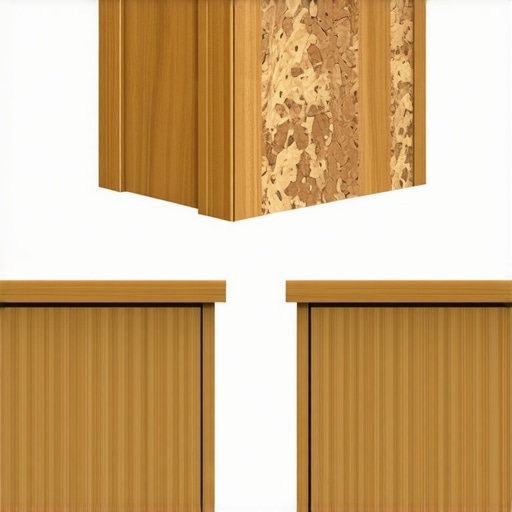
How to Tell if Your Cabinet Maker Is Using Subpar Particle Board
Ever opened a cabinet door during a kitchen remodel and felt that unsettling wobble or noticed a strange crunching sound when you brace your weight against it? That moment of realization—
wait a second, this doesn’t feel right—can be both frustrating and costly. I remember my own experience vividly. I had invested so much hope into transforming my outdated kitchen, only to discover that some of the cabinets felt flimsy and poorly constructed just months after installation. Turns out, not all particle board is created equal, and using cheap or subpar materials can turn a dream kitchen into a DIY nightmare.
Today, I’m going to help you recognize the telltale signs that your cabinet maker might be cutting corners by using inferior particle board. This knowledge can save you from headaches and hefty repairs down the road. Whether you’re planning a full [kitchen overhaul](https://artisancabinetworkz.com/revolutionize-your-kitchen-remodel-using-built-ins-and-creative-storage) or simply upgrading your storage solutions, understanding what’s behind those cabinet panels is crucial.
How to Spot Particle Board That’s Not Up to Par
One of the first mistakes I made early on was trusting a contractor based solely on price. I assumed all particle board was pretty much the same. Spoiler alert: it’s not. The key is to look for signs of low-quality material that could compromise your cabinets’ longevity and stability.
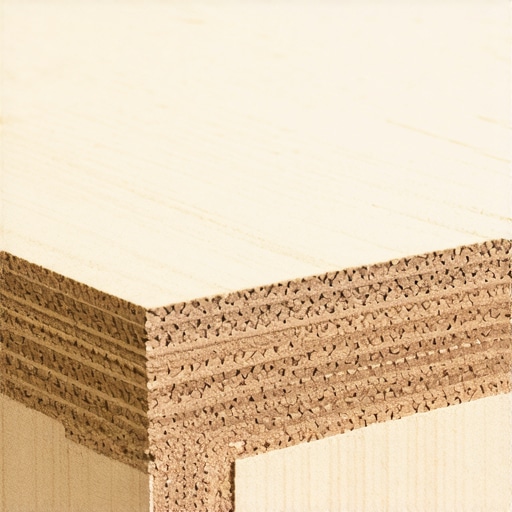
For example, inexpensive particle board often has a rougher surface, uneven edges, and a noticeable smell of chemicals. Over time, these panels may swell or warp, especially in kitchens prone to humidity. When you lightly tap the surface, lower-quality particle board can sound hollow or dull, indicating inferior density and bonding agents. Comparing materials in person can make a big difference—so don’t just rely on pictures or price tags.
And here’s a surprising fact: According to professionals, some types of particle board used in cheap cabinets can begin to degrade within just a few years in moisture-rich environments, leading to sagging shelves and loose doors. That’s why it’s essential to specify the right type of board—like moisture-resistant MDF or high-density particle board—for your kitchen. Want to dive deeper? Check out our guide on [creating seamless kitchen remasters](https://artisancabinetworkz.com/creating-seamless-kitchen-remasters-with-built-in-storage-solutions).
Now, before you start inspecting every panel, let me share a personal mistake I made early in my project—trusting a builder’s word without verifying the materials used. That oversight temporarily masked the problem, only for it to become glaringly obvious a year later. From my experience, doing a visual and tactile check is invaluable, especially when you’re investing in custom cabinetry or high-end finishes.
In the upcoming sections, I’ll walk you through practical steps to identify subpar particle board and ensure your cabinets are built to last. But first, ask yourself: Have you ever had a cabinet or piece of furniture that felt cheap or fell apart prematurely? If so, keep reading—I’ve got the insider tips that could save your remodel.
Inspect the Surface and Edges
Start by visually examining the cabinet panels. Low-quality particle board often has a rough or uneven surface, with visible strands or splinters. Run your fingers over the edges—if you feel a cardboard-like texture or see rough, unfinished edges, it’s a sign of inferior material. I once checked a cabinet during a demo, pressing lightly with a screwdriver; the panels crumbled easily, confirming the poor quality used. Always look for smooth, consistent surfaces and sealed edges to ensure you’re dealing with better-grade material.
Assess the Smell and Sound
Next, smell the panels for chemical fumes—faint or harsh odors indicate cheap adhesives. Tap the surface lightly; a hollow sound suggests low density, which correlates with weaker panels. In my project, I bought a sample panel to compare before ordering, noticing that the cheaper one sounded dull and smelled strongly of formaldehyde. This simple test can save you from future headaches caused by panels that warp or swell in humidity.
Check for Moisture and Warping
Moisture-resistant panels are better for kitchens. Look for signs of warping, sagging, or swelling, especially in areas exposed to humidity. During my renovation, I deliberately left a panel in a bucket of water overnight; the cheap particle board swelled within hours, while the high-quality MDF remained stable. Ask your supplier for moisture-resistant options like moisture-resistant MDF or high-density particle board, and verify these specifications in writing.
Compare Material Density
Press gently on the panels—they should feel dense and firm. Light, spongy panels are likely poor-quality particle board. When I visited a cabinet maker, I tested samples by pressing with my thumb; the dense ones felt substantial, giving me confidence in their durability. High-density panels are less prone to warping and sagging over time, especially in demanding environments like kitchens.
Review Manufacturer Information
Always request detailed specs from your cabinetmaker. Reputable shops will provide datasheets indicating the type of board used, its density, and whether it’s moisture-resistant. I once caught a mistake when I asked for documentation, discovering they initially intended to use cheaper, standard particle board. Clarify these details upfront and verify the materials match your project’s needs, especially if your remodel includes high humidity areas.
Consider Material Alternatives
If your project demands longevity and resistance to moisture, opt for materials like plywood or solid wood veneer instead of particle board. While more expensive, they offer higher durability. For my own kitchen, I insisted on plywood for the cabinets’ sides and bottoms, which has stood up well to moisture and daily use. Exploring these options can be a game changer for your remodel’s lasting quality.
< >Many homeowners believe that choosing built-in storage solutions automatically guarantees a sleek and functional kitchen. However, a frequent misconception is that all customizations are created equally; in reality, the hidden nuances can make or break your project’s success. For instance, some assume that opting for high-end materials alone ensures durability, but overlooking structural details, like proper framing and joinery, can lead to sagging shelves or loose panels over time. This is a trap that even experienced renovators often fall into: trusting aesthetics over engineering.
Additionally, the myth that built-ins are always more expensive than modular options can deter some from exploring smarter, cost-effective solutions. In fact, a well-designed custom built-in can save space and reduce clutter, especially when you leverage innovative storage hacks (check out our guide on [built-ins and storage tricks](https://artisancabinetworkz.com/built-ins-and-storage-hacks-for-a-sleek-functional-kitchen)). Beware of the oops moment where homeowners select solutions based solely on looks, without considering long-term usability or integration with existing architecture.
For advanced readers wondering how to balance aesthetic appeal with lasting functionality, consider the importance of understanding load-bearing capacities and material compatibilities. Clever design isn’t just about fitting everything in; it’s about knowing how each element interacts under daily stresses. According to industry experts, neglecting these nuances often leads to costly repairs down the line, undermining the initial investment.
Moreover, be cautious about the blanket belief that all built-ins are customizable to the same degree. The reality is that some manufacturers limit options that could be crucial for your specific needs—like hidden compartments or power routing. To truly maximize your kitchen’s potential, explore tailored solutions that incorporate smart technology (see our [smart storage ideas](https://artisancabinetworkz.com/smart-storage-solutions-for-small-kitchens-in-2025)).
Have you ever fallen into this trap? Let me know in the comments. Remember, the devil is in the details—so arm yourself with knowledge before committing to your next remodel.
Investing in Reliability: Essential Tools for Long-Term Kitchen Storage Solutions
Maintaining your custom cabinetry and storage solutions is crucial to ensure their longevity and functionality. As someone passionate about durable kitchen design, I recommend equipping yourself with specific tools that streamline maintenance tasks. A high-quality cordless drill with torque control allows you to tighten or replace hinges and drawer slides without damaging delicate finishes. I personally prefer models with adjustable speed settings because they provide finesse when dealing with sensitive hardware.
A digital level is indispensable for realigning shelves or upper cabinets if they sag over time. I use a digital bubble level that displays precise angles, making it easier to restore perfect horizontal surfaces without guesswork. Regularly checking and adjusting your cabinetry ensures everything remains aligned, preventing long-term issues like sagging or misalignment.
An impact driver fitted with specific drill bits (such as high-torque Phillips or Torx bits) excels in removing or installing hardware, especially in tight spaces. I find that impact drivers significantly reduce the effort required and minimize wear on screws and hinges. Investing in high-quality screwdriver bits also pays off, as they resist stripping and last much longer.
Booking Routine Checks and Cleanings
Set a schedule to inspect your storage solutions periodically. I recommend a quarterly review where you examine hinges for squeaks or looseness, clean tracks and slides to prevent dust buildup, and assess the tightness of all fasteners. Using a soft cloth and mild soap, I clean the surface finishes, which helps maintain the aesthetics and prevents grime from embedding into the material.
Applying silicone spray lubricant to hinges and slides can prolong their smooth operation. I’ve seen that routine lubrication significantly reduces squeaking and sticking, especially in humid conditions typical of kitchens. Remember, avoiding harsh chemicals preserves your finishes and hardware integrity.
Leveraging Modern Software and Documentation
To keep track of your maintenance activities, I use digital note-taking apps like Evernote or Notion. These tools help document when hardware was last inspected, replaced, or cleaned. Additionally, referencing manufacturer manuals or technical datasheets—some of which are available online—provides specific guidance tailored for your cabinetry materials, such as moisture-resistant MDF or plywood. For accurate specifications, consult the datasheets linked in professional cabinet manufacturing standards, like those detailed by the Wood Magazine standards.
Embrace Future Trends with Smart Maintenance Gadgets
Looking ahead, smart home integration will revolutionize how we care for built-in storage. Devices like Wi-Fi-enabled hinge sensors alert you when a hinge or slide needs maintenance, preventing larger issues from developing. I predict that in the next few years, incorporating these sensors into cabinetry will become more affordable and widespread, making maintenance more proactive and less reactive.
For now, I highly recommend trying out a digital level combined with routine inspections and lubrication. These simple yet effective methods can save you significant costs and keep your kitchen looking pristine. Why not start today by checking the alignment of your upper cabinets—sometimes, a quick adjustment can make a world of difference!
During my journey assembling built-in storage solutions, I learned that the devil truly is in the details—overlooking small signs of poor quality can lead to costly fixes later on. I once assumed that all particle board was equal, but discovering warped or sagging panels after the fact taught me to scrutinize material density and edge finishes more carefully. The biggest lightbulb moment came when I realized that asking for detailed specifications upfront prevented surprises and saved me time and money. Additionally, I found that routine maintenance with simple tools like a digital level and lubricant keeps custom cabinets looking pristine far longer than neglecting such care. These personal lessons highlight the importance of being vigilant and proactive; they’re lessons I wish I had embraced earlier, saving me headaches and expenses. If you’re planning a kitchen upgrade, remember that understanding your materials and maintaining them regularly can make all the difference in achieving a durable, beautiful space.