The Blind Corner Pivot: Why We Stopped Using Lazy Susans
I still vividly remember the moment I opened a cabinet and watched a small jar slip and knock over half a dozen others, all buried deep in that infamous blind corner. It was frustrating, embarrassing, and a clear sign that my kitchen storage wasn’t working for me anymore. At that time, I believed that installing a Lazy Susan was the perfect fix for tight, awkward corners in my cabinets. But the truth is, those spinny trays often became more of a nuisance than a solution. That lightbulb moment made me re-evaluate everything I thought I knew about optimizing kitchen storage.
The Problem with Lazy Susans and Corner Cabinets
Lazy Susans have long been crowned kings of corner cabinet solutions, but over the years, I noticed a pattern. They tend to spin unevenly, trap debris, and make it difficult to access stored items without a mini scavenger hunt. Plus, with frequent use, they often wear out or become misaligned, leading to more frustration. Early in my renovation journey, I made the mistake of assuming that these rotating trays would be a lifelong fix. Turns out, I was only addressing the symptom, not the root problem of inefficient space utilization.
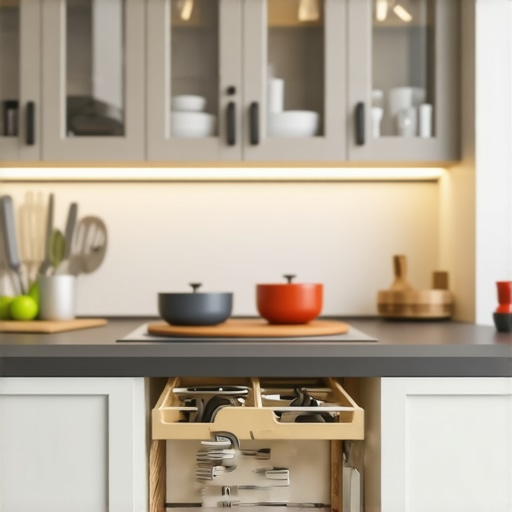
Instead of battling with sticky or wobbly Lazy Susans, I discovered a variety of custom storage options that provide immediate access and make more sense for everyday use. These include pull-out shelves, angled cabinet inserts, and built-in organizers that turn typically dead space into usable storage. Since making the switch, I’ve found that my kitchen not only feels more spacious but is also far more functional, reducing stress during meal prep and cleanup.
If you’re tired of wrestling with your corner cabinets or wondering why your kitchen just doesn’t feel as organized as you imagined, you’re not alone. I’ll show you exactly how to convert that awkward space into a sleek, accessible storage haven. Ready for a kitchen that truly works for you? Let’s dive into the options that finally eliminate the frustrations surrounding corner storage.
Is the hype about custom solutions overblown?
Early in my remodel, I hesitated to invest in custom cabinetry, thinking it might be too costly or unnecessary. My biggest mistake was underestimating how much better well-designed storage could be—sometimes, off-the-shelf solutions just don’t cut it. For example, I learned that bespoke cabinets and built-ins can optimize space more effectively and last longer, which is why I now recommend exploring those options. Curious how this approach might work in your home? You can find inspiration from projects that have transformed kitchens, such as those showcased in [modern kitchen remodels with custom cabinets](https://artisancabinetworkz.com/modern-kitchen-remodels-featuring-custom-cabinets-and-built-ins), and learn how to plan your upgrades for maximum impact.
Measure and Plan Before Cutting
Start by carefully measuring your cabinet space using a tape measure, noting width, height, and depth. I once rushed into building a custom shelf without double-checking dimensions, only to find it didn’t fit after assembly. To avoid this, create a detailed sketch and include all measurements, considering the placement of hinges, handles, and lighting if applicable. Planning ensures your custom solution fits perfectly and functions smoothly.
Choose the Right Material for Durability
Select high-quality plywood or MDF for your shelves and inserts, balancing cost and strength. I once used inexpensive particle board, which bowed under the weight of my pots within months. Opting for solid wood or high-grade plywood offers longevity and a premium look. When ordering, specify finishing options—painted, stained, or sealed—to match your kitchen’s style and protect against moisture.
Build or Assemble Your Custom Components
Using your measurements, build shelves, dividers, or pull-out trays. For example, I built a pull-out for my corner with a side-mounted track system. Use a carpenter’s square to keep everything aligned, and pre-drill screw holes to prevent splitting. For DIY-ers, kits with pre-made parts are available, but custom builds allow you to optimize space precisely. Attention to detail here makes the difference between clunky and sleek movement.
Install with Precision
Securely mount your built-ins with appropriate fasteners, ensuring they are level and flush. I used a spirit level during installation to adjust for uneven floors, which prevented sagging. Anchoring into studs instead of drywall enhances stability, especially for heavy shelves or cabinets. Use a drill and proper anchors; avoid over-tightening, which can warp materials.
Optimize Accessibility and Organization
Arrange items logically, placing frequently used tools at the front. Incorporate adjustable dividers or labels if needed. I added a small sliding basket for baking sheets and trays, which kept everything accessible and reduced clutter. Utilizing innovative storage accessories like corner wedges or angled shelves, as detailed in this guide, can maximize space and efficiency.
When it comes to upgrading your kitchen with custom cabinets or built-ins, many homeowners fall prey to misconceptions that can sabotage their projects. One prevalent myth is that pre-made, off-the-shelf solutions are just as effective as custom-designed options. In my experience, this couldn’t be farther from the truth. While ready-made cabinets might seem budget-friendly, they often lead to wasted space and limited functionality, especially in irregular kitchen layouts. Investing in custom cabinetry ensures that every inch is utilized optimally, providing seamless integration and a polished look, as discussed in this comprehensive guide. Another common misconception is that built-ins are only suitable for large, spacious kitchens. However, smartly designed built-ins can unlock storage in tight spaces, turning underused nooks into practical storage hubs. Understanding the hidden nuances here can make a huge difference.
A frequent mistake I see is homeowners rushing to choose materials without thoroughly understanding their long-term benefits. For instance, choosing low-quality particle board for high-moisture areas can result in warping or damage, which is why I recommend high-grade plywood or moisture-resistant MDF for durability. Skipping this step might save money upfront but costs dearly in repairs later. Additionally, many assume that a quick DIY approach is always best. While DIY can be rewarding, certain aspects like precise measurements, perfect alignment, and seamless finishes often require professional craftsmanship. Not paying attention to details like filler gaps or hardware installation can turn a sleek project into a visual disappointment.
For those considering more advanced solutions, it’s worth asking: How can integrated storage features elevate your kitchen’s functionality without clutter? Experts suggest that incorporating smart storage ideas—such as adjustable shelves, hidden compartments, or pull-out trays—can revolutionize how you use your kitchen space. Incorporating such features not only maximizes capacity but also improves usability, especially in busy households.
Make sure you’re aware of potential pitfalls before starting your project. For example, a common trap is underestimating the importance of proper framing and support for heavy built-ins. Without reinforcement, even the best cabinetry can sag or become misaligned over time. To avoid this, consult with professionals and reinforce walls accordingly. Lastly, don’t overlook the finishes and hardware. High-quality handles, soft-close hinges, and durable paint finishes can significantly extend the lifespan and aesthetic appeal of your cabinetry.
Are you guilty of these misconceptions? Or perhaps you’ve fallen into one of these traps? Let’s dig deeper—share your experiences in the comments! Understanding these hidden nuances ensures your remodel stands the test of time, adding real value to your home.Maintaining your custom cabinets and built-ins ensures they stay functional and beautiful for years. Invest in quality, specialized tools like a digital caliper for precise measurements and a cordless screwed driver with adjustable torque to handle different hardware settings—these are vital for accurate assembly and adjustments. Regularly organize your tools using labeled storage bins or a magnetic strip mounted inside your pantry door, making sure everything is accessible when needed. Implementing routine check-ups, such as inspecting hinges, slides, and hardware annually, prevents costly repairs and preserves smooth operation. For cleaning, use non-abrasive, hardware-specific cleaners to preserve finishes and prevent wear. Embrace preventive measures like applying silicone spray on drawer slides to reduce squeaking and ensure seamless movement over time. Staying consistent with these simple steps keeps your storage solutions from jamming or wearing prematurely, ultimately saving you money and hassle. Future trends point toward smarter, IoT-enabled hardware that can alert you to malfunctions remotely, making ongoing maintenance even more effortless. How do I maintain my built-ins over the years? Regularly inspect all moving parts, lubricate hinges and slides, and address issues promptly to extend lifespan. I recommend using adjustable torque screwdrivers for hardware adjustments—they prevent over-tightening and damage. Try incorporating a routine maintenance schedule with these tools; it’s a simple step that pays dividends. For more advanced storage management, explore smart hardware options detailed in this guide, which can automate part of your upkeep process. Remember, consistent care keeps your investment looking sharp and functioning perfectly for the long haul.
What I Wish I Knew When I Started Transforming My Corner Cabinets
The biggest lesson I learned was that not all solutions are created equal—Lazy Susans, while popular, often fall short in real-world use, leading to more frustration than convenience. I underestimated the importance of precise measurements and tailored design, which are crucial in turning awkward spaces into functional storage. Experience taught me that investing in custom solutions pays off in durability and usability, saving headaches down the line.
Tools and Resources That Changed My Kitchen Game
I personally rely on a high-quality digital caliper for exact measurements, ensuring seamless fitting of shelves and organizers. The expert guide to custom cabinets has been invaluable for planning my remodel, offering insights that cut down guesswork. Additionally, the smart storage solutions resource introduced me to innovative ideas that maximize every inch of space, proving that good design is both art and science.
Your Turn to Innovate in Kitchen Storage
Embarking on your own kitchen upgrade can feel daunting, but remember—every step is a milestone toward a space that truly works for you. With the right tools, resources, and mindset, transforming awkward corner storage into a sleek, accessible system is within reach. Don’t let misconceptions hold you back—start small, measure meticulously, and enjoy the satisfaction of creating a kitchen that’s as functional as it is beautiful.
Have you ever struggled with designing or installing a corner storage solution? Share your experiences below, and let’s learn from each other’s journeys in mastering built-ins and custom cabinets!
,