The Mudroom Shoe Strategy: Why Open Slats Beat Solid Shelves for Wet Boots
I vividly remember the day I ran into my first muddy boot disaster in my mudroom. Shoes piled high, water dripped everywhere, and I realized that my solid shelves weren’t cutting it anymore. That lightbulb moment made me rethink my entire storage strategy. If you’re tired of wet boots causing chaos and mess, you’re not alone. Many homeowners face the same frustration, but there’s a surprisingly simple solution that changed everything for me: open slats.
The Struggle with Solid Shelves for Wet Shoes
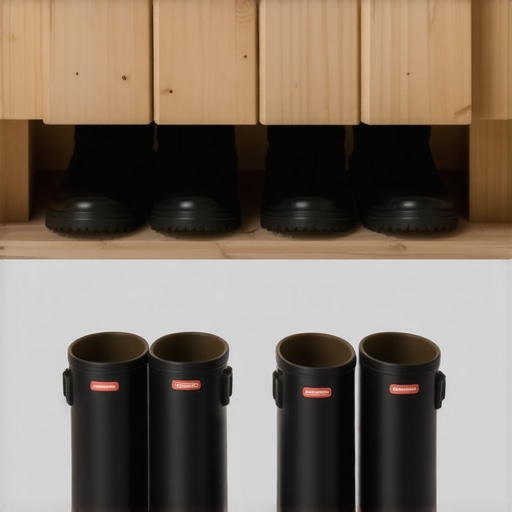
Ever tried stacking your muddy boots on a solid shelf? The water seeps and stagnates, leading to mold, unpleasant odors, and dampness that can damage your footwear. Plus, bulky solid shelves are hard to clean and often trap dirt, mud, and moisture, turning your entryway into a breeding ground for bacteria.
In my experience, the rigidity of solid shelves feels more like a barrier than a solution. They look neat initially but quickly become a soggy, grimy mess. I realized I was fighting an uphill battle every time I tried to keep my mudroom fresh and hygienic.
What if there was a better way?
That’s when I discovered the genius of open slat design for shoe storage. It turns out, this simple tweak can make a world of difference in maintaining a dry, clean, and organized mudroom. Today, I want to share how open slats outperform solid shelves, backed by practical experience and expert insights.
Did you know that moisture-wicking and airflow are crucial for drying wet footwear? According to a study published by the University of Minnesota, proper ventilation can reduce mold growth by as much as 90%. This insight was eye-opening and prompted me to revamp my storage approach.
Throughout this post, we’ll explore why open slats are a game-changer, how to implement them effectively, and common pitfalls to avoid. Whether you’re renovating your mudroom or just looking for quick upgrades, understanding this strategy will help you keep your footwear and entryway neat and hygienic.
Ready to transform your muddy mess into a tidy, inviting space? Let’s dive into the practical steps that make open slats the right choice for wet boots. But first, let’s tackle some doubts you might have about this approach.
Choose the Right Materials and Design
Start by selecting durable, weather-resistant wood like cedar or pressure-treated pine to withstand moisture. Opt for slats with a width of at least 1.5 inches to facilitate airflow and quick drying. I once used leftover cedar planks from a fencing project, which proved sturdy and naturally resistant to moisture, making the installation both economical and effective.
Measure and Plan Your Layout Carefully
Decide on the number of shelves based on your space and how many shoes you need to store. Mark the height where each shelf will mount, ensuring enough clearance for tall boots. Use a level and painter’s tape to outline your measurements, avoiding uneven gaps. Once, I accidentally mismeasured, leading to uneven shelves, so double-checking before drilling saved me hours of adjustment later.
Install Support Brackets Properly
Use sturdy L-brackets anchored into wall studs for reliable support. If your wall lacks studs in the desired locations, install heavy-duty anchors. I learned this the hard way when a shelf sagged under weight; switching to stud-mounted brackets vastly increased stability. Attach brackets level to keep shelves straight and ensure they can support wet footwear without warping.
Spacing Your Slats Effectively
Maintain 0.5 to 1-inch gaps between slats to promote airflow. Use spacers or guides as you screw the slats onto brackets. I once hurried and skipped spacers, resulting in crowded slats that didn’t dry as efficiently. Proper spacing is critical for moisture evaporation and preventing mold.
Finish and Seal the Surfaces
Apply a waterproof sealant or outdoor finish to protect against water damage and extend shelf life. A quick coat of sealant transformed the look, giving a clean, professional appearance. Remember, sealing is especially vital in high-humidity environments to prevent wood decay.
Test and Adjust Your Setup
Place a few wet boots on the shelves and observe airflow and drainage. Check for any sagging or instability. If any issues arise, tighten brackets or adjust slat spacing. Periodic inspection and maintenance ensure your storage remains functional and hygienic over time.
While many homeowners believe that opting for pre-made storage solutions is just as effective, this misconception often leads to costly mistakes. One prevalent myth is the idea that standard-sized cabinets fit all spaces perfectly, but in reality, custom cabinetry is tailored to your unique kitchen layout, ensuring maximum utilization and a seamless look, as discussed in our comprehensive guide on [custom cabinets ideas](https://artisancabinetworkz.com/custom-cabinets-ideas-that-transform-your-homes-style). Furthermore, a common trap is assuming that built-ins are only for aesthetic enhancement. However, thoughtful built-in designs can significantly improve functionality, provide hidden storage, and streamline your workflow—especially when integrated with innovative solutions like hidden electrical outlets or combo zones.
**Avoid the Big Pitfall of One-Size-Fits-All Solutions**: Standard cabinets often force you to compromise on space and accessibility. For example, corner cabinets are notorious for wasted space, but custom-built options with optimized storage, such as lazy Susans or pull-out trays, can unlock their true potential. This nuanced approach maximizes every inch, aligning with principles outlined in expert articles on [smart storage ideas](https://artisancabinetworkz.com/smart-storage-ideas-to-maximize-your-kitchen-space-this-year).
**The Hidden Nuance: Material Selection and Construction Quality** is frequently overlooked. Many assume that all cabinetry materials are equal, but subtle differences in wood species, veneer, or finishing techniques dramatically impact durability and aesthetics. For instance, choosing moisture-resistant plywood over MDF in humid environments extends the lifespan of your cabinets. For detailed insights, exploring our [guide on transforming your kitchen](https://artisancabinetworkz.com/transform-your-kitchen-with-custom-cabinets-expert-guide-for-2025) can be enlightening.
What Advanced Considerations Should Homeowners Be Aware Of When Customizing Storage?
Diving deeper, the critical factor becomes integration with your home’s electrical and plumbing systems. Proper planning prevents hidden costs and installation delays. For example, installing built-in wine racks or refrigerated drawers requires precise coordination with the existing infrastructure, which often goes unnoticed in the planning phase. Consulting with experts, as we recommend in [our expert tips](https://artisancabinetworkz.com/expert-tips-on-selecting-storage-solutions-for-a-perfect-kitchen-upgrade), ensures these nuances are addressed upfront rather than as costly surprises later.
Remember, rushing through these details can lead to discrepancies that alter the aesthetic coherence or hinder functionality. For example, poorly aligned cabinet doors or mismatched grain patterns can detract from the overall design, emphasizing the importance of meticulous craftsmanship. To avoid such pitfalls, work with experienced artisans who prioritize quality and precision—discover how [custom cabinetry](https://artisancabinetworkz.com/custom-cabinets-as-a-game-changer-in-your-kitchen-remodel-journey) can elevate your home.
Have you ever fallen into this trap? Let me know in the comments about your experiences or questions regarding custom storage solutions. Ensuring you’re informed of these subtle but impactful nuances makes all the difference in creating a truly personalized and durable space.Maintaining your custom kitchen and storage solutions requires precision, the right equipment, and ongoing attention. Over years of projects, I’ve identified specific tools and methods that truly stand out in delivering professional results and long-term durability. One essential item I rely on is a high-quality compact laser level, which ensures flawless alignment of cabinets and built-ins. Unlike bubble levels, laser levels provide accurate, continuous reference lines across multiple surfaces, saving time and avoiding misalignments that can compromise aesthetics and function. I prefer models like the Bosch GLL 55, which offers self-leveling capabilities and an impressive range, making it ideal for both small refinements and large-scale remodeling.
For precision drilling, especially when installing custom cabinetry, I turn to a corded drill with adjustable torque settings. A versatile drill like the DeWalt DWD112 provides consistent power without overdriving screws or damaging delicate materials like veneer. Paired with specialty bits, including brad point or Forstner bits, I can create clean, accurate holes for hinges, support brackets, or electrical pass-throughs. These minimize rework and ensure seamless operation.
Long-term results depend heavily on the finishing touches. Applying a thorough sealant is crucial, particularly in humid environments like kitchens or mudrooms. My go-to is a water-based polyurethane, which provides durability while avoiding the strong odors and VOCs associated with solvent-based finishes. For added ease, I use a high-grade foam brush to apply thin, even coats, which cure quickly and resist chipping or peeling.
In future-proofing my projects, I am increasingly adopting digital design tools. Software like SketchUp or 20-20 Design allows me to visualize layouts in three dimensions, identify potential issues early, and make adjustments without costly site visits. These applications also help coordinate with clients, so expectations align perfectly before construction begins.
How do I maintain storage systems and built-ins over time? Regular inspections and maintenance routines are vital. For instance, I check supports, hinges, and drawer slides every six months, lubricating moving parts with silicone spray or graphite lubricant to ensure smooth operation. Sealing or re-sealing wood surfaces periodically prevents moisture infiltration that can cause warping or mold. Consistent cleaning—using gentle, non-abrasive products—keeps surfaces looking pristine and functional.
Predictably, as trends shift, so will the tools and techniques. Automation and smart technology integration are on the rise, with voice-controlled lighting or sensor-activated drawers likely becoming standard. Staying updated with innovations, such as the latest in cabinet hardware or moisture-resistant materials, is essential for sustainable results.
I encourage you to try implementing an advanced tip: invest in a laser level for your next project. Accurate, efficient, and easy to use, it will vastly improve your craftsmanship and the longevity of your installations. Want to know more? Connect with experienced professionals or visit our detailed guide on [maximizing storage](https://artisancabinetworkz.com/maximize-space-with-innovative-storage-solutions-for-every-room) to set your project up for success.
Lessons from My Mudroom Mistakes That Changed Everything
One of the toughest lessons I learned was the importance of flexibility in storage design. Initially, I insisted on rigid shelves, but they turned into mud-traps. Now, I realize that adaptability and proper ventilation are vital—embracing open slats taught me the value of simple, effective solutions over complicated, unchangeable setups.
Another insight was the power of meticulous planning. Skipping measurements and rushing installation cost me time and effort later. Taking the time to measure, double-check, and plan every detail has saved me countless headaches—this patience pays off in every project involving built-ins or custom cabinets.
Lastly, I discovered that material choice is not just about aesthetics but durability. Moisture-resistant woods like cedar can dramatically extend the life of storage units in humid environments, making them a worthwhile investment. Choosing the right materials, coupled with expert finishing tips, ensures your storage solutions stand the test of time.
Tools and Resources That Elevated My Projects
One game-changer has been a high-quality laser level, like the Bosch GLL 55—precision and efficiency in aligning shelves or cabinet frames are non-negotiable. Pairing this with a versatile drill such as the DeWalt DWD112 enables me to perform accurate, clean installations consistently.
For finishing, a water-based polyurethane sealant has become my go-to, offering durability without strong fumes—crucial for kitchens and mudrooms. Additionally, digital design software like SketchUp has allowed me to visualize and tweak my plans before cutting, saving time and material waste. These tools collectively have transformed my approach from guesswork to confident craftsmanship.
Your Next Step in Storage Transformation
Remember, creating a functional, beautiful space isn’t just about following steps—it’s about understanding what works best for your home and lifestyle. Embrace innovative ideas like open slat shelves to promote airflow and dry out wet footwear naturally. Invest in the right materials and tools, and don’t shy away from customizing solutions that fit your space perfectly.
Are you ready to elevate your storage game? Think about where moisture, clutter, or inefficient use of space hold you back. The possibilities are vast, and with a little planning and the right resources, you can turn even the messiest mudroom into an organized sanctuary. Dive into our detailed guides and start transforming your home today!