The Countertop Support Move: Using Steel Brackets Instead of Bulky Corbels
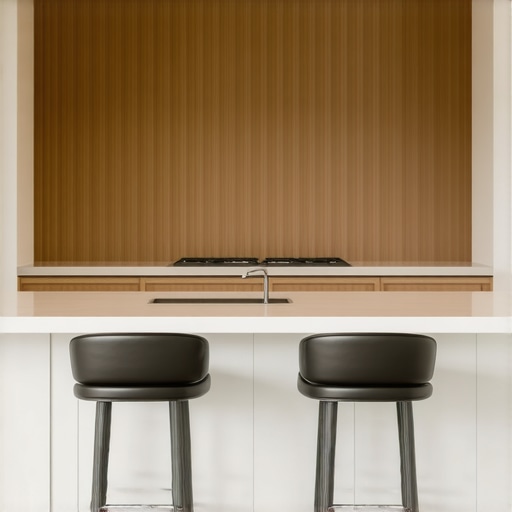
I’ll never forget the day I ruined my first custom kitchen island. I was so excited about adding that stunning overhang for casual seating, but when I finally loaded it up with too-heavy bar stools, the entire thing started to sag—and I hadn’t even installed the supports yet. That moment was a real eye-opener: supporting a heavy countertop overhang isn’t just about aesthetics; it’s about safety, durability, and avoiding costly repairs. As I tackled my own remodel, I realized the traditional bulky corbels I initially considered were more trouble than they were worth.
Discovering a Leaner, Stronger Support System
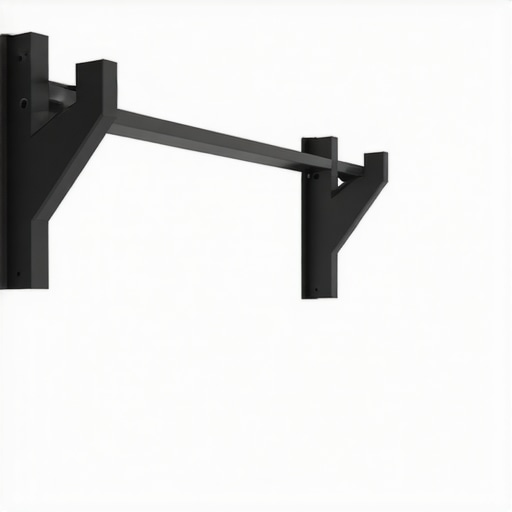
Over time, I experimented with different support solutions, and I want to share what truly made a difference: steel brackets. Their strength, sleekness, and ease of installation transformed my approach to supporting heavy countertops. Today, I want to guide you through this simple yet effective change that can elevate your project from shaky to rock-solid, without cluttering your space with unsightly supports or risking sagging down the line. If you’ve ever faced the frustration of a wobbly overhang or wondered how to support a custom-built island properly, this post is for you. For more ideas on creating stunning kitchen layouts that blend form and function, check out my favorite modern kitchen remodel tips.
Is This Just a Fad or Worth the Hype?
Initially, I too was skeptical about ditching the traditional corbels for what seemed like a more modern, minimalist solution. My early mistake was underestimate the load-bearing capacity of these sleek brackets—they looked so understated. When I first installed them, I worried they might not hold up, but I learned that quality steel brackets are capable of supporting far more weight than bulky corbels, especially when properly installed. This realization saved me time, space, and money, and I wish I had known about it sooner. Do you worry that minimal supports won’t be strong enough? You’re not alone, but let me assure you: with the right brackets and installation, steel brackets are more than capable. In fact, this approach is becoming a popular trend among savvy homeowners and pros alike who want a cleaner, more streamlined look. Don’t fall into the trap of thinking bigger is better—sometimes, smart is better. Ready to see how you can incorporate this into your own space? Let’s dive into the practical steps next.
Prepare Your Materials and Workspace
Start by gathering high-quality steel brackets rated for your specific load. Clear the area beneath the overhang, remove any obstructing items, and ensure your workspace is clean. This initial step is crucial to prevent accidents and give you a clear view during installation. I remember the time I worked late into the evening, only to realize I was missing a vital drill bit—causing a delay. Double-check your tools and materials to avoid such setbacks.
Determine Exact Placement of Brackets
Measure the length of your overhang and decide on the number of brackets needed—typically one every 24 inches for sturdy support. Use a level to mark the precise spots on the underside of the countertop where brackets will be mounted. Visualizing these points helps prevent uneven support, which could cause sagging. I once marked the spots, but forgot to account for hidden pipes—leading to re-measuring and adjustment. Double-check for obstacles before marking.
Install Support Blocks for Stability
Before affixing brackets, attach small support blocks or cleats to the wall studs at your marked points. Secure them with a stud finder to locate the studs, then drill or screw into the wooden framing. These blocks act as a base for the brackets, distributing weight evenly. I learned this from a mistake where brackets pulled out because there was no solid backing—adding support blocks fixed this issue.
Attach Brackets Securely to Wall
Align each bracket with your support blocks, then mark the screw holes. Drill pilot holes to prevent splitting the wood, and fasten the brackets tightly using heavy-duty screws. Ensure each bracket is level and flush to provide a uniform support line. During my last project, I used a level laser to double-check, saving time rerouting screws.
Mount the Countertop Support onto Brackets
With brackets installed, position the underside of your countertop onto the brackets. Drill through the bracket holes into the support structure of the countertop—using appropriate anchors if necessary. Tighten all screws to secure the support. I once forgot to pre-drill, causing the steel to bend; pre-drilling prevents this and ensures a clean installation.
Test the Support System
Finally, lightly load the overhang with weight similar to your expected usage—such as a loaded bar stool. Observe for any signs of movement or wobbling. If stable, you’re ready to finish your project; if not, re-examine the bracket placement and attachment points. Remember, a well-supported overhang not only looks great but ensures safety and longevity. When I did this on my own renovation, I was relieved to see no sagging after a week of use, confirming a job well done.
By following these concrete steps—measuring accurately, choosing the right brackets, securing them properly—you can create a professional-grade support system that withstands heavy use and looks sleek. For additional storage ideas to complement your support system, explore my modern kitchen remodel tips.
Many homeowners believe that installing sleek, modern cabinetry or abundant storage automatically guarantees a flawless kitchen remodel. However, in my experience working with clients, there’s a significant misconception about what truly leads to durable, functional, and aesthetically pleasing spaces. One prevalent myth is that high-end materials alone determine success; in reality, proper planning and understanding nuanced details make all the difference. For example, choosing the right hinges is often underestimated. While soft-close hinges are standard, opting for titanium-core hinges that won’t sag over time ensures longevity, a tip supported by experts like those at this authoritative source. Another common mistake is assuming that built-ins are only for maximizing space—when in fact, their design impacts overall room flow and user convenience. Incorporating hidden compartments or customized niches can elevate both function and style, if executed thoughtfully, which is covered extensively in my guide on built-ins.
Beware of the trap many fall into: prioritizing trendy finishes over structural integrity. For instance, painted cabinets might look stunning initially, but if the topcoat isn’t the right formulation, chips and wear become inevitable. The secret lies in selecting finishes that are engineered for durability—something I delve into on my detailed article.
Beyond materials, misconceptions about storage solutions can sabotage your project. Many assume that more cabinets mean better storage; however, poorly planned layouts lead to clutter and inefficiency. Instead, innovative pull-outs and vertical dividers can optimize space and accessibility, as discussed in this post.
Ever wondered why some kitchen remodels seem to age gracefully, while others stumble? The key is in understanding the hidden nuances—like the importance of proper anchoring for floor-to-ceiling cabinets or ensuring that your support brackets can handle heavy countertops without sagging. Skipping these details is a common mistake that can cost time and money. Remember, a successful kitchen remodel combines stylish design with meticulous execution, from the choice of hardware to the arrangement of every storage compartment.
Ready to elevate your project? Keep these insights in mind, and don’t fall prey to superficial solutions. For tailored advice on your remodel, visit my contact page. Have you ever fallen into this trap? Let me know in the comments.
Invest in Quality Tools for Precision and Longevity
Having the right tools can make or break the quality of your kitchen renovation. I swear by a high-torque cordless drill with adjustable clutch settings; it provides the control needed for delicate cabinet work and heavy-duty tasks alike. A good speed square isn’t just a measuring device—it ensures your cuts and fittings are perfectly aligned, preventing costly rework. For more intricate tasks, I rely on a digital caliper, which helps measure hardware and openings down to the millimeter, ensuring custom components fit exactly as planned. These tools are investments that pay off by increasing efficiency and reducing errors, ultimately extending the lifespan of your remodel.
Maintain Your Cabinets and Storage Systems
Proper maintenance keeps your custom cabinets and built-ins looking pristine and functioning smoothly over time. Regularly use a soft microfiber cloth to wipe away dust and fingerprints—especially on matte finishes that tend to show smudges. For cleaning, I recommend a mixture of warm water and a few drops of mild dish soap, followed by drying with a soft cloth to prevent moisture damage. Applying a silicone-based conditioner once a year ensures that hinges and moving parts stay lubricated, diminishing squeaks and stiff movements. Taking these small steps preserves the integrity of your cabinetry and prevents costly repairs down the line.
How do I keep my storage solutions in top shape for the long haul?
Consistent checks on pull-out drawers, soft-close mechanisms, and hinges help identify issues early. Replacing worn-out or damaged hardware before breakdowns occur can save you from disruptive renovations later. For innovative solutions, consider upgrading older slides with heavy-duty models that support more weight and last longer—like those discussed in this post. Now, try applying a lubricant to your cabinet hinges today; a simple maintenance step that boosts smooth operation and extends the life of your hardware.
Tools for Scaling Your Remodel Efforts
As your space evolves, so should your toolkit. For larger projects, a portable dust extractor helps keep your work area clean without the hassle of cords and bulky vacuums, making ongoing maintenance less tedious. For precise measurements across multiple rooms, a laser distance meter cuts down on manual errors and speeds things up—critical when planning additional built-ins or extending storage solutions like the ones outlined in this article. Looking ahead, technological advancements are pointing toward smarter, connected tools that can sync measurement data directly with project management apps—streamlining maintenance and scaling efforts.
Making Maintenance Seamless: Your Next Step
Set a quarterly reminder to check all hardware and clean your cabinetry; this routine keeps issues from festering. Or, upgrade your hinge hardware now to those Titanium-core hinges—a smart move that ensures long-term durability, especially in high-traffic kitchens. Remember, maintenance isn’t just about fixing problems—it’s about proactively ensuring your customized space continues to serve your needs beautifully for years to come. Start by trying out one of these advanced tips today, and see how much more your kitchen can deliver over time.
What I Wish I Knew When Supporting Kitchen Overhangs
One of the most valuable lessons I learned is that minimalist supports, like sleek steel brackets, can outperform bulky traditional corbels both in strength and aesthetics. It’s tempting to stick with conventional methods, but embracing innovative solutions transformed my kitchen projects—and saved me from future headaches. I also realized that proper installation steps, such as securing brackets to wall studs and supporting blocks, are critical; overlooking these details can compromise safety and durability. Finally, I’ve discovered that understanding load-bearing capacities beyond appearance prevents unexpected sagging, ensuring your custom kitchen island remains stunning and functional for years to come.
My Go-To Tools for Successful Kitchen Renovations
Over time, I’ve relied on several tools that make a world of difference. A high-quality cordless drill with adjustable torque enables precise fastening without damage. A sturdy level, especially a laser level, guarantees perfectly aligned supports and cabinets, saving time and rework. For measuring intricate spaces, a digital caliper provides accuracy that standard tapes can’t match. These tools have become essential in my toolkit for creating seamless, long-lasting kitchen support systems and ensuring every detail is spot-on.
Designing a Kitchen You Can Be Proud Of
The journey to a beautiful, functional kitchen starts with intentional choices and attention to detail. Selecting durable finishes and high-quality hardware, like titanium-core hinges, prevents common issues like sagging or chipping—something I learned from experience and trusted sources. Thoughtful layout planning, including hidden storage and support placements, enhances usability and aesthetic appeal. Maintaining open communication with professionals and continuously learning about new materials or hardware can elevate your project from ordinary to extraordinary. Remember, small upgrades and informed decisions have a ripple effect that transforms your space into a timeless masterpiece.
Your Turn to Impact Your Kitchen’s Future
Investing in the right support systems, tools, and materials can make all the difference in creating a kitchen that is both beautiful and durable. Don’t hesitate to experiment with innovative solutions like steel brackets or hidden supports—your future self will thank you. Start planning your next project today, focusing on quality and smart design choices. What’s the one support upgrade you’re most excited to try in your kitchen? Share your plans below and let’s inspire each other to build better spaces!
**[Explore more about modern kitchen remodels with custom cabinetry and built-ins](https://artisancabinetworkz.com/modern-kitchen-remodels-featuring-custom-cabinets-and-built-ins)**.