The Heavy Mixer Move: Why a Built-In Lift Saves Your Back and Your Countertops
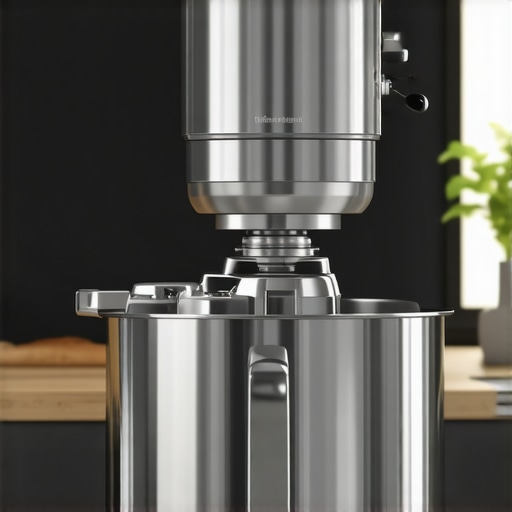
It was a typical Saturday morning in my kitchen—pots clattering, the smell of brewing coffee filling the air, and I was trying to lift my heavy stand mixer out of its cabinet. As I strained and winced, it hit me—there’s got to be a better way. That moment was my lightbulb, realizing how much unnecessary pain and wear I was putting my back and countertops through. Maybe you’ve faced the same struggle, lugging bulky appliances out just to get a simple task done, only to regret it later.
Why a Built-In Lift Could Be Your Kitchen’s Best Friend
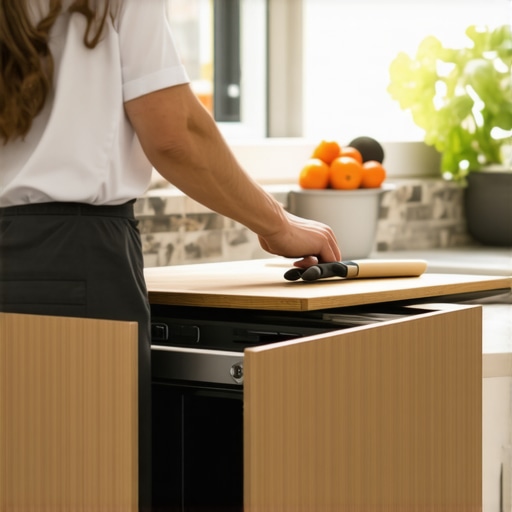
The truth is, heavy mixers, blenders, and other bulky appliances are staples in our kitchens, especially with the rise of gourmet cooking and baking hobbies. But every time you lift, twist, or drag these giants out, you’re risking back injury and potential damage to your beautiful countertops. That’s where a built-in mixer lift comes into play—a simple yet revolutionary solution that keeps heavy appliances accessible without the physical strain.
Is the Hype About Mixer Lifts Just Overblown?
Early in my remodeling journey, I made a rookie mistake—assuming that a built-in lift was a fancy luxury I didn’t need. Turns out, neglecting these innovations can lead to repeated back pain and even damaged cabinetry. A built-in lift isn’t just about convenience; it’s about safety and preserving your home’s value. According to a study by the American Chiropractic Association, lifting heavy objects improperly is among the top causes of back injuries at home. So, investing in a quality lift can save you from costly doctor visits and pain in the long run.
Have you ever struggled with lifting or reaching for your heavy kitchen gadgets? If so, you’re not alone—and there’s a smarter way. Up next, we’ll explore exactly how these lifts work and how they can seamlessly integrate into your kitchen, transforming your space into a safer, more functional area. For more ideas on stylish remodeling, check out our guide to [custom cabinets that transform your home’s style](https://artisancabinetworkz.com/custom-cabinets-ideas-that-transform-your-homes-style).
Start with Precise Measurements and Planning
Before cutting or installing anything, measure your appliance and available cabinet space accurately. Use a tape measure to record height, width, and depth of your heavy mixer, then compare these dimensions with your cabinet where the lift will be integrated. Sketch a simple diagram and note clearance for movement. I once misjudged my cabinet’s height, which led to a messy trial-and-error process before realizing I needed a custom-sized lift platform. This upfront planning saves time and prevents costly mistakes.
Choose the Right Lift Mechanism
Select a lift designed to handle the weight of your appliance. Heavy-duty piston lifts or motorized mechanisms are popular choices. For example, I opted for a hydraulic piston lift rated for 50 lbs, which smoothly raised my mixer with minimal effort. When shopping, review the weight capacity and compatibility with your cabinet. Consulting [built-ins that elevate your living rooms functionally](https://artisancabinetworkz.com/built-ins-that-elevate-your-living-rooms-functionality) can provide inspiration for seamless integration.
Prepare the Cabinet for Installation
Remove the cabinet door and hardware, then reinforce the interior walls with vertical and horizontal braces if necessary. Using a level, mark the exact location where the lift will be installed, ensuring balance and easy access. I used a stud finder to locate framing to secure mounting brackets, preventing any sagging over time. This step is crucial; unstable mounting can cause the lift to malfunction, much like how bracing heavy cabinets ensures longevity.
Install the Lift Components
Fit the hydraulic or mechanical lift into the pre-measured cavity, attaching mounting brackets to the cabinet interior and the appliance platform. Double-check that the lift is level and centered. I initially installed mine slightly crooked, resulting in uneven movement. Realigning the system improved the operation noticeably. Secure all bolts tightly and test the lift’s movement multiple times before replacing the cabinet door.
Add Finishing Touches and Safety Features
Cover any exposed hardware with trim or wood panels to match your cabinetry for a polished look. Install a soft-close hinge system to prevent abrupt slamming when lowering the appliance—a feature that I found invaluable to extend the life of my cabinets. Consider installing a safety lock or slow-down mechanism for controlled movement. These details transform a DIY installation into a professional-looking, enduring fixture in your kitchen.
Test and Adjust for Smooth Operation
Now, operate the lift several times, observing for jerks or uneven movement. Fine-tune the tension or hydraulic settings if available. I had to make minor adjustments to my lift’s pressure, which made its operation nearly silent and effortless. Proper testing ensures safety and functionality, much like calibrating your cabinets for perfect alignment and ease of use.
Ensure Long-Term Durability and Maintenance
Regularly inspect the lift mechanism for leaks, rust, or wear. Lubricate moving parts if recommended by the manufacturer. Keep the area clean and free of debris. I learned the hard way that neglecting maintenance caused squeaking noises, which I fixed by applying a lithium-based lubricant. Incorporating routine checks prolongs the lifespan of your built-in lift, keeping your kitchen running smoothly for years.
While many homeowners believe that choosing built-in cabinets and storage solutions is a straightforward process, the truth is, there’s a lot more beneath the surface that can make or break your kitchen remodel. A common misconception is that premium materials are always the best choice, but in my experience, understanding the nuances of material properties—like moisture resistance and expansion rates—is crucial to long-term durability. For example, some steered towards traditional hardwoods without considering humidity fluctuations, leading to warping and buckling over time; instead, bio-resin or basalt fiber cabinets offer superior stability in varying climates.
How do advanced materials influence the longevity of custom kitchen cabinetry?
Experts like those at the National Kitchen and Bath Association recommend evaluating material performance based on environmental conditions rather than just aesthetics or initial cost. Failing to account for these factors can result in costly repairs or replacements, defeating the purpose of investing in customized storage. Additionally, many assume that all built-ins are easy to incorporate into existing structures, but the reality involves precise measurements and understanding load-bearing limits—especially with heavy appliances and stone countertops. Overlooking such details can lead to sagging or compromised structural integrity, as highlighted in articles about supportive framing techniques. For an in-depth look, see our guide on how to brace your cabinets against heavy stone counters.
A common trap during a remodel is underestimating space requirements for future needs. Homeowners often opt for sleek, minimal designs but later regret the lack of flexibility. Incorporating modular and smart storage solutions ensures adaptability, especially as family needs evolve. Belligerently assuming that a standard layout will suffice ignores the importance of personalized arrangements—something that I learned the hard way when trying to cram a bulky mixer lift into tight spaces. Explore our innovative storage solutions for every room to discover how thoughtful planning creates a more functional kitchen. Remember, the goal isn’t just aesthetics but optimizing usability with precision. So, have you ever fallen into this trap? Let me know in the comments.
To ensure your investment in custom cabinets, built-ins, and storage solutions pays off over the long term, having the right tools and maintenance routines is crucial. I rely heavily on a combination of precision measuring instruments, high-quality lubricants, and professional-grade cleaning supplies. For instance, I swear by a digital caliper for checking cabinet and appliance dimensions after modifications, ensuring everything fits perfectly and avoids misalignments that could cause sagging or functional issues over time. Additionally, a silicone-based lubricant like Super Lube is my go-to for smoothing hinges and slides, reducing squeaks and wear processes that happen naturally with regular use.
Effective Tools for Ongoing Maintenance
Investing in a cordless drill with variable torque settings simplifies tightening and loosening cabinet hardware, especially when balancing delicate finishes versus stubborn screws. A magnetic screw holder keeps parts organized during adjustments, saving time and preventing loss. For cleaning, I prefer microfiber cloths combined with mild, non-abrasive cleaners designed specifically for wood and laminate surfaces. They remove dust and grease without damaging delicate finishes, which is vital for maintaining a sleek look in your remodeled kitchen. Moreover, a small air compressor can help clear debris from hinges and slides without disassembling entire units, prolonging their operational life.
How do I keep my custom cabinetry pristine long-term?
Long-term results depend greatly on regular, targeted maintenance. Schedule quarterly inspections to check for loose hardware, signs of moisture, or wear on sliding mechanisms. Applying a protective coating specific to your cabinet material can block out humidity and trap dirt, especially in climates with high moisture. For example, UV-resistant matte finishes are gaining popularity because they resist fingerprints and scratches better than glossy surfaces.Using these tools and routines, you can maintain your kitchen’s beauty and function for decades, turning your renovation into an enduring asset. For more ideas on enhancing your space, check out our guide to modern kitchen remodeling featuring custom cabinets and built-ins. As technology evolves, new maintenance solutions like smart hinges with self-lubricating mechanisms are becoming more accessible, potentially reducing even further the time and effort needed for upkeep. I recommend experimenting with a silicone lubricant for hinges—it’s a small step that yields big results in longevity and quiet operation.
Ready to streamline your maintenance routine? Incorporate a small bottle of high-quality lubricant into your toolkit and apply it to hinges and drawer slides every six months. Trust me; your future self will thank you for the smoother, quieter operation and the extended life of your cabinetry.
Lessons I Can’t Unlearn About Built-Ins and Kitchen Ease
Trust me, the biggest eye-opening realization was how overlooked details, like precise measurements and material choices, can make or break your kitchen dreams. I once thought a quick measurement was enough, only to find my sleek custom cabinet wouldn’t open fully—teaching me the importance of double-checking every dimension. Also, investing in high-quality hardware and finishes might seem costly initially, but they pay off by preventing early wear and tear, saving you time and money. Another lesson was that blending functionality with aesthetics isn’t just a trend—it’s a must. A smart storage solution can turn chaos into calm, especially when designed with your specific needs in mind. Lastly, patience is key. Rushing the installation or choosing shortcuts can lead to headaches later, so take your time planning and executing each step for a result that lasts.