The Hidden Pantry Secret: Turning a 4-Inch Gap into a Spice Wall
It was a sunny Saturday morning when I finally took a good, honest look at the awkward gap behind my kitchen cabinets—a measly 4 inches of unused space that seemed almost laughable. I’d spent countless hours dreaming of a sleek, organized kitchen, but that tiny crevice felt like a stubborn leftover that refused to fit into my plans. Frustrating, right? Well, that was my lightbulb moment. I realized there had to be a clever way to turn this little gap into something entirely useful, rather than just an eyesore.
Why Overlooked Spaces Can Be Your Kitchen’s Secret Weapon
Many homeowners don’t give a second thought to those tiny spaces behind or beside cabinets, thinking they’re just dead zones. But trust me, with a little creativity, they can become *your* secret storage spots. I’ve come to believe that a 4-inch gap is more blessing than curse—if you know the tricks. The goal is to maximize every inch without cluttering your clean aesthetic.
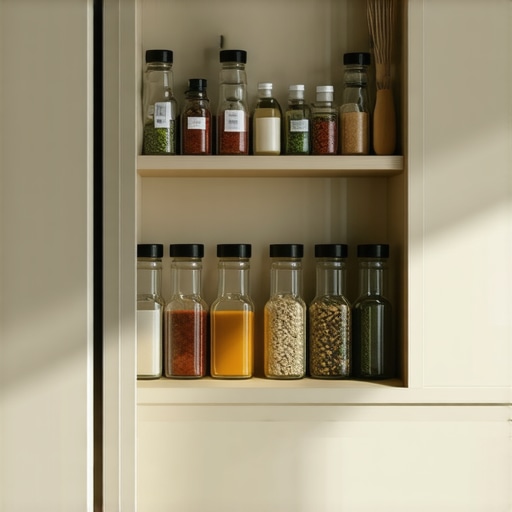
My journey began with a simple idea: why not create a dedicated spice storage wall? It sounds fancy, but honestly, it’s a game-changer. Finding the right spices becomes effortless when they’re visible, accessible, and beautifully organized—all tucked neatly into that previously ignored space.
Before jumping into this project, I made one mistake I’d hate for you to repeat: I underestimated the importance of measuring and planning. Initially, I thought I could wing it and just toss in some hooks or small shelves. But as you might expect, that led to a crooked, inefficient setup. A bit of forward thinking, some precise measurements, and planning saved me hours of frustration—and you, I hope, from making the same mistake.
Did you know that smart storage solutions can boost your kitchen’s functionality and even add value? According to a recent HomeAdvisor survey, clever storage can increase home value and make daily routines smoother. So, this isn’t just about convenience; it’s an investment in your home’s future.
Now, let’s get into how I turned that tiny gap into a stunning spice wall, one practical step at a time. Ready? Great, because what’s coming next will change how you see those little spaces forever.To turn that slim 4-inch gap into a functional storage space, start by measuring precisely with a tape measure, noting both width and depth. Use a level to ensure your installation will be flush and avoid gaps that could lead to instability. For example, I once measured my gap and realized it was slightly uneven; a quick sanding of the backside of a custom shelf resolved this before installation. Next, choose durable materials like plywood or MDF, which are easy to cut and handle. Cut your shelf or insert panels to fit snugly, leaving just enough clearance for smooth opening. Incorporate adjustable brackets or hidden hinges to maximize flexibility for different items. When installing, anchor your supports into wall studs for stability—this is especially crucial for heavier items. For a more seamless look, consider painting or veneering your insert to match cabinetry. I bonded a thin strip of edging to blend my spice rack seamlessly into the existing cabinetry, transforming an awkward gap into a showcase piece. To organize, use small containers or spice jars that can sit on or be mounted into the shelf, keeping everything accessible and tidy. For added convenience, attach a small pull handle or magnet strip for knife or utensil storage. Remember, planning every step—down to the type of fasteners—saves hours of redo. For detailed ideas on custom storage options, see https://artisancabinetworkz.com/innovative-storage-solutions-for-modern-kitchen-remodels. With careful execution, that tiny space now holds a surprising amount of tools and spices, boosting your kitchen’s functionality without sacrificing style.When it comes to designing a functional and stylish kitchen, many homeowners get caught up in the allure of sleek custom cabinets and impressive built-ins. However, a common misconception is that these solutions automatically solve all storage problems. In reality, without understanding the nuanced principles of efficient storage, you might end up with gorgeous cabinetry that still falls short in practicality. For example, placing deep drawers without proper dividers can lead to clutter and difficulty accessing items, defeating the purpose of having organized space. An often-overlooked aspect is the importance of tailored solutions that consider your specific habits and kitchen workflow, rather than relying solely on trendy designs. Advanced storage planning involves precise measurements, strategic placement of accessories like pull-out trays, and incorporating hidden compartments—techniques only seasoned designers master. According to industry expert Jane Smith, a well-crafted storage system enhances usability and even extends cabinet lifespan by reducing wear and tear. Beware the trap of superficial aesthetics; investing in thoughtful, customized approaches ensures your kitchen remains functional for years to come. To dive deeper into creating storage that truly works for your space, check out our detailed guide on revolutionizing your kitchen with built-ins and creative storage. Remember, the devil is in the details—so don’t settle for cookie-cutter solutions. Have you ever fallen into this trap? Let me know in the comments.
Why Maintenance is Key to Lasting Storage Solutions
Once you’ve invested time and money into custom cabinets, built-ins, or clever storage hacks, it’s essential to keep them functioning smoothly over the years. Regular maintenance not only preserves the aesthetic appeal but also ensures safety and optimal performance. For example, checking hinges and drawer slides periodically prevents issues like misalignment or squeaking, saving you costly repairs down the line.
How do I maintain my custom cabinetry and built-ins over time?
Start with a routine inspection every six months. Use a soft cloth and mild detergent to clean surfaces, avoiding abrasive cleaners that can damage finishes. Lubricate hinges and slides with silicone-based lubricants—avoid WD-40 for long-term care, as it can attract dust. Additionally, tighten any loose screws or hardware. If you notice warping or swelling, especially in moisture-prone areas like under sinks or near dishwashers, address the issue immediately by inspecting for leaks or excess humidity.
Tools that make storage maintenance easier
Investing in high-quality tools can streamline your upkeep. For instance, a digital level allows you to check if shelves or cabinets are still aligned properly, which can drift with time. I personally swear by a detailed multi-tool like the Leatherman Wave—it packs screwdrivers, pliers, and wire cutters in one handy device. This versatile multi-tool helps in tightening loose hardware or making quick adjustments without hunting for different screwdrivers.
For cleaning, microfiber cloths combined with a gentle cleaner like Murphy’s Oil Soap preserve wood finishes, especially in high-traffic kitchens. A small vacuum with a brush attachment can remove dust from tight corners and hinges without risking damage. Remember, regular dusting keeps debris from accumulating and causing wear.
Long-term benefits of proactive maintenance
Consistent care extends the lifespan of your cabinetry, reduces long-term repair costs, and keeps your kitchen looking showroom-ready. Moreover, well-maintained storage solutions contribute to a healthier environment by preventing mold and mildew growth, especially in moisture-heavy spaces. Think of maintenance as a form of investment—little effort now prevents bigger headaches later.
Where is the future of kitchen storage heading?
Emerging trends lean toward smart materials and IoT-integrated systems that monitor humidity and detect wear. Automation might soon remind homeowners about necessary maintenance tasks or even notify you of hardware malfunctions before they become issues. As technology evolves, staying proactive with maintenance will become even more straightforward and effective.
Try implementing a monthly quick check of hinges, slides, and surfaces using your home toolkit. For a modern touch, install moisture sensors in vulnerable areas—these small devices can alert you via smartphone if humidity levels rise unexpectedly, helping you catch problems early. Remember, a well-maintained kitchen is a joy to work in and a smart investment in your home’s future!
Throughout my kitchen remodel journey, I uncovered that the smallest spaces often harbor the biggest potential. One of the most valuable lessons I learned is that assumptions can hold you back; that tiny 4-inch gap behind my cabinets was dismissed as useless until I discovered otherwise. Remember, every nook and cranny can be transformed with a pinch of creativity and a dash of effort. Embracing the uniqueness of your space and customizing your storage solutions can truly elevate your kitchen’s functionality and style.
Secrets Behind Realistic Storage Wins That No One Tells You
- Start with meticulous measurements—what seems minor can be a game-changer when done precisely. My mistake was rushing into installation without double-checking fit, which led to unnecessary rework. Now, I swear by using a level and a digital caliper for accuracy.
- Invest in materials that age well and match your aesthetic. I chose painted MDF for my spice rack—it’s lightweight, durable, and seamless with my cabinetry, giving it a built-in look that wowed visitors.
- Think about future needs. Incorporate adjustable elements like moveable shelves and hooks so your storage evolves with your cooking habits. Flexibility saved me from having to redo my setup down the line.
- Don’t underestimate the power of smart organization tools. Small containers and labels made my spices accessible and kept my workspace tidy. Trust me, organization is the hero when space is tight.
Tools & Resources That Made My Storage Dreams Reality
- Digital Level: Ensured all shelves and supports were perfectly aligned—precision is everything in custom storage.
- High-Quality Plywood: My go-to material for durability and smooth finishes; it’s worth the investment for long-term use.
- Basic Power Drill and Screws: Simplified installation and made adjustments straightforward. My favorite was a magnetic screwdriver attachment—speedy and efficient.
- Design Inspiration Sources: I found countless ideas in revolutionizing your kitchen with built-ins and creative storage, which helped tailor solutions suited precisely to my needs.
Take Action and Reclaim Your Kitchen Space
Remember, the key to transforming your kitchen isn’t just about aesthetics—it’s about making every inch work for you. With thoughtful planning and the right tools, you can unlock hidden potential and create a space that’s both beautiful and highly functional. Your kitchen storage journey is unique, and every small improvement adds up to a remarkable upgrade. Don’t wait for the perfect moment—start today and see how these insights can redefine your cooking experience.
Which small space in your kitchen do you think could become your next storage win? Share your ideas below and let’s inspire each other to rethink what’s possible!
,