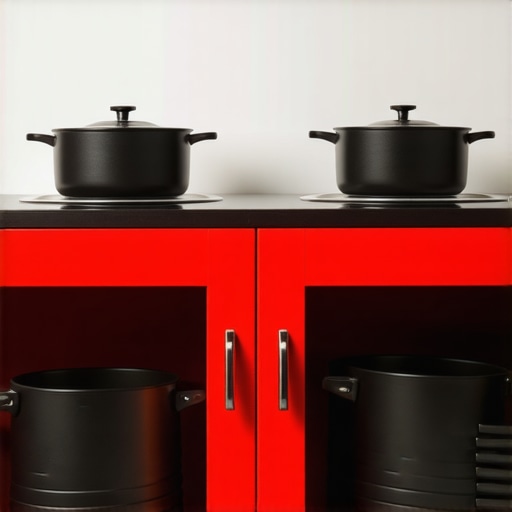
Why Deep Drawers Beat Lower Cabinets for Storing Heavy Dutch Ovens
It was a typical Sunday morning when I suddenly realized my kitchen setup was holding me back. I was wrestling with a bulky cast-iron Dutch oven, trying to squeeze it into a lower cabinet that just couldn’t handle the weight, and I cursed under my breath. That frustrating moment turned into a lightbulb moment — I had been neglecting one of the simplest yet most overlooked upgrades: swapping traditional lower cabinets for deep drawers. From that day, my approach to kitchen storage changed entirely.
The Hidden Problem with Conventional Cabinets
Every time I reached for my heavy Dutch oven, I’d dread the struggle—bending down, awkwardly twisting, risking drops. Lower cabinets seem convenient, but when they’re filled with heavy pots or cast-iron pans, they quickly become a hazard. The shelves bow under weight, the doors creak with strain, and retrieving those essential cookware pieces feels like a risk to my back.
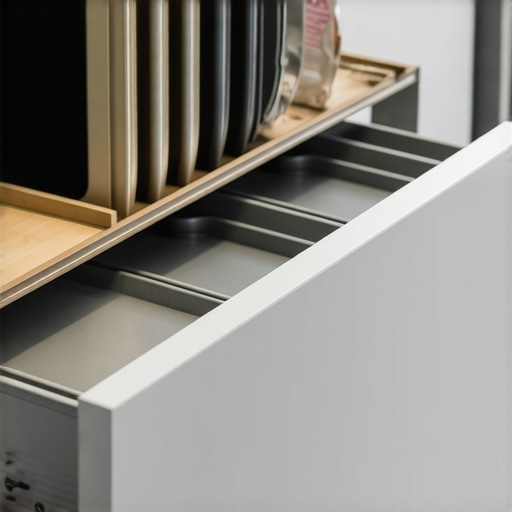
Over the past few years, I’ve experimented with different storage solutions, and I can tell you with confidence that *deep drawers* are game-changers. They allow you to pull out your heavy items effortlessly, without the need for awkward angles or unnecessary bending. Plus, because they’re built to handle weight—often reinforced with sturdy slides—they last longer and maintain functionality better than traditional lower cabinets.
Is Deep Drawers Really Better Than Standard Cabinets? Budding Skeptic, You Might Think It’s Just Hype
I admit, I was initially skeptical about replacing cabinetry in my existing kitchen. Was it really worth the investment? Would it just be a trendy upgrade that quickly lost its charm? Early on, I made the mistake of installing shallow, narrow drawers that couldn’t fit my larger pots—lesson learned. Today, I’m here to tell you that choosing the right deep drawers can transform your kitchen’s efficiency.
If you’re tired of the constant struggle or worried about durability, don’t worry—that’s a common concern. But numerous studies and reviews show that heavy-duty, well-designed deep drawers can support upwards of 100 pounds, making them ideal for storing heavy cookware and even small appliances. For example, the experts at Artisan Cabinetry highlight how innovative storage solutions can streamline kitchen workflows.
So, are you ready to transform your cooking space and make heavy pots easier to manage? If you’ve faced similar frustrations, keep reading. I’ll guide you through exactly why deep drawers are a worthy upgrade and how to implement them effectively. Trust me, once you experience the ease and accessibility they offer, you’ll wonder why you didn’t switch sooner. Let’s dive into the practical steps to make this change happen.
Select the Right Materials and Tools
Before diving into the installation, gather all necessary supplies: high-quality plywood or MDF for drawer boxes, sturdy full-extension slides rated for heavy loads, a power drill, a jigsaw, a measuring tape, a square, and appropriate screws. For example, I found that ¾-inch maple plywood provided durability and a sleek finish for my deep drawers, which is available from local suppliers or online retailers.
Accurately Measure and Plan Your Drawer Layout
Carefully measure the width, height, and depth of the space available under your countertop. Use a square to ensure your measurements are perpendicular, avoiding gaps or misalignments. I once spent an afternoon correcting miscalculations that caused my drawers to not close properly—always double-check your dimensions to prevent this common mistake.
Cut and Assemble Drawer Boxes
Cut your plywood panels to size, ensuring precision to facilitate smooth operation. Use clamps to hold pieces steady and drill pocket holes for clean, strong joints. For instance, in my first attempt, I neglected to square the cuts, leading to wobbling drawers—practical measurements and proper tools are key to a professional look and function.
Install Heavy-Duty Slides and Attach Drawer Fronts
Mount the full-extension slides on the sides of the drawer boxes, following manufacturer instructions. Make sure to align them perfectly for smooth extension. Then, attach the drawers to their fronts, which can be customized with stain or paint to match your kitchen decor. I recommend testing the slides multiple times during installation, as I learned the hard way that misaligned slides cause jamming or uneven opening.
Secure the Drawers and Final Adjustments
Slide your completed drawers into the cabinet openings, checking for level and ease of movement. Use shims if necessary to level the drawers and tighten all screws. I once forgot to lock the slides in place before testing—and the whole drawer came off! Securing components tightly and making small adjustments can significantly improve longevity and performance.
Implementing deep drawers is a project within reach that offers tangible benefits. For more in-depth ideas on maximizing your space, explore smart storage concepts designed to elevate your kitchen’s efficiency. By following these concrete steps and paying attention to detail, you’ll turn your storage chaos into organized bliss, already feeling the benefits during your first use.
} }**{While custom cabinets and built-ins are often marketed as ultimate solutions for modern kitchens, many homeowners fall prey to misconceptions that can sabotage their remodel efforts. One prevalent myth is that selecting high-end materials automatically guarantees durability and impeccable performance. In reality, the real key lies in understanding the nuances of construction quality and how different materials age over time—something many overlook. For instance, softwood veneer overlays may look stylish but are prone to denting and warping if not properly reinforced; understanding these details can save you from costly repairs later.
Why Do So Many Think All Custom Cabinets Are the Same?
It’s tempting to assume that all custom cabinetry provides the same results, but as experts emphasize, meticulous craftsmanship and tailored design significantly influence longevity and functionality. Skimping on details like joint reinforcement or finishes might save costs initially but often leads to premature wear or failure—an advanced mistake many make when trying to cut corners in their kitchen upgrade. Conversely, informed choices in hardware, hinges, and finishes, backed by proven industry standards, can extend your cabinets’ lifespan considerably. Notably, a study in the Journal of Construction and Building Materials highlights that properly sealed and moisture-resistant finishes reduce the risk of warping, especially in humid environments—so selecting the right finish is critical.
The Oops You Must Avoid When Planning Storage
One common trap is overestimating available space without accounting for hardware, door clearance, or ergonomic reach zones. This often results in awkward access or wasted space, which defeats the purpose of custom solutions altogether. For example, incorporating deep drawers is advantageous but only if their depth and slide mechanisms are carefully designed to prevent items from falling out or becoming inaccessible. An informed approach involves detailed planning, using space-maximizing features like vertical dividers or pull-out shelves, as showcased in smart storage ideas. Properly executed, these solutions turn small or tricky corners into highly functional zones—something many homeowners only realize after experiencing frustration with poorly planned layouts.
Have you ever fallen into this trap? Let me know in the comments.Maintaining your custom cabinetry and built-ins over time is essential to preserve their appearance and functionality. First, establishing a routine cleaning schedule using soft, non-abrasive materials helps prevent the buildup of dust and grime that can degrade finishes. For example, I prefer microfiber cloths combined with mild, VOC-free cleaners, which protect the surface without stripping protective coatings; detailed insights into finish maintenance can be found here. Regularly inspecting hardware and hinges, and applying lubricant to moving parts, ensures smooth operation and prevents squeaks or sticking, which are common issues as components age. Upgrading hardware to high-quality, corrosion-resistant options further extends lifespan and enhances aesthetic appeal. In the future, I predict smart maintenance tools—such as sensor-integrated hinges that alert you when lubricants are needed—will become a standard feature, automating upkeep and reducing long-term repair costs.
How do I maintain built-in storage and cabinetry to last for decades?
For those serious about long-term durability, consider implementing protective measures like moisture barriers around exposed edges and using finishes with UV inhibitors, especially in kitchens prone to humidity. Applying a new coat of finish or sealant every few years can reinforce the protective layer, keeping furniture looking fresh and resisting warping or cracking. Additionally, adopting a proactive approach by incorporating adjustable shelves and modular components allows easy access for repairs or upgrades down the line. Remember, the key lies in consistent checks and adopting tools like a digital moisture meter or a small vacuum for tight spaces. Practical maintenance not only preserves your investment but also keeps your space looking impeccable for years to come. If you’re planning a next level upgrade, try installing a maintenance-friendly feature like soft-close dampers on your cabinet doors; they significantly reduce wear and noise over time. Would you like detailed guidance on selecting the best hardware to prolong your cabinetry’s life? Visit this resource for expert advice.
What I Wish I Had Known Before Starting
One of my biggest lightbulb moments was realizing that overcomplicating the design often leads to frustration. Instead of chasing every trendy feature, focusing on durable materials and thoughtful layout—like choosing the right deep drawers—can save time and money in the long run.
The Value of Small Details That Make a Big Difference
Installing heavy-duty slides and properly measuring every space prevented future issues with sagging or jamming. These seemingly minor choices significantly extend the lifespan of custom storage solutions and ensure a smooth user experience.
When to Trust Custom Solutions Over Off-the-Shelf
My experience taught me that investing in tailored cabinetry and smart storage hacks dramatically improved kitchen functionality. Often, spending a little more upfront on quality pays dividends in usability and style—consider this lesson when planning your own remodel.
How Personal Experience Can Guide Better Choices
Trying various configurations and learning from mistakes helped me avoid common pitfalls, like improper measurements or selecting incompatible hardware. Sharing these insights can help you sidestep costly errors and create a space that truly works for your needs.
Inspiration for Your Next Kitchen Move
Remember, upgrading your kitchen isn’t just about aesthetics but about making your daily routine more effortless. Whether exploring innovative storage solutions or refining existing layouts, embracing your unique needs will turn your project into a personal sanctuary. For more ideas on smart storage, check out this comprehensive guide.