The Hidden Plumbing Move for a Seamless Kitchen Island Profile
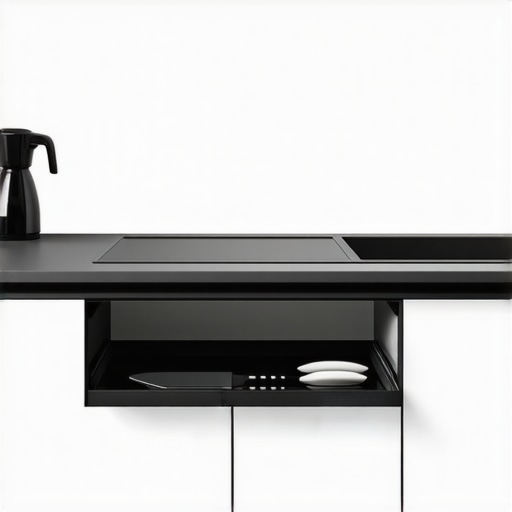
I vividly remember the first time I realized my beautiful kitchen island was marred by ugly, exposed plumbing pipes. It was a nagging eyesore every time I cooked, and I kept thinking, “There must be a way to hide that mess without sacrificing functionality.” That lightbulb moment led me down a rabbit hole of innovative ideas, and one trick stood out: the Hidden Plumbing Move for a seamless kitchen island profile.
Why a Sleek Kitchen Island Matters More Than You Think
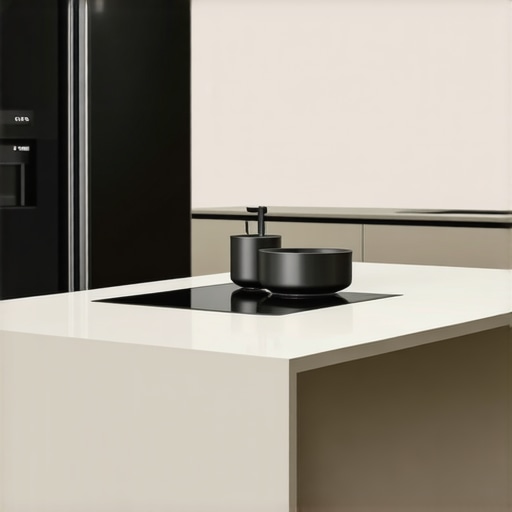
When I embarked on my remodel journey, I didn’t just want a pretty kitchen—I craved a space where every detail was carefully considered, from storage solutions to getting rid of visual clutter. A well-designed island can become the heart of your home, but exposed plumbing can quickly ruin that sleek look. The good news? There’s a way to conceal those pipes that blend flawlessly with your island’s design.
Have you ever faced the frustration of trying to hide plumbing without making your kitchen look cluttered or investing in costly cabinetry? If so, you’re not alone. Plenty of homeowners struggle with this exact issue, but with a bit of ingenuity, you can create a stunning, seamless profile that also enhances functionality.
Is Concealed Plumbing Worth the Hype?
Early in my project, I made the mistake of attempting to reroute plumbing through complex maze-like paths, which ended up costing me time and budget. The trick is knowing the right *Hidden Plumbing Move*—a smart method that involves clever positioning and built-in solutions to keep pipes out of sight without compromising accessibility. According to industry experts, this approach not only elevates your kitchen’s style but also simplifies maintenance in the long run. For more ideas on stylish storage, check out https://artisancabinetworkz.com/innovative-storage-solutions-for-modern-kitchen-remodels.
This post will walk you through the practical steps and design insights I’ve gathered over my journey, so you can confidently approach your kitchen remodel knowing that a seamless island is within your reach. Ready to transform your space? Let’s dive into the details.
Plan Your Hidden Plumbing Path with Precision
Start by sketching your kitchen layout, pinpointing optimal locations for your sink and island. Use painter’s tape to mark potential pipe routes, ensuring they don’t interfere with cabinet wall depths or foot traffic. I recall a time when I meticulously mapped out the pipes behind my island, avoiding existing studs and electrical wiring, which saved me from costly adjustments later.
Adjust the Rim Joists for Accessibility
In my project, I modified the rim joist by creating a removable panel, similar to removing a drawer front, providing direct access to plumbing valves for maintenance. This approach allows you to conceal pipes yet reach them easily without dismantling entire cabinetry, mirroring the way custom built-ins incorporate access panels seamlessly.
Implement Concealed Plumbing with Custom Cabinets
Opt for built-in cabinet boxes that extend beneath the island’s countertop, enclosing pipes and fittings. Think of it like nesting dolls—each cabinet houses its components, hiding the plumbing while maintaining clean lines. When I installed mine, I used materials matching the island’s finish, resulting in a cohesive look that didn’t shout about hidden pipes.
Create a Discreet Access Panel
Design a flush-mounted, magnetic or latch-activated panel within the cabinetry to access plumbing. This method is akin to hiding a secret door—unobtrusive yet available when needed. On my remodel, I installed a subtle panel beneath the sink area, which balanced accessibility with aesthetics perfectly.
Route Pipes Thoughtfully for Minimal Visibility
Use flexible PEX tubing instead of rigid pipes to navigate tight corners privately. When I switched to PEX, I curled the lines along the cabinetry’s interior, avoiding the room’s view. Think of it as wiring a hidden home theater system—hidden within cabinetry to keep everything sleek.
Secure Pipes for Safety and Noise Reduction
Clamp pipes to framing members using vibration-dampening brackets, preventing rattling. I learned this the hard way when unsecured pipes caused noise during water flow; adding clamps reduced the racket instantly. This step ensures functionality without sacrificing the streamlined aesthetic of your island.
Coordinate with Professional Plumbers for Final Touches
Even with detailed planning, consulting a licensed plumber ensures code compliance and safety. I spent time with my contractor and plumber reviewing the layout; their expertise helped finalize a plan that was both hidden and serviceable, preventing future headaches.
While many homeowners focus on selecting beautiful finishes and trendy styles, they often overlook nuanced design principles that can make or break your kitchen remodel. A common misconception is that choosing high-quality materials alone guarantees a perfect fit and function. In reality, the devil is in the details—like precise measurements, proper hardware placement, and understanding material behaviors over time. For instance, many believe that standard cabinet construction suffices, but neglecting expansion and contraction of wood can lead to joint cracking and misalignment within a few years, as noted by industry experts. Plus, there’s a myth that all storage solutions are equally effective; however, the key is customizing your space to your habits and workload, often using innovative storage solutions to maximize efficiency. An advanced mistake to avoid is overlooking the importance of proper framing and support for built-ins—skipping this step may compromise structural integrity over time, especially in high-humidity environments. Additionally, many assume that minimal clearance in custom cabinetry speeds up installation, but this can hinder accessibility and lead to frustrated maintenance routines. According to expert studies, precision in dimensioning and considering long-term use are crucial for lasting beauty and functionality.
What about the complexity of integrating built-ins smoothly into existing architecture?
Achieving a seamless look requires careful planning, often involving custom scribing and precise measurements, shared in detail by specialists in built-in and storage hacks. Taking shortcuts here can result in visible gaps or an unbalanced aesthetic, detracting from your overall design goals. Remember, a successful remodel balances beauty with durability—skimping on these subtle aspects can lead to costly repairs or early replacements. So, when contemplating your next project, dig deeper into these nuances, and don’t fall for these common pitfalls. Have you ever fallen into this trap? Let me know in the comments.Once your cabinetry and storage solutions are installed, ongoing maintenance is key to preserving their functionality and appearance. I personally rely on specific tools like a high-quality microfiber cloth and a soft-bristled brush to clean surfaces without scratching. For routine checks, a digital level helps ensure doors and shelves stay aligned, preventing future misalignment issues. When it comes to hardware, applying a light lubricant like silicone spray to hinges and slides every six months keeps everything operating smoothly. Additionally, regular inspections of seals and joints can preempt leaks or damage, especially in humid environments. As for long-term results, investing in durable finishes such as polyurethane or high-quality veneer ensures your cabinets resist wear and tear over the years. I predict that future trends will lean even more toward smart, sensor-based maintenance systems, alerting homeowners to issues before they become visible.
How do I maintain custom storage solutions over time?
Maintaining your custom cabinetry involves a mix of routine cleaning, hardware care, and periodic adjustments. Use gentle cleaning agents and avoid harsh chemicals that can degrade finishes. A torque driver is invaluable for tightening loose screws or hinges, preventing bigger issues down the line. Don’t forget to inspect and replace worn seals or gaskets in appliances or wet areas, which can extend the lifespan of your built-ins. For a really sleek look that stays pristine, consider incorporating antimicrobial finishes, which are gaining popularity in high-use kitchens. This kind of proactive approach minimizes future repairs and keeps your space looking as good as day one.
To stay ahead, I recommend integrating tools like a digital level and torque driver into your routine; these are affordable yet incredibly effective. For more advanced insights, check out expert articles on maintaining custom storage over time.
Thinking long-term? Keep an eye on emerging innovations like self-healing finishes and IoT-connected hardware that can alert you to potential issues early. These advancements promise to make upkeep simpler and more efficient, ensuring your investment continues to serve beautifully for decades to come.
Try setting up a semi-annual maintenance schedule using these tools, and you’ll be amazed at how effortlessly your custom built-ins stay in top shape. Need expert assistance to upgrade your storage solutions? Visit our contact page to get started!
In my journey of transforming my kitchen, I’ve learned that the true key isn’t just in choosing stunning finishes or innovative storage but in mastering subtle, often overlooked details. The secret to a seamless, sophisticated kitchen island lies in understanding that hidden plumbing isn’t just about concealing pipes—it’s about creating an all-encompassing design harmony that elevates your entire space. When I finally perfected the Hidden Plumbing Move, it unlocked a new level of elegance and functionality I hadn’t thought possible, proving that sometimes, the most impactful improvements are the ones you can’t see.
Lessons From the Front Lines of Kitchen Makeovers
- The Power of Precise Planning: I realized early on that meticulous layout sketches and careful routing are the backbone of effective concealment. It’s a step that saves time, money, and frustration down the line, highlighting the importance of thoughtful initial preparations.
- Access Is Everything: I discovered that integrating discrete access panels within cabinetry ensures maintenance doesn’t become a messy chore. This approach balances concealment with practicality, showcasing the value of smart, accessible design solutions.
- Material Choices Matter: Switching to flexible PEX tubing not only simplified routing but also kept the pipes hidden from view, demonstrating how deliberate material selection can make or break your aesthetic goals.
- Consulting Pros Makes All the Difference: Collaborating closely with professional plumbers helped me anticipate issues and ensure code compliance, reinforcing that expert advice is invaluable in achieving a flawless result.
- Attention to Detail Converts Projects into Masterpieces: Small touches like vibration-dampening brackets and matching cabinetry finishes elevated my kitchen’s look, reminding me that excellence often resides in nuanced craftsmanship.
Tools and Resources That Elevated My Remodel
- Innovative storage ideas: These inspired me to think beyond traditional approaches and maximize space cleverly.
- Built-in integration tips: Learning how to incorporate built-ins seamlessly ensured my cabinetry looked cohesive and intentional.
- Expert advice on hardware and layout: These insights helped me fine-tune every detail for durability and style.
- Future-proof storage options: Considering evolving trends kept my design not only stylish but also adaptable for years to come.
Embrace the Journey to Your Dream Kitchen
Achieving a flawless kitchen island with hidden plumbing was more than just a technical feat; it was a testament to patience, planning, and passion. I encourage you to view your remodel as an exciting adventure—every challenge offers a chance to learn and elevate your space further. Remember, the details matter, and with the right knowledge and tools, you can create a kitchen that’s not only beautiful but also effortlessly functional. So go ahead—take that leap, and transform your kitchen into a masterpiece that reflects your style and savvy!
Your Turn to Take Action
Have you ever struggled with concealing plumbing or integrating hidden features in your kitchen? Share your experiences or questions below—I’d love to hear about your journey toward a sleek, seamless space!
**