The Knife Block Drawer Insert That Keeps Your Counters Empty
It hit me one morning, coffee in hand, as I stared at my cluttered kitchen counter. A stray chef’s knife was awkwardly balanced in a tiny dish, and I realized—my countertops had become a catch-all for everything, except the space I needed to actually prepare meals. I used to believe that keeping a few less-used gadgets out in the open was fine, but it was creating chaos instead of comfort.
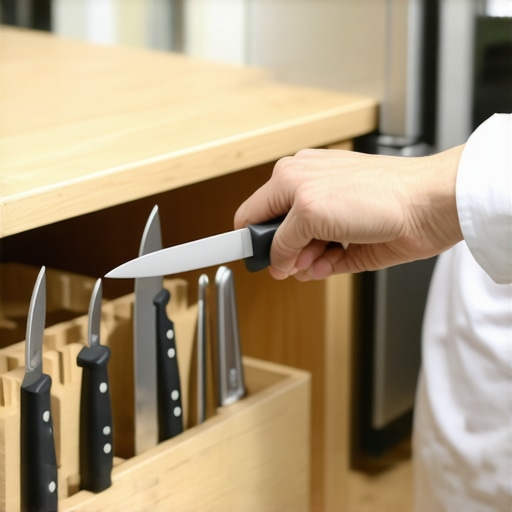
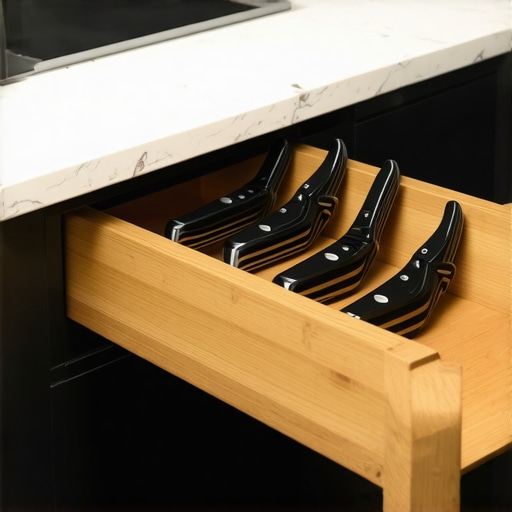
That was my lightbulb moment. I knew I needed a smarter solution—something that would keep my counters clear and my kitchen more functional. Enter the humble but game-changing **knife block drawer insert**.
Today, I want to share my journey from clutter chaos to sleek efficiency, and show you how a small, simple addition can transform your cooking space. No more knocking over utensils or digging through messy drawers every time you need a paring knife. With the right insert, you’ll reclaim your counter space and enjoy a kitchen that’s as organized as it is beautiful.
The Power of a Well-Organized Drawer
Imagine your kitchen: everything you need for cooking within arm’s reach, yet nothing taking up valuable counter real estate. That’s the magic of a dedicated knife drawer with the right insert. But I get it—this idea might sound too simple or even unnecessary. You’re probably skeptical about whether a small organizer can truly make a difference.
I’ll admit, I initially made a mistake early on: I bought a generic, cheap knife tray that didn’t fit well, was hard to clean, and didn’t hold my blades securely. *Lesson learned*: cheap solutions often lead to frustration. Instead, investing in a custom-fit, quality insert can make all the difference in maintaining a clutter-free space.
Not only does this keep your knives safe and accessible, but it also prevents the jostling and dulling that can occur with loose storage. Plus, a dedicated drawer means your *countertops stay clear*, making your whole kitchen feel more open and inviting.
Curious if this is worth the effort? Well, researchers have found that an organized kitchen can actually *reduce cooking time* and *lower stress*. Better organization leads to a smoother, happier cooking experience.
Thinking about giving it a try? Let’s explore how to pick the perfect insert to suit your space and needs, and turn your kitchen into the functional oasis you’ve always wanted. If clutter has haunted your countertops for too long, this might just be the fix you’ve been searching for. Want to learn more about transforming your kitchen with custom storage? Check out [this expert guide](https://artisancabinetworkz.com/transform-your-kitchen-with-custom-cabinets-expert-guide-for-2025) for some inspiring ideas.
Select the Right Storage Components
Start by assessing your kitchen’s size and your storage needs. Measure the available space meticulously, including drawer depths and cabinet openings. When I undertook my remodel, I used a tape measure to note every dimension, avoiding guesswork that could lead to ill-fitting drawers or inefficient use of space. Think about the specific items you need to store—spices, utensils, pans—and plan compartments accordingly. Consider incorporating specialized inserts or dividers; these make organization seamless and prevent clutter from cluttering your workflow.
Design With Functionality in Mind
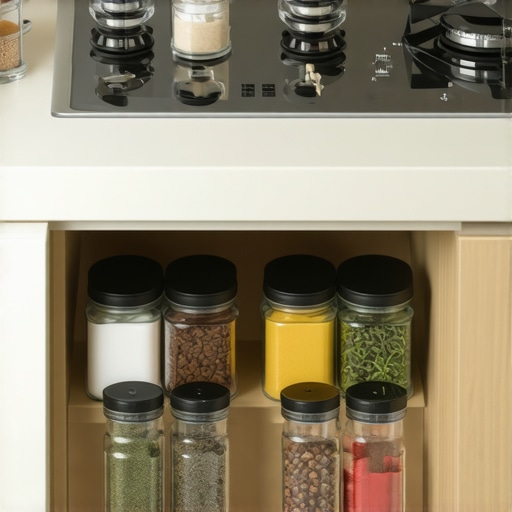
Next, sketch a layout integrating your chosen storage components. Visualize how drawers will open without hitting surrounding cabinets and how accessible each item will be. I recommend creating a detailed plan on grid paper or digital design tools, especially when working with complex arrangements like corner cabinets. For example, I designed a custom spice drawer with adjustable dividers that made finding ingredients quick and effortless, saving me time during busy mornings. Remember, a well-designed storage plan minimizes unnecessary movement and enhances overall kitchen efficiency.
Choose Quality Materials and Hardware
The durability and smooth operation of your storage solutions depend heavily on the materials chosen. Opt for high-quality plywood or MDF with a proper veneer finish for longevity. When I built a pull-out pantry, I used metal ball-bearing slides rated for heavy loads, which ensured smooth, silent operation over years. Hardware, such as soft-close hinges and slides, can prevent slamming and damage. Investing in premium components may cost more upfront but pays off by maintaining your kitchen’s functionality and appearance over time. For guidance on selecting best materials, review the expert tips on storage solutions.
Prepare and Build Your Custom Units
Once your design and materials are ready, prepare the workspace. Clear the area and set up a sturdy workbench with all necessary tools: drills, screwdrivers, clamps, and levels. When I installed a built-in wine rack, I marked every cutline precisely and double-checked measurements before cutting to avoid costly mistakes. Follow your plans closely, assembling components in stages—frame first, then shelving, followed by hardware installation. Use a level frequently to ensure everything is perfectly aligned. Precise assembly guarantees the functionality and visual appeal of your custom storage units.
Install and Fine-Tune for Perfect Fit
With the units built, carefully install them into your cabinets or designated spots. Secure them with screws, anchoring to studs or solid backing to withstand daily use. During one project, I used shims to level a slightly uneven cabinet floor, ensuring the drawer fronts sat flush. After installation, test each drawer and door for smoothness and alignment. Small adjustments to screws and slides often improve performance dramatically. This final step ensures your custom storage solutions integrate seamlessly into your kitchen remodel, elevating both utility and aesthetic appeal. For detailed installation techniques, see built-in storage.
When it comes to custom cabinets and innovative storage solutions, many homeowners believe they have it all figured out—selecting materials, choosing finishes, and dreaming of sleek designs. However, even seasoned designers sometimes fall into common traps that can undermine the entire project. Let’s dig deeper into these nuances and uncover the myths that could trip you up during your remodel.
A prevalent misconception is that more elaborate, high-end finishes automatically deliver better durability. In reality, some luxurious materials, like certain veneers, are more susceptible to damage from humidity and wear over time. Understanding the *performance characteristics of materials* is crucial; for instance, real hardwoods like oak or maple tend to age better than softer woods like pine in high-traffic kitchens. Relying solely on aesthetic appeal without considering environmental resilience can lead to costly regrets.
Another myth is that custom cabinetry is always more expensive than semi-custom or stock options. While it’s true that premium craftsmanship at a top-tier shop does come with a higher price tag, many overlook how customization can *save* money in the long run by maximizing storage efficiency, reducing the need for future alterations, or avoiding the purchase of supplementary organizers. Plus, well-designed built-ins can elevate your home’s value and longevity. To get a clearer picture of these benefits, review the comprehensive guides available on custom cabinets’ impact.
Avoid the trap of designing for current trends rather than lasting functionality. Trends come and go, but your home’s core functionality should last for decades. For instance, choosing *overly ornate handles* might look stunning now, but could clash with future decor updates, or be difficult to clean. Focus on timeless hardware and versatile layouts that can adapt over time, ensuring your investment remains relevant.
What many fail to realize is how overlooked the importance of *correct framing and structural support* truly is. Without proper support, even the most beautiful cabinets can sag or warp, especially in humid environments. Improperly designed corner units or unsupported overhangs are common pitfalls. An advanced mistake is not accounting for *thermal expansion* in materials, which can cause cracking or buckling. A good rule of thumb is to consult with experts about the specific environmental conditions your cabinetry will face, and ensure the design accounts for these factors.
To see how these advanced details can influence your project, visit the article on seamless built-ins.
What about space optimization? Many assume that installing larger cabinets maximizes storage, but this can crowd the space and hinder workflow. Instead, deep-drawer organizers, adjustable shelves, and innovative vertical dividers can vastly improve usability without sacrificing floor space. Be wary of generic solutions that don’t fit your unique layout—customization here is key.
Finally, realizing the *true potential of built-ins* involves understanding the hidden value of *integrating electrical and plumbing rough-ins* during the design phase. Overlooking this step can lead to costly modifications down the line, re-routing wires or pipes after installation. Planning ahead ensures your cabinets accommodate features like integrated charging stations or hidden appliance garages without sacrificing aesthetics.
Have you ever fallen into this trap? Let me know in the comments. Mastering these subtleties distinguishes an ordinary renovation from an extraordinary one, ensuring your investment pays dividends for years to come.
When diving into custom cabinetry and built-in storage solutions, having the right tools and maintenance routines makes all the difference in achieving professional results and ensuring your investments last for years. I’ve personally found that combining high-quality equipment with a disciplined approach to upkeep keeps the project smooth and the outcomes impeccable.
Invest in Precision Power Tools
My first go-to is a versatile cordless drill with variable speed settings. I swear by the DeWalt DCD791D2, which offers the power and finesse needed for delicate hinge adjustments or heavy-duty frame assembly. Its brushless motor provides extended runtime, crucial during longer projects. Pair this with a quality circular saw like the Makita 5007Mg, renowned for clean cuts on plywood and hardwood, ensuring your cabinet components fit precisely without splintering. These tools are reliable, durable, and essential for any serious remodel.
Use Specialized Jigs and Guides
Accurate drilling and hardware installation depend on proper alignment. My trusted equipment is the Kreg pocket hole jig system. It simplifies creating strong joints, especially when building custom frames or reinforcing shelves. The consistency it offers minimizes errors and saves time, making intricate assembly feel straightforward. For intricate drawer fronts and door alignments, I rely on a digital reach verifier like the Bosch Digital Angle Finder, which ensures perfect squareness—crucial for a seamless finish.
Maintain Your Equipment for Long-Term Performance
Tools are investments. Regular cleaning, proper storage, and occasional calibration keep them functioning optimally. I wipe down bits and blades after each use, lubricate moving parts, and store everything in a dedicated toolbox. For power tools, using manufacturer-recommended batteries and chargers prolongs their life. When my saw blades started showing wear, a quick sharpening with the Dremel 610 kept my cuts precise without the cost of replacements. This routine prevents delays and costly repairs down the line.
Adopt Routine Inspection and Care
Designing and building custom units isn’t just about the tools—it’s also about staying vigilant. Check hardware, hinges, and slides periodically for wear or looseness. A simple application of a lubricant like silicone spray to slides and hinges ensures quiet, smooth operation. Additionally, inspecting for environmental factors like humidity helps prevent wood warping or swelling. I’ve updated my storage environment with a dehumidifier, extending the lifespan of my plywood and veneer finishes.
The future points toward more digital integration, such as using smart storage solutions that incorporate sensors and automation. Keeping your tools calibrated and well-maintained now builds a foundation for adopting these advancements seamlessly.
How do I maintain my cabinet-building arsenal for longevity?
Developing a regular maintenance routine—cleaning, inspecting, and calibrating—ensures your tools stay precise and operational. Consider investing in protective cases and storage solutions that prevent damage from moisture or impacts. Over time, this discipline pays off by reducing downtime and repair costs, letting you focus on creating stunning, durable cabinets that stand the test of time.
Ready to upgrade your toolkit? Start by adding a quality digital angle finder to your workshop and see the difference it makes in achieving perfectly aligned components. Want detailed advice tailored to your project? Reach out through our contact page for personalized guidance and support.
Reflecting on my journey with custom cabinets and innovative storage, I’ve uncovered some truths that aren’t in any workshop manual. The most profound lesson? That whispers of experience often carry more weight than glossy brochures. For instance, I once underestimated the importance of precise framing, only to learn that a subtle misalignment could ripple into flaws that compromise both function and aesthetic. It’s these nuanced lessons—those late-night realizations—that truly shape a successful kitchen remodel.
Additionally, I discovered that embracing a collaborative approach with suppliers and designers enriches the entire process. Trusting experts who understand the intricate dance of materials and techniques ensures your vision isn’t just beautiful but resilient. Be cautious, though: not every resource claiming top-tier advice fits your unique space. My tip? Seek out those who’ve walked the path and can share tales of triumph and pitfalls alike—like the comprehensive expert guide.
Finally, I learned to listen to my intuition—your gut often knows best when planning complex storage solutions or choosing materials. That instinct, honed through experience, guides you toward options that feel right, blend seamlessly, and stand the test of time. Remember, mastering your kitchen transformation isn’t about chasing perfection but about cultivating spaces that serve your lifestyle with grace and durability. If you’re contemplating a remodel, consider the insights shared here—they’re the compass that can lead you toward your dream kitchen.
The Insider Wisdom You Won’t Find in How-To Guides
- Don’t underestimate the power of precise measurements. A few millimeters can make or break a drawer’s function or a door’s alignment. I once installed a corner cabinet where a slight miscalculation led to rubbing doors—a fix that cost extra time and effort. Trust me, meticulous measurement saves headaches later.
- Materials speak louder than trends. Choose durable, resilient materials tailored to your environment. Softwoods may look charming but can succumb in high-traffic kitchens. I recommend sticking with proven options like oak or maple, and consulting expert resources to guide your choices.
- Prioritize quality hardware for longevity. Cheaper pulls and slides might save money upfront but often falter over time. Investing in soft-close hinges and heavy-duty slides keeps your custom cabinets performing beautifully for years.
- Anticipate future needs during design. Incorporate features like built-in charging stations or hidden compartments early on. The earlier you plan these details, the smoother the execution—and you’ll avoid disruptive renovations later.
- Build relationships with trusted professionals. Connecting with experienced craftsmen ensures your vision is realized flawlessly. Let their expertise steer the project, and don’t hesitate to ask questions or seek clarifications.
Tools and Resources That Changed My Approach
- High-caliber power tools: I swear by brands like DeWalt and Makita—dependable and built to last, making precise cuts and assembly much easier.
- Specialized jigs like Kreg pocket hole systems: These simplified complex joinery, saving time and ensuring consistent strength.
- Design software tools: Digital planning platforms helped me visualize layouts and experiment with storage configurations before cutting wood—saving money and reducing errors.
- Educational content: Courses and tutorials from trusted sources deepened my understanding, like the detailed guides on built-in storage hacks.
Dream Big, Build Better
Now, it’s your turn to transform your kitchen into a space that harmonizes form and function. The journey of custom cabinets and storage solutions is as rewarding as it is challenging—each step, a testament to your dedication. Remember, every master craftsman started with a single cut, a cautious measurement, and a willingness to learn. Embrace the process, trust your instincts, and don’t shy away from seeking expert advice. Your dream kitchen awaits, and with the right knowledge, you’ll build it with confidence. Ready to take the next step? Share your plans or questions below—let’s make your vision a reality.