The Sink Base Strategy: Why Every Kitchen Needs a Waterproof Bottom Liner
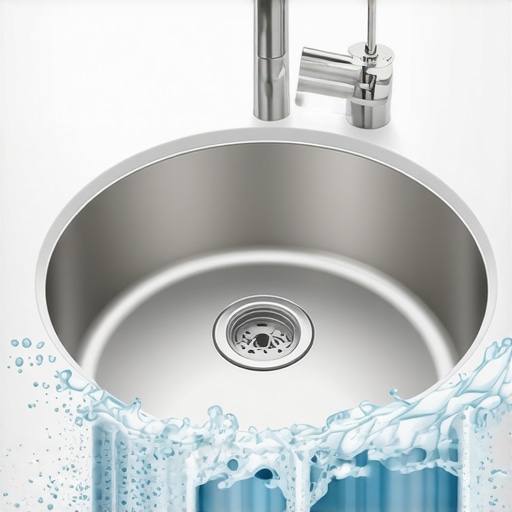
One weekend, I finally settled into my newly renovated kitchen—expecting a sleek, functional space I could enjoy for years. But days later, I discovered a soggy, moldy mess beneath the sink. Turns out, I had overlooked a crucial detail: a waterproof bottom liner. That lightbulb moment made me realize how one simple upgrade can prevent costly damage and headache down the line.
The Real Cost of Ignoring Waterproofing Under the Sink
When tackling a kitchen remodel, it’s easy to focus on stunning cabinets, sparkling countertops, or high-tech appliances. But beneath all the beauty, hidden vulnerabilities can threaten your investment. I learned this the hard way, and I don’t want you to experience the same frustration. A waterproof bottom liner isn’t just a luxury—it’s a smart barrier against leaks, spills, and moisture control, all of which can cause rot, mold, and expensive repairs. According to the National Kitchen & Bath Association, moisture-related issues are among the top reasons kitchen renovations double in cost due to preventable damages. Investing in a sturdy bottom liner from the start can ultimately save you hundreds or even thousands.
Could Your Kitchen Be at Risk Without It?
Early in my project, I made the mistake of assuming that standard cabinetry would suffice without additional waterproofing. I thought sealing and caulking would be enough—and it wasn’t. That oversight led to a mold problem I had to address months later, halting my progress and increasing my costs. Trust me, I learned that a waterproof bottom liner isn’t a fancy upgrade; it’s a necessity in any practical kitchen.
What’s Next? Protecting Your Investment
Now that I understand the importance of waterproofing, I plan to share the essential steps to ensure your kitchen withstands moisture and leaks. Whether you’re in the middle of a renovation or just dreaming about one, implementing this small but mighty upgrade can make all the difference. Ready to discover how to integrate this into your plan? Let’s go beyond aesthetics and build a kitchen that lasts. And if you’ve faced unexpected water damage or seepage issues before, I’d love to hear your story—drop a comment below or visit our contact page.
Selecting the Right Material for Your Waterproof Liner
Start by choosing a durable, flexible waterproof membrane such as PVC or rubberized mat. In my own project, I opted for a heavy-duty EPDM rubber liner, which I learned about from detailed guides like this resource that emphasizes quality materials. This step is crucial because the material must withstand moisture and accidental spills without degrading over time.
Preparing the Base Surface
Clear out all items under the sink and inspect the cabinet base for existing damage. Clean the area thoroughly to remove dust, grease, or residues that could impair adhesion. Use a damp cloth and mild detergent, then let it dry completely. I remember a time I overlooked this step and found the liner slipping later, causing water to seep through. Proper surface prep ensures the liner adheres effectively, preventing leaks. For insights on maximizing space and proper sealing, see this article.
Measuring and Cutting the Liner
Measure the exact dimensions of the cabinet base, accounting for any curves or irregularities. Add an extra inch to each side to allow for overlap and secure sealing. Use a utility knife or scissors for clean cuts. I once made the mistake of cutting too tight—resulting in gaps that leaked—so precise measurement saved my project from water disasters. It’s a good idea to have spare material to accommodate any adjustments. For specific tips on cabinetry and built-in installation, visit this guide.
Sealing Edges and Overlaps
Apply a waterproof adhesive or silicone sealant along the edges and overlaps of the liner. Pay special attention to corners and seams, pressing the material firmly to eliminate air pockets. Use a caulking gun for even application. I recall a project where I used an off-brand sealant that failed after a few months, leading to leaks—so investing in high-quality sealants is worthwhile. Proper sealing is the difference between a temporary fix and a long-lasting barrier against moisture intrusion.
Securing the Liner and Final Checks
Fasten the liner in place with finishing nails or clamps where applicable, especially along the edges that meet the cabinet walls. Check for wrinkles or folds and smooth them out to prevent water pooling. Replace the sink and reconnect plumbing carefully, testing for leaks before completing the assembly. I experienced a small leak after reinstallation because I didn’t double-check the sealant—so take your time during testing. This step ensures your investment in waterproofing pays off in durability, and reduces future restoration costs.
Additional Tips for Long-Term Success
Regularly inspect the liner, especially after plumbing repairs or heavy usage. Reapply sealant if you notice any cracks or deterioration. Incorporate maintenance checks into your routine to prevent mold and rot. For more comprehensive remodeling strategies that include built-in storage, explore this resource, which combines smart solutions with durability. Remember, a well-installed liner acts as a guardian for your kitchen, protecting your space and your peace of mind for years to come.Many homeowners assume that choosing ready-made cabinets or standard storage options will suffice for a functional kitchen, but this oversimplification can lead to costly mistakes. One prevalent myth is that all built-ins are created equal, yet in my experience, the quality and installation precision of custom solutions dramatically influence longevity and usability. For example, poorly designed corner pull-outs often fail prematurely because they don’t account for door swing clearance or weight distribution, leading to frustration and repeated repairs.
Another nuance often overlooked is the integration of storage with your workflow, rather than viewing cabinets solely as aesthetic elements. Advanced homeowners know that strategic partitioning within drawers—even utilizing custom inserts—can vastly improve efficiency. However, many fall into the trap of choosing generic organizers, which limit flexibility. As detailed in this resource, customizing storage to your specific needs and habits yields the best results.
Why do some built-in investments fail to last?
Often, it’s due to a lack of understanding about material selection and environmental factors. For instance, using MDF in high-humidity zones without proper sealing can cause warping and deterioration over time. Expert insights recommend moisture-resistant cores and finishes that withstand the kitchen’s conditions, as outlined in this article. Overlooking these details may seem minor initially but can result in significant expenses and inconveniences down the line. Additionally, improper anchoring or installation techniques can compromise structural integrity, especially in custom-built units designed for heavy appliances or high-traffic areas. Remember, the devil is in the details, and a thorough understanding of these nuances can transform your renovation from average to exceptional. ” alt=”Custom built-in cabinet with strategic storage” title=”High-quality custom built-in storage solution”/> Have you ever fallen into this trap? Let me know in the comments.
To ensure your kitchen remains functional and beautiful for years to come, having the right tools and maintenance routines is crucial. I personally rely on a high-quality cordless drill like the DeWalt DCD791D2. Its compact design and powerful brushless motor make installing custom cabinets and securing storage solutions effortless, saving me time and reducing frustration. Additionally, I use a precision laser level, such as the Bosch GLL 3-80, to ensure perfectly aligned shelves and cabinet doors, which maintains the aesthetic integrity over the long haul. For cleaning and checking seals, I keep a digital moisture meter handy; this helps me catch any subtle leaks early, preventing costly damage down the line.
What’s the best way to keep your built-ins working smoothly?
I recommend investing in specialized hardware maintenance kits. For instance, regular lubrication of hinges with a silicone spray like Chrystal Clear Silicone keeps them functioning silently and extends their lifespan. I also suggest using a soft microfiber cloth and mild cleaning solutions to preserve finish quality without damaging surfaces. A proactive approach, like inspecting seals and joints every six months, naturally extends the life of your storage solutions and custom cabinetry—saving you money and headaches. As we look toward the future, innovations in smart hardware, like sensor-activated hinges and automated drawer systems, are becoming more accessible, making maintenance even easier and more efficient.
How do I maintain my storage solutions over time?
Incorporate routine checks into your schedule: verify that joints remain tight, lubricate moving parts as needed, and replace seals when signs of wear appear. Keep a small toolkit with screwdrivers, replacement hinges, and sealant applicators nearby to tackle minor adjustments on the spot. Modern storage ideas are evolving rapidly—adopting smart features can give you a long-term edge. For example, integrating motion sensors with LED lighting in cabinets enhances accessibility and safety, especially in low-light conditions. Regular maintenance not only preserves your investment but also ensures everything functions seamlessly amid daily use, making your kitchen truly work for you as it ages.
If you’re ready to upgrade your storage solutions further, I recommend exploring custom options that can be tailored to your specific needs. Think about adding pull-out trash bins or corner storage innovations, which can revolutionize your space. To see how you can combine durability with smart design, check out this detailed guide. As technology advances, so do the possibilities for maintenance and long-term performance—don’t miss out on these opportunities. I encourage you to try implementing a maintenance routine with a moisture meter and lubrication kit today to keep your custom cabinets and storage solutions in top shape for decades to come.
The Tough Lessons That Shaped My Approach to Built-Ins and Storage
One key realization I wish I had embraced earlier is that the quality of materials makes all the difference. Using premium plywood or moisture-resistant cores isn’t just about durability; it’s about ensuring your built-ins withstand the test of time—especially in high-humidity areas like kitchens and bathrooms. I’ve learned that sacrificing quality for convenience often leads to costly repairs down the line.
Secondly, the importance of precise measurements cannot be overstated. During my first projects, small miscalculations led to misaligned doors and squeaky hinges. Investing in a good laser level and spending extra time measuring saved me from headaches and rework later. Taking your time at this stage is a small effort that pays off in perfection.
Another lesson revolves around seamless integration. Attempting piecemeal solutions without considering the overall flow of your space can result in cluttered or awkward layouts. I now understand that designing with functionality first, such as incorporating smart storage like pull-out spice racks or hidden compartments, elevates both usability and aesthetic appeal—nothing kills a design faster than forgettable, poorly planned spaces.
Lastly, I realized that regular maintenance proactively prevents many issues. A quick quarterly check of hinges, seals, and surfaces prevents major problems—saving you money and preserving your custom work. Embracing these lessons transformed my approach from trial-and-error to strategic planning, ensuring my remodels stand the test of time and use.
Tools and Resources That Keep My Projects on Track
Over the years, I’ve relied on specific tools that continually enhance my craftsmanship. The built-in solutions guide has been invaluable for understanding space optimization and durability. It emphasized quality materials and thoughtful design, which I now incorporate into every project.
For precise measurements, my trusted laser level, the Bosch GLL 3-80, ensures perfect alignment and reduces guesswork—an absolute must for professional results.
When it comes to hardware, I recommend investing in soft-close hinges and heavy-duty drawer slides. Brands like Blum or Hettich provide reliability and smooth operation that last, which I verify through these tips.
Finally, maintaining your built-ins becomes effortless with routine inspections and quality lubricants. Keeping a toolkit with essentials like the fixing supplies allows me to address small issues before they escalate, extending the life of my storage investments.
Your Next Step Towards a Resilient Kitchen Or Storage Space
Now that these insider lessons are part of my toolkit, I encourage you to take action with confidence. Whether you’re updating a small pantry or redesigning your entire kitchen, remember that quality materials, precise measurements, and proactive maintenance are your best allies. Embrace the details—because in custom cabinetry and storage, the devil truly is in the details. Are you ready to implement these strategies and build a space that’s both beautiful and built to last? Your ideal kitchen is within reach—start today and share your progress or questions below. Together, we can keep your built-ins and storage solutions functioning flawlessly for years to come.