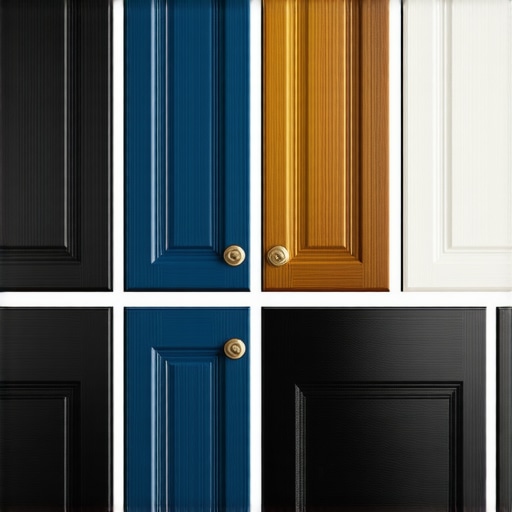
Why Painted Cabinets Chip: 4 Toughened Finishes to Use Now
The day I finally finished my kitchen remodel, I stared in horror at the new painted cabinets—chips and scratches already spidering across the surface. It was such a frustrating, disheartening sight, especially after investing so much time and money into creating a beautiful space. I realized I wasn’t alone in this struggle; many homeowners face the same disappointment when beautiful painted cabinets start to look worn out prematurely. That’s when I had my lightbulb moment: I needed to discover tougher, more durable finishes that could stand up to real kitchen life.
Choosing Finishes That Actually Last
If you’re like me, you want your cabinets to look fresh and pristine for years, not just until the first dish soap splash or kid’s artwork. That’s where understanding why painted cabinets chip becomes essential. The truth is, standard paints often lack the resilience needed in the busy heart of your home. I made the mistake early on of assuming all finishes were created equal—trust me, that was a quick way to end up with peeling, chipped surfaces. Fortunately, I found that adopting certain toughened finishes makes all the difference. Today, I’ll guide you through those options so you can avoid my early mistakes and enjoy beautiful, chip-resistant cabinetry.
Is a Tough Finish Really Worth the Extra Effort?
Many folks are skeptical about switching to specialized finishes because they worry about cost, appearance, or application difficulty. I get it—change can feel intimidating, especially when the DIY route seems daunting. My own experience taught me that the right finish not only withstands daily wear but also preserves your cabinetry’s aesthetic, saving you money in the long run. A common misstep I made was underestimating the importance of proper prep, which is why I highly recommend following expert advice on application techniques. If you’re committed to a durable solution, then choosing the right toughened finish is absolutely worth it. To see how it transforms your space, check out some innovative storage solutions that complement your newly resilient cabinets—these are game-changers for maximum utility and style.
Interested in elevating your kitchen? Discover how custom cabinetry ideas can dramatically enhance your home’s style and functionality by visiting this inspiring guide.
Applying Tough Finishes for Long-Lasting Cabinets
Start by thoroughly sanding your cabinets to create a smooth surface, which helps the finish adhere better. Use a high-quality, water-based polyurethane or epoxy resin for maximum durability. I once applied a thick coat of epoxy on my DIY kitchen project, which took patience and careful brushwork, but the result was a glossy, resistant surface that withstood daily wear without chips. When applying, work in thin, even layers, and allow ample drying time between coats to prevent bubbles or uneven texture. This approach is like sealing a brick wall with a strong mortar—it’s your armor against the chaos of kitchen life.
Building Custom Storage Solutions
Assess Your Space and Needs
Measure every nook and cranny, noting high-traffic areas and awkward corners that typical cabinets ignore. Think of your kitchen like a puzzle—every piece has a place, but only custom solutions make it fit perfectly. I once faced a shallow corner that wasted valuable space; I designed a bendy, pull-out corner cabinet that turned dead space into functional storage. Use a laser measure or a tape—double-check your dimensions before cutting or ordering materials. This ensures your new built-ins aren’t just visually appealing but also genuinely practical.
Design with Function in Mind
Plan adjustable shelves for flexibility, and include pull-out trays for heavy pots. For utensils and small gadgets, consider shallow drawers with dividers, which I installed under my countertop for easy access. Anchor each component securely using heavy-duty brackets and confirm weight capacity, much like reinforcing a bridge before traffic flows across. For guidance, check out this comprehensive guide on seamless storage integration. Remember, the goal is to make every inch serve your daily routine without clutter or frustration.
Securing and Finishing Your Custom Pieces
Use hidden screws or dowels for a clean look, and finish with a protective coat to prevent moisture damage. When installing, support large panels with clamps until glue sets, preventing warping or misalignment. I once worked on a long floating shelf that sagged prematurely because I didn’t reinforce the brackets properly; after adding steel supports, it held a stack of heavy cookbooks without a wobble. It takes some effort, but these details pay off by making your cabinets last longer and look professionally crafted. For more detailed installation tips, explore this resource on innovative storage.
Many homeowners rush into kitchen remodels eager for a fresh look but overlook nuanced details that can make or break the longevity and functionality of their space. Contrary to popular belief, investing solely in high-end materials without considering structural integrity and expert craftsmanship often leads to costly regrets. For example, opting for cheaper shelving or hardware might seem like a savings upfront, but these choices commonly result in quick wear and tear, undermining your remodeling investment. Additionally, a common myth is that all built-ins are inherently more expensive—while they can be pricier upfront, they often pay off by maximizing space and durability over time, especially when designed with expert insight.
Are Built-Ins Always the Best Choice? Think Twice.
Many assume that built-in solutions are the only way to achieve a seamless, custom look, but in reality, poorly planned installations can cause more harm than good. Improper anchoring or material selection—like using standard drywall anchors for heavy cabinets—are frequent mistakes that compromise safety and longevity. Instead, a nuanced approach involves detailed assessment of your wall types and future load expectations, with professional-grade hardware and precise mounting techniques. To avoid these costly errors, I recommend consulting comprehensive guides like this resource, which emphasizes expert methods for durable installations.
Another misconception centers around storage solutions: many homeowners underestimate the importance of intelligent spacing and the benefits of custom-designed drawers and shelves. Overstuffed cabinets with mismatched compartments lead to clutter and inefficiency. An advanced mistake is neglecting to consider future needs—what seems sufficient now might become a nuisance later. Integrating adjustable, modular components ensures your storage evolves with your lifestyle, preventing the age-old trap of reorganizing every few years. For more detailed ideas, explore these innovative concepts.
Why Do Some Storage Solutions Fail Over Time?
This is a question that trips up even experienced remodelers. Often, the culprit isn’t the design but the implementation—using substandard materials or overlooking environmental factors like humidity and temperature fluctuations. For instance, inexpensive MDF shelving can warp or sag under weight, especially in kitchens where moisture is prevalent. The solution? Employing high-quality, moisture-resistant hardwoods and finishes, as advised by industry experts, can dramatically enhance durability. Moreover, understanding the hidden nuances—like proper sealing and proper load distribution—is crucial. When these details are ignored, even the most beautiful cabinetry will fail prematurely. I’ve seen countless installations where neglecting these factors led to costly repairs or replacements. To prevent such pitfalls, check out this guide on resilient storage options.
In summary, the key to a successful kitchen remodel lies in understanding the hidden nuances—how materials, installation techniques, and future adaptability intertwine. Jumping into design choices without this knowledge is a common mistake that homeowners and even some contractors make. So, do yourself a favor: dig deeper, plan thoroughly, and consult trusted sources. Have you ever fallen into this trap? Let me know in the comments!
Keeping It Working: Tools I Recommend for Durability and Precision
An effective kitchen remodel isn’t just about aesthetics; long-term performance depends on the right tools and maintenance. One tool I rely on heavily is a high-quality orbital sander with variable speed control. It allows me to sand cabinet surfaces smoothly without gouging or uneven spots, which is critical when applying durable finishes that stand up to daily wear. Another essential is a digital moisture meter, which helps monitor humidity levels in cabinets and prevents warping or swelling of wood over time. I use this regularly during installation and follow-up checks, especially in humid climates.
For precise cuts and fitting, especially when customizing storage solutions, I prefer a dual-bevel sliding compound miter saw. Its accuracy ensures tight joints and clean edges, vital for bespoke cabinetry. Additionally, a cordless impact driver with high torque is invaluable during assembly, making screw placement quick and secure without overtightening that could damage veneers or finishes. Regular maintenance of these tools, like cleaning brushes and lubricating moving parts, prolongs their lifespan and maintains their performance.
Software-wise, I recommend using a 3D design program tailored for kitchen planning, such as SketchUp or Fusion 360. These help visualize custom storage solutions and built-ins before any physical work begins. By simulating different layouts, you can optimize space and ensure your designs are functional and truly tailored to your needs. As technology advances, we can predict more intuitive CAD tools that integrate real-time measurements and material options, further streamlining the remodeling process.
How do I maintain my cabinetry and storage solutions over time?
Proper ongoing maintenance is key to preserving the investment you’ve made in your kitchen. Regularly clean cabinets with a gentle, water-based cleaner—avoiding harsh chemicals that can degrade finishes. Check hinges and slides every six months, applying a silicone-based lubricant to keep everything operating smoothly and prevent squeaks or sticking. Upgrading hardware, like drawer pulls and handles, can also refresh the look and improve durability; choose options with rust-resistant finishes such as brass or nickel. For more advanced tips on preserving your custom cabinets, explore expert advice on storage maintenance.
Implementing these tools and practices ensures your kitchen remains functional and beautiful for years. I encourage you to try upgrading your toolkit with a moisture meter or impact driver if you haven’t already—small investments that make a significant difference in long-term results. Keep your installations tight, finishes protected, and hardware operating smoothly, and your renovation will truly stand the test of time.
Surprising Lessons That Changed My Approach to Kitchen Improvements
One of the biggest revelations I had was realizing that meticulous planning isn’t just about aesthetics—it’s the backbone of longevity. I once chose a trendy paint finish without considering its resilience, only to watch it chip after just a few months. That experience taught me to prioritize high-performance materials, even if they come with a steeper price tag. Additionally, I learned that not all built-ins are created equal; understanding wall types and hardware compatibility saved me from costly mistakes. Lastly, I discovered that embracing technology—like moisture meters and advanced design software—made the entire renovation process more precise and less stressful.
Tools and Resources That Elevate My Cabinets and Storage Solutions
My toolkit has become essential in achieving professional-grade results. For durability, I rely on a high-quality orbital sander and a digital moisture meter—these help me prep surfaces flawlessly and prevent future issues like warping. When designing, I turn to SketchUp for visualizing custom storage, allowing me to experiment with layouts before cutting a single board. For hardware and finishes, I trust brands like Blum and Caesarstone for their reliability and quality. Books such as “The Kitchen Remodeling Bible” and online resources from artisancabinetworkz have been invaluable sources of inspiration and technical guidance, helping me craft a space that’s both beautiful and built to last.
Ignite Your Creativity and Make Your Vision Happen
Embarking on your kitchen remodel journey can feel overwhelming, but remember: every expert was once a beginner. With the right tools, knowledge, and a passion for quality, you can transform your space into a haven of durability and style. Don’t hesitate to dive into innovative storage ideas or invest in robust finishes; these choices will pay dividends over time. The future of kitchen remodeling isn’t just about looks—it’s about creating functional, resilient environments that adapt to your lifestyle for years to come. Now’s the moment to start turning your dream kitchen into reality!
What’s the one upgrade you’re most excited to try? Share your plans or ask questions below—I’d love to hear about your project!
**