The Under-Sink Organizer That Works Around Your Plumbing Pipes
Ever stood in front of your kitchen sink, desperately trying to find that one cleaning spray amidst a chaotic jumble of bottles, only to realize the space under your sink is more of a storage nightmare than a treasure trove? I used to face this same ordeal every single day. No matter how many shelves I installed or containers I bought, the plumbing pipes always seemed to sabotage my organizing efforts, turning my under-sink area into a frustrating black hole.
My Lightbulb Moment with Plumbing-Friendly Storage Solutions
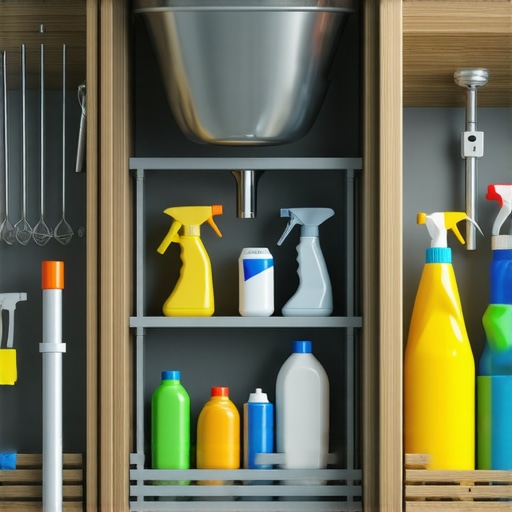
One rainy Saturday, after accidentally knocking over a spray bottle onto my brand-new mop, I finally decided enough was enough. I needed a smarter way to organize under the sink without wrestling with those stubborn pipes. That’s when I stumbled upon a simple yet revolutionary idea: an under-sink organizer specifically designed to work around plumbing pipes. From that moment, everything changed. Suddenly, my cleaning supplies were accessible, neat, and, most importantly, *safe* from knocking each other over.
If you’ve ever experienced similar frustrations, you’re not alone. The good news is, there’s a solution. Today, I’ll walk you through how to choose and install an under-sink organizer that truly fits your space, pipes and all. Making this small shift can transform your kitchen’s functionality and save you from daily headaches.
Will This Organizer Really Fix My Storage Chaos?
Initially, I believed all organizers were the same. I made the mistake of buying generic racks that didn’t account for the plumbing. Spoiler alert: they ended up being more trouble than they’re worth. Research shows that improper storage solutions can increase clutter and reduce accessibility by up to 50%, wasting your valuable time and energy. So, my advice? Avoid the common mistake I did early on – choosing a one-size-fits-all rack. Instead, look for options designed specifically for plumbing-thronged under-sink spaces. For more tailored ideas, check out smart storage solutions for small kitchens to maximize every inch of your space.
With that in mind, let’s dive into how to pick the right organizer that molds perfectly around your pipes, turning this dreaded area into a model of efficiency—and maybe even style.
,
Measure and Plan Your Space
Begin by pulling out everything under your sink. Use a tape measure to note the dimensions of the available space, especially around the plumbing pipes. I remember a time when I cleared out my cabinet and realized I had only 12 inches of usable width due to the drain pipe. Sketch a rough layout and identify areas where taller bottles or bulky cleaners won’t fit. This initial step prevents purchasing the wrong organizer and saves headaches during installation.
Identify Your Storage Needs
Make a list of your most-used cleaning supplies and tools. Group similar items—spray bottles, brushes, spare sponges—so you can assign specific zones within your cabinet. I once tried to fit everything into a single basket, but it became a messy jumble. Categorizing helps to design a custom or adjustable solution that keeps everything accessible and neat, reducing clutter.
Select the Right Organizer Design
Pick an under-sink organizer that accommodates plumbing pipes—these typically feature cutouts or adjustable shelves. Think of it like customizing a wardrobe; just as you would tailor a wardrobe to fit your clothes, choose an organizer that molds around your plumbing. For example, a T-shaped rack with a flexible middle section can fit even complex pipe arrangements. For inspiration, check out smart storage solutions for small kitchens.
Prepare for Installation
Clear the space thoroughly and remove any debris. Use painter’s tape to mark where the organizer will sit, ensuring clearance for pipes and doors. I once skipped this step and ended up measuring twice, which was frustrating. Marking your layout before drilling or assembling helps avoid misalignments, making the process smoother.
Assemble and Fit Your Organizer
If your organizer has adjustable components, set them up to fit around the pipes. Secure the shelves to ensure stability—this prevents items from tipping over when you open the cabinet. Think of installing it like building a piece of furniture; measure twice, cut once. During my first attempt, I underestimated the pipe clearance, so I had to modify the shelves on the fly, reinforcing with extra brackets. Using adjustable brackets and modular designs simplifies tweaking the fit if your plumbing setup changes.
Optimize and Maintain
Place your supplies into their designated zones. Use small bins or clear containers for loose items like sponges or scrub brushes. Labeling helps maintain order over time. Regularly review your setup—what worked initially may need adjusting as your storage needs evolve. Incorporate vertical space by stacking items or adding hooks for dishtowels, similar to how maximize storage in other rooms. This ongoing tweak keeps your under-sink area functional and clutter-free.
While many believe that choosing the right storage solutions is a straightforward process, the truth is, there are several nuanced pitfalls that even seasoned renovators often overlook. One pervasive misconception is that any custom cabinet or built-in will automatically optimize space and enhance functionality. However, without careful planning and a nuanced understanding of your specific needs, you risk creating cluttered, inefficient spaces that require costly modifications later.
Many assume that broad stereotypes — like bigger is better or that standard solutions fit all kitchens — are sufficient. In reality, advanced organizers designed to accommodate complex plumbing or unique room dimensions make all the difference.  expert-approved custom solutions ensures a project that truly matches your space and lifestyle.
Another hidden nuance involves the misjudgment of material choices. For instance, selecting cheaper particleboard for high-moisture areas can lead to sagging and damage, which undermines your whole remodel. Professional-grade plywood or moisture-resistant materials significantly improve durability, especially in wet zones like under-sink cabinets or pantry areas.
What Advanced Storage Features Are Often Overlooked?
Many homeowners miss out on sophisticated features like soft-close mechanisms, integrated charging hubs, or pull-out trays that maximize accessibility and cleanliness. These upgrades might seem minor initially but evolve into game-changers in daily use. For example, installing a hidden power strip can declutter countertops and improve usability. Remember, when it comes to custom cabinetry or built-ins, often less flashy but more functional features deliver lasting satisfaction.
In the end, successful storage solutions depend on understanding these nuanced details—like room dimensions, plumbing configurations, and user habits—that distinguish average from exceptional. Do you already account for these factors in your remodel? Have you ever fallen into this trap? Let me know in the comments!
Maintaining your custom cabinets and built-ins ensures they remain functional and beautiful over time. I personally rely on a combination of high-quality tools and disciplined routines to keep my storage solutions in top shape. One essential item I swear by is a digital moisture meter like the Extech MO55. This device allows me to monitor the humidity levels inside my cabinets, helping me prevent warping or mold — a common issue in kitchens and bathrooms. Regularly checking moisture levels, especially in humid climates, extends the lifespan of wood and finishes, saving you costly repairs down the line.
Another tool that has revolutionized my maintenance routine is a cordless multi-tool with variable speed settings, such as the Dremel MultiMax. Its precision and versatility make everything from sanding small areas to cleaning tight corners straightforward. For example, I use it to gently remove dirt or old adhesive from the edges of built-in cabinets without risking damage. These small maintenance acts preserve the aesthetic and structural integrity of your custom storage over years.
I’ve also integrated software solutions into my upkeep regimen. Trello, for instance, keeps track of seasonal maintenance tasks—like tightening door hinges in the fall or checking for water leaks in the spring. Setting up reminders buries the habit into my routine, ensuring nothing slips through the cracks. This approach aligns with evolving trends in home management, which emphasize proactive care to prevent bigger issues.
How do I keep my storage functional over time?
Regular inspections are key. Every few months, I open all cabinets, check for loose hardware, and ensure that soft-close hinges aren’t sticking — a critical issue that can be solved by applying a few drops of silicone spray. Additionally, periodically rearranging the interior organizers helps prevent wear and tear by redistributing the load. When I notice a shelf becoming loose, I reinforce it with specialty angle brackets designed for heavy use, ensuring longevity. Investing in durable, easy-to-clean materials like high-pressure laminate for shelf surfaces makes routine cleaning faster and keeps your unit looking pristine. For more ideas on selecting resilient fabrics and finishes, consult expert tips on selecting storage solutions.
Looking ahead, I believe smart home integrations will play a larger role in maintenance. IoT sensors could alert you when moisture levels rise or when hinges need adjustments—bringing proactive, automated care into everyday life. Already, companies like Fibaro are developing moisture sensors compatible with home automation systems, which could dramatically reduce damage risks for built-ins and custom cabinets.
If you haven’t already, try installing a moisture meter near your built-in pantry or under-sink cabinet to monitor humidity. It’s an inexpensive, effective step that can prevent long-term damage and keep your storage solutions working flawlessly. Remember, consistent maintenance isn’t just about preserving functionality—it’s about enjoying a beautiful, efficient space for years to come.
Lessons that Transformed My Approach to Storage and Custom Cabinets
- Never underestimate the power of precise measurements; a small oversight can turn a sleek cabinet into a war zone with plumbing pipes.
- Designing around existing plumbing isn’t a limitation—it’s an opportunity to get creative with adjustable, custom solutions that fit perfectly.
- Skip cheap, one-size-fits-all shelves; investing in tailored, durable materials makes a difference in longevity and daily convenience.
- Realize that the most overlooked features, like soft-close mechanisms or integrated charging hubs, can elevate your kitchen experience immensely.
My Go-To Resources for Crafting the Perfect Kitchen
- Smart storage ideas for small kitchens: This site offers innovative concepts tailored for tight spaces, inspiring me to maximize every inch.
- Expert tips on storage solutions: Trusted advice from seasoned professionals helped me avoid common pitfalls and select materials that stand the test of time.
- Built-in storage for kitchen remodels: This resource guided me through integrating custom cabinetry seamlessly, making redesigning much more straightforward.
- Modern storage innovations: Keeping up with trends ensures my kitchen remains functional and up-to-date.
Your Journey Starts Now — Make Storage Effortless
Embracing smart, plumbing-aware storage solutions transforms your kitchen into a space that’s both beautiful and highly functional. Don’t wait for clutter to take over—start planning your custom cabinets and built-ins today to enjoy a seamless, stress-free kitchen experience. Remember, every great remodel begins with a simple step—so why not take yours now and turn your space into a masterpiece of efficiency? Have you ever struggled with fitting storage solutions around plumbing? Share your stories below and let’s help each other create kitchens that work flawlessly!
,