Why Pocket Doors Are the Best Way to Hide a Messy Coffee Station
It was a typical morning in my kitchen—busy, noisy, with a constant parade of mugs, spoons, and tiny coffee pods stacking up like a mini mountain. Then, I looked over at my once-pristine countertop now littered with used mugs, stray sugar packets, and half-opened bags of beans. That sinking feeling hit me—my coffee station had become an eyesore, glaring at me every time I entered the room. I realized no matter how much I tidied, the clutter would always make an unwelcome appearance, challenging my efforts to keep the space tidy and inviting.
How to Keep the Coffee Chaos Hidden and Your Kitchen Stylish
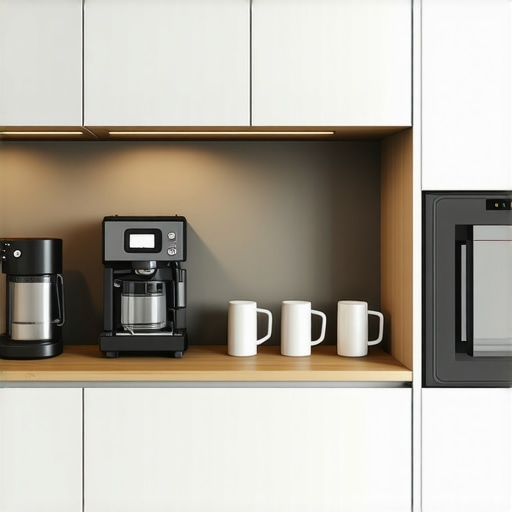
As I struggled with these cluttered mornings, I discovered the magic of installing a pocket door—an unobtrusive solution that transforms my kitchen from chaotic to sleek in seconds. Pocket doors slide discreetly into the wall, concealing the mess behind a simple, elegant panel. This quick fix has been a game-changer, giving me the peace of mind that my messy coffee station won’t be on display to every guest or even my family. Today, I’ll share how a clever pocket door setup can help you hide your own kitchen clutter with minimal fuss and maximum style, perfectly suited for tight spaces and busy households. Ready to reclaim your countertops? Let’s dive into how pocket doors can revolutionize your kitchen storage—and your mornings.
Is this trendy solution really worth the effort and cost?
In my early days of DIY, I made the mistake of assuming that any sliding door would do. I underestimated how essential precise measurements and quality hardware are for smooth operation. That oversight led to a door that stuck, screeched, and ultimately added frustration, not function. Since then, I’ve learned the importance of choosing the right materials and installation techniques—details that greatly impact durability and ease of use. If you’re cautious about investing in a solution that might turn into a headache, don’t worry—I’ll guide you through the essentials so you can avoid common pitfalls. Curious if this upgrade truly fits your space and style? Stay tuned as we explore the ins and outs of installing a pocket door that truly works for your home.
Plan Your Space meticulously before cutting into any wall or cabinet
Recall a time when I decided to expand my pantry and jumped straight into demolition. I started removing drywall without mapping out the new layout, which led to unexpected electrical wires and existing plumbing snags. To avoid this chaos, I measured twice, drew precise sketches, and confirmed locations for wiring, outlets, and plumbing. Using a tape measure and a level, I marked the wall to ensure the new cabinetry would align perfectly, avoiding uneven gaps and awkward fits. For your project, consider consulting blueprints if available or using a stud finder to locate studs behind the drywall, ensuring your built-ins are secured properly. This initial planning is critical and sets the foundation for a seamless installation, making the subsequent steps smoother and more predictable. Next, select high-quality materials that suit your room’s style and withstand daily wear and tear. I recommend using durable plywood over particle board, which sagging shelves and quick wear can compromise. For ideas on choosing the best material, visit plywood alternatives for kitchen cabinets. Once you have your materials, sketch detailed plans or even create a template for custom-cut pieces. Precise measurements are your best allies here. During my build, I used a jigsaw and a circular saw for different cuts; the jigsaw was perfect for curved edges, while the circular saw delivered straight, clean cuts. Remember, sloppy cuts result in gaps, which detract from both aesthetics and structural integrity. Use clamps to hold your materials steady while cutting, and double-check dimensions before proceeding. When assembling, dry-fit components first to verify they fit correctly, then proceed with glue and screws for permanence. To reinforce heavy shelves, I installed extra braces and supported the underside with L-brackets, ensuring they won’t bow under weight. This method aligns with best practices outlined in cabinet-bracing techniques. Remember, patience during assembly pays off with a professional finish. For finishing touches, sand rough edges and apply a protective primer and paint or stain as desired. This step not only beautifies your built-ins but also prolongs their lifespan. By following these concrete steps—from meticulous planning and material selection to precise cutting and sturdy assembly—you can transform your kitchen with custom cabinets that elevate aesthetics and functionality.Many homeowners assume that designing custom kitchen cabinets is simply about choosing the right style or finish, but the real pitfalls lie in the nuances that often go overlooked. One common myth is that more elaborate cabinetry always equals better functionality. In reality, over-customizing without considering everyday use can lead to impractical layouts that hinder efficiency rather than improve it. For instance, incorporating numerous intricate moldings or decorative elements might elevate aesthetics but can complicate cleaning and maintenance, especially in high-traffic kitchens. Advanced homeowners know that durability and ease of access should take precedence over purely visual enhancements, which is why selecting high-quality materials, such as durable plywood options, is essential.
Another overlooked aspect is the importance of proper hardware placement and type. Many believe that soft-close hinges or push-to-open mechanisms are solely about convenience, but incorrect installation can cause misalignment, resulting in doors that don’t close flushed, creating gaps that compromise the look and function. Investing in high-quality hardware and ensuring precise measurements—possibly with a professional’s help—can prevent these issues.
A frequent mistake is neglecting future-proofing during design, such as ignoring the need for adjustable shelves or considering how appliances or tech gadgets will integrate seamlessly. Advanced users understand that adaptability is key; for example, custom pull-outs for spices or hidden compartments for smart devices can significantly enhance kitchen workflow. External expert insights emphasize that planning for these features from the start can avoid costly retrofits later.
The ‘oh, it’ll be fine’ attitude often leads to mistakes. For example, failing to reinforce shelves or using lightweight materials in heavy-use areas can cause sagging or warping over time, especially in humid environments or under the weight of heavy cookware. To avoid this, consult resources like this guide on material strength, which underscores the importance of choosing the right core and supports.
Advanced designers also challenge the general belief that any finish will do as long as it looks good initially. The real secret is understanding the long-term effects of finishes, like how matte black hardware hides fingerprints better but might show water spots if not treated properly. Paying attention to finish types and applying protective topcoats can save time and cost in ongoing maintenance.
Are you aware of these nuances that can make or break your custom kitchen experience? Keep in mind that detailed planning, high-quality materials, and precise installation are the backbone of a truly functional and beautiful space. Don’t fall into common traps—invest today with a keen eye on these subtleties. Have you ever fallen into this trap? Let me know in the comments, and browse this collection of modern kitchen remodels for inspiration.Maintaining your custom cabinetry and kitchen upgrades isn’t just about cleaning; it’s about choosing the right tools and methods that ensure longevity and seamless functionality. I personally rely on high-quality, precision-engineered tools like the Festool Domino Joiner, which allows me to create tight joints that resist wear and tear over time. Its punch-hole system ensures consistent connections, vital for long-term durability in built-ins or storage solutions, especially when supporting heavy loads. For delicate refinishing or touch-ups, I recommend using a variable-speed rotary tool like the Dremel 4300, equipped with fine grit sanding attachments. This tool helps eliminate small scratches or paint imperfections without damaging the finish, preserving the aesthetic appeal for years. When it comes to software, I swear by CAD programs such as SketchUp Pro, which helps in planning storage solutions like pull-outs or custom dividers with precision, reducing errors during installation and saving time and money in the long run. As the trend shifts toward smarter homes, integrating maintenance alerts via apps like Home Connect or custom dashboards can help track wear, service dates, or upgrades needed, ensuring your investment remains pristine. Looking ahead, I predict a surge in AI-driven maintenance apps that will proactively notify homeowners about issues before they become costly repairs, especially for built-ins and large-scale remodels. How do I maintain custom cabinets over time? Regularly inspecting hinges, slides, and finishes and addressing small issues immediately with specialized lubricants like WD-40 Specialist Silicone is key. Applying protective coatings, such as UV-resistant varnishes, can also prevent damage from sunlight, which is a common issue in kitchens with large windows. For instance, using a silicone-based lubricant on drawer slides ensures smooth operation without attracting dust or grime, extending their lifespan significantly. Don’t forget to keep a toolkit with essential items like a set of precision screwdrivers, multi-bit bits for different hardware, and a small hammer; these are invaluable for quick fixes or adjustments. My advice: invest in a high-quality angle grinder for removing old hardware or smoothing rough edges before finishing; it’s incredibly versatile for DIY renovation projects. As you plan your next overhaul, remember that the key to long-lasting results lies in precise techniques, quality tools, and proactive maintenance. For comprehensive guidance, check out this detailed guide on maximizing space with innovative storage solutions or this deep dive into the best hardware for heavy-duty kitchen cabinets. Ready to elevate your kitchen’s longevity? Try implementing a monthly inspection routine, focusing on hinges and slides, with the right lubricant—your cabinets will thank you for it.Throughout my experience transforming kitchens, I’ve learned that the devil is truly in the details—small choices can make or break your project, and often, it’s the overlooked nuances that determine success or frustration. One key lesson is the importance of patience during planning; rushing into demolition without meticulous layout mapping can lead to costly surprises like hidden wiring or uneven surfaces. Investing the time upfront saves headaches down the line. Another revelation is how quality hardware and precise measurements elevate the final look and function of your built-ins, proving that shortcuts here are rarely worth it. I’ve also realized that understanding material properties—like how plywood outperforms particle board in load-bearing capacity—ensures durability for years to come. Lastly, embracing a proactive maintenance mindset, from regular hinge checks to appropriate lubrication, can preserve your custom cabinets’ beauty and functionality long after installation.