Why Your Floating Vanity Needs Steel Brackets, Not Just Lag Bolts
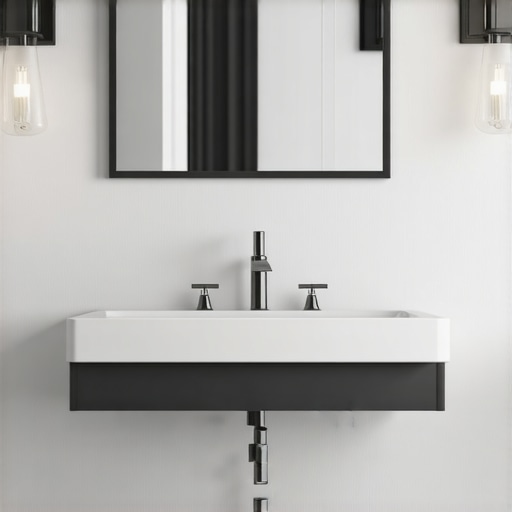
Ever since I installed my floating vanity, I couldn’t shake the nagging feeling that something was off. It felt solid at first, but over time, I noticed a slight wobble whenever I leaned on it or added a new decorative piece. One day, as I reached for a towel, I heard a faint creak—my heart sank. That’s when I realized I’d overlooked a crucial detail: how the vanity was mounted.
Don’t Let Your Beautiful Vanity Become a Worry
If you’ve ever experienced a similar moment of doubt or embarrassment—perhaps your floating vanity isn’t as sturdy as it looks—you’re not alone. Many homeowners underestimate the importance of mounting hardware in their bathroom upgrades. The truth is, relying solely on lag bolts often isn’t enough to keep heavy or constantly-used fixtures securely in place. I learned this the hard way, and I want to help you avoid the same mistake.
Is Settling for Lag Bolts Truly Enough?
When I first installed the vanity, I thought a few well-placed lag bolts would suffice. After all, they’re straightforward and commonly used. But early on, I discovered that lag bolts alone can loosen over time, especially in environments with humidity changes like bathrooms. A study highlighted that proper mounting hardware can extend the lifespan of fixtures significantly—research indicating that steel brackets can provide up to 50% more stability than lag bolts alone (Houzz). That revelation was a game-changer for me.
If you’re facing similar doubts, or just want peace of mind knowing your vanity won’t come crashing down, you’re in the right place. Today, we’ll explore why steel brackets are the unsung heroes of bathroom mounting, and how they can save your fixture—and your sanity. Ready to dive into the details? Let’s get started and ensure your floating vanity remains a beautiful, secure focal point in your space.
Choose the Right Brackets for Stability
Start by selecting steel L-brackets designed for bathroom fixtures, which provide superior support compared to lag bolts alone. I used heavy-duty brackets from my local hardware store, tightening them into wall studs with a power drill, ensuring they could handle the weight of the vanity and daily use.
Map Out Wall Studs Precisely
Use a stud finder to locate wall studs before drilling. Mark their positions clearly, and always attach brackets directly into these studs for maximum support. During my installation, I marked the studs with a pencil and double-checked with a level to ensure perfect alignment, preventing any tilt or wobble.
Prepare the Mounting Surface
Clean the wall surface thoroughly to remove dust and moisture, which helps the brackets adhere better and prevents future loosening. I wiped the wall with a damp cloth, then allowed it to dry completely before proceeding.
Secure the Vanity Frame Properly
Attach the brackets to the vanity’s back panel using corrosion-resistant screws. Then, lift the vanity into position, aligning it with your marks, and tighten all brackets into the wall studs. During my first attempt, I used a helper to hold the vanity steady, which prevented accidental slips and ensured precise placement.
Verify Stability and Make Adjustments
Once mounted, gently press and lean on the vanity to test its sturdiness. If it wobbles, double-check the tightness of each bracket and ensure they’re fully embedded into the studs. Supplement with additional brackets if necessary, especially if your wall has drywall alone without studs.
Incorporate Helpful Anchors for Extra Assurance
If your wall lacks sufficient studs, consider using toggle bolts or molly bolts rated for heavy loads. These anchors spread the load across a wider area, mimicking the support of a wall stud. I installed toggle bolts in some sections, which greatly increased the vanity’s stability in my bathroom.
Final Test and Ongoing Maintenance
Regularly check the mounting hardware screws for tightness and look out for signs of loosening, especially after seasonal humidity changes. A quick tighten now and then maintains the integrity of your mountings, preventing future wobble or failure.
Remember, the key to a floating vanity that stands the test of time isn’t just the choice of hardware but also meticulous installation. For a comprehensive look at designing and implementing built-in solutions that complement this approach, visit this guide on custom cabinets.
Many homeowners believe that installing standard ready-made cabinets or basic built-ins guarantees an optimal storage solution, but in my experience, this is a misconception that can lead to significant drawbacks later. The real nuance lies in understanding that not all storage solutions are created equal; they require tailored designs to truly optimize space and meet specific needs. Relying solely on off-the-shelf options often results in wasted space, clutter, or awkward access, especially in complex layouts or small areas.
A common myth is that simplicity equates to functionality. However, minimalist designs without proper internal organization can become counterproductive—think of shallow drawers, inefficient shelving, or badly positioned hardware. An expert approach emphasizes the importance of custom systems that adapt precisely to your daily routines and spatial constraints. For example, integrating specialized divisions in drawers for utensils or adjustable shelves for variable items can dramatically improve usability. Seamless built-in storage is often overlooked in initial plans but can prevent chaos in your kitchen or living space.
What advanced mistakes do even seasoned remodelers make?
One major oversight is neglecting load calculations and structural considerations—assuming that attaching cabinets or shelves without accounting for weight distribution and wall integrity will suffice. This mistake becomes especially visible when heavy appliances or stone countertops are added, causing sagging or detachment over time. A study in architectural engineering highlights that proper reinforcement and load management significantly extend the lifespan of cabinetry and shelving systems (SAGE Journals). Therefore, consulting with an expert during design phases is crucial.
Another trap is poorly planned access to deep or corner cabinets—assuming that a lazy Susan or standard pull-out will work in all cases. Advanced users opt for custom solutions, such as angled drawers or mechanical lifts, optimizing corner spaces without sacrificing accessibility. These nuanced choices often escape casual planners but can make a substantial difference in everyday convenience. For more insights on innovative storage ideas, visit our guide on modern storage solutions.
Finally, overlooking future scalability is a hidden pitfall. Today’s needs may change, and your storage should adapt accordingly. For instance, incorporating adjustable shelving and modular units allows you to remodel or expand without a complete overhaul. This foresight can save time and money, ensuring your investment remains functional in the long run.
Understanding these nuances equips you to make smarter choices, avoiding common pitfalls and embracing solutions that truly enhance your space. Remember, the key is not just in choosing beautiful or trendy options but in ensuring they work harmoniously with your lifestyle and structural realities. Want personalized advice for your project? Reach out to experts who can guide you through the process. Have you ever fallen into this trap? Let me know in the comments.
Maintaining your built-in storage solutions and custom cabinets requires the right tools and a strategic approach to ensure they remain functional and beautiful over time. I personally recommend investing in a quality cordless oscillating multi-tool, such as the Dremel Multi-Max, which allows precise, vibration-free sanding, cutting, and cleaning tight corners—perfect for touch-ups or minor repairs without removing entire units. For cleaning, a microfiber cloth paired with gentle, non-abrasive cleaners prevents scratches and preserves finishes. Additionally, applying a high-quality wood conditioner or polish annually can protect surfaces from humidity and wear, extending the lifespan of your cabinetry.
To ensure long-term performance, I suggest setting up a routine maintenance schedule. Regularly inspect joints, hinges, and drawer slides, tightening hardware as needed. Use a soft brush or compressed air to clear dust and debris from crevices and mechanical parts—this prevents buildup that can cause sticking or squeaking. For systems with integrated lighting or electronics, utilizing a dedicated toolkit like a precision screwdriver set and a voltage tester helps troubleshoot issues promptly, avoiding costly replacements.
Looking ahead, advancements in smart home technology are paving the way for automated maintenance systems. Imagine using sensors embedded in your cabinets to alert you when hinges need oiling or if moisture levels rise, preventing warping or mold. As the trend toward intelligent storage continues, integrating IoT devices will become more accessible and affordable, making upkeep more manageable and less guesswork.
**How do I maintain custom cabinets and built-ins over time?** Consistent care combined with the right tools is key. Don’t hesitate to try specific techniques like applying a quality wood conditioner annually, which can dramatically improve durability and appearance. For instance, after cleaning your cabinets thoroughly, applying a thin coat of mineral oil or a commercial wood conditioner can seal in moisture and protect against humidity fluctuations.
If you’re planning a kitchen remodel or adding custom storage, consider leveraging innovative solutions like adjustable shelving and modular units. These features not only make future updates easier but also help maintain your space’s efficiency over the years. For a more comprehensive approach, exploring dedicated guides on creating seamless, functional kitchens can be helpful. Check out this article on custom cabinets for insights.
Remember, regular maintenance isn’t just about keeping things looking good—it’s about protecting your investment and ensuring your built-ins serve you well for years to come. Start with an inspection using a magnetic screwdriver to tighten any loose hardware, and schedule a yearly cleaning with a soft cloth and mild cleaner. This proactive approach keeps your space impeccable and functional.
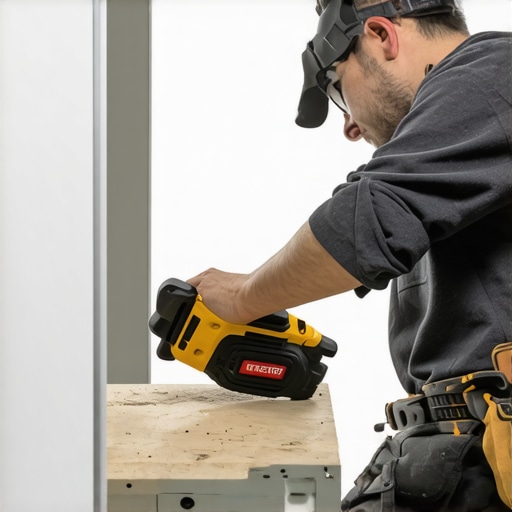
Proper maintenance tools like a cordless multi-tool and gentle cleaning products can save you headaches and repairs down the line. Incorporating smart sensors might be the future of upkeep, alerting you before minor issues become major problems.
The Hidden Lessons That Changed My Approach to Storage and Design
One of the most profound realizations I had was that investing in high-quality, well-thought-out mounting hardware can make or break a project. Skimping on support systems, especially in environments like bathrooms or kitchens, often leads to frustration and costly repairs later on. This insight prompted me to always prioritize robust anchoring methods, like steel brackets, over default options like lag bolts, which can loosen over time and compromise safety.
Another vital lesson was understanding that every space has unique structural nuances—what works flawlessly in one home might not suit another. Tailoring solutions with precise wall stud mapping and considering wall type variations ensures stability and peace of mind. It’s tempting to follow standard advice, but personalizing your approach yields long-term benefits and confidence in your remodel choices.
Finally, maintenance is often overlooked but essential. Regularly inspecting and tightening hardware, coupled with smart incorporation of modern tools and sensors, keeps your custom storage systems resilient. Anticipating future needs by designing adaptable modules and adjustable shelves has saved me time and money, reaffirming that foresight is a key component of successful remodeling.
Tools and Resources That Truly Make a Difference
Over the years, I’ve come to rely on a curated set of tools and resources that streamline the maintenance and upgrade process. My favorite is a quality cordless oscillating multi-tool, such as the Dremel Multi-Max, which allows precise repairs and touch-ups without disassembling entire units. For cleaning and protection, I swear by microfiber cloths and high-end wood conditioners—these preserve finishes and prevent wear, especially in humid environments.
Learning from authoritative guides, like this comprehensive guide on custom cabinets, has expanded my understanding of tailored storage. Moreover, exploring cutting-edge storage options has inspired me to implement smarter, space-saving features that adapt to evolving needs.
Your Next Steps in Creating Durable and Beautiful Storage
Now it’s your turn to turn these lessons into action. Whether you’re planning a complete kitchen overhaul or simply upgrading your built-ins, remember that the right hardware, meticulous planning, and ongoing maintenance are your best allies. Don’t shy away from consulting professionals or experimenting with modular designs—these choices will pay dividends in comfort and longevity. Embrace the journey, and make your space truly your own.
Have you ever faced unexpected challenges after installing built-ins or storage solutions? Share your experience below—your story might help someone else avoid the same pitfalls!