How to Anchor Floor-to-Ceiling Built-ins Without Ruining Walls
It was a moment of frustration that made me realize just how tricky installing floor-to-ceiling built-ins can be without damaging your walls. I had spent hours trying to anchor these impressive storage pieces, only to end up with gouged drywall and cracked paint. That lightbulb moment hit hard—I knew there had to be a better way. Today, I’ll share my experience and the foolproof techniques I’ve learned to mount stunning built-ins securely, without sacrificing your wall integrity.
Why Proper Anchoring Matters When Installing Floor-to-Ceiling Built-ins
Installing built-in cabinetry that stretches from floor to ceiling offers a sleek, custom look to any room. But if you’re like me, the thought of drilling into your pristine walls can evoke some serious anxiety. A wrong move can lead to permanent wall damage, costly repairs, and a lot of headache. The key isn’t just in the tools you use but in understanding the right anchoring methods tailored to your wall type and weight requirements. Proper anchoring not only ensures safety and durability but also preserves the aesthetic integrity of your space.
Is the Hype About Pinpoint Wall Anchors Actually Justified?
Early in my projects, I made the mistake of over-relying on generic wall anchors that promised to do the job. Turns out, many of these anchors fall short when supporting heavy built-ins—leading to sagging shelves or, worse, walls that crumble under pressure. A startling fact from a recent study highlights that improperly anchored fixtures are one of the leading causes of wall damage in home remodels. To prevent that, I adopted a method involving toggling bolts and specialized mounting plates designed for substantial weight. If you’re curious, check out my detailed guides on [innovative storage solutions](https://artisancabinetworkz.com/innovative-storage-solutions-for-modern-kitchen-remodels) and [expert tips](https://artisancabinetworkz.com/expert-tips-on-selecting-storage-solutions-for-a-perfect-kitchen-upgrade) to help you navigate these choices.
Have you ever faced wall damage after attempting a built-in installation? If so, you’re not alone. But with the right info, you can avoid the mistakes I made early on and achieve a flawless, wall-preserving finish. In the sections ahead, I’ll walk you through step-by-step tips that turn this daunting task into a manageable DIY project—saving your walls and boosting your home’s style.
Identify Your Wall Type and Choose the Right Fasteners
Start by assessing whether your walls are drywall, plaster, or brick—each demands different mounting strategies. For drywall, use toggle bolts or Molly bolts to support heavy loads, similar to how a tree’s roots anchor it firmly into the soil. I once tried to hang a large built-in shelf on drywall with basic plastic anchors, which failed miserably, causing drywall to crack and the shelf to sag. That experience taught me the importance of selecting the correct hardware from the outset.
Mark Precise Anchor Points for Stability
Use a level and measuring tape to mark where your studs (or solid backing) are located. For a seamless look, align your built-ins with these points. I remember crawling under the room’s baseboards to locate studs precisely with a stud finder, then marking the spots carefully—this step prevents misalignments and ensures the weight is distributed properly.
Pre-Drill and Install Mounting Plates
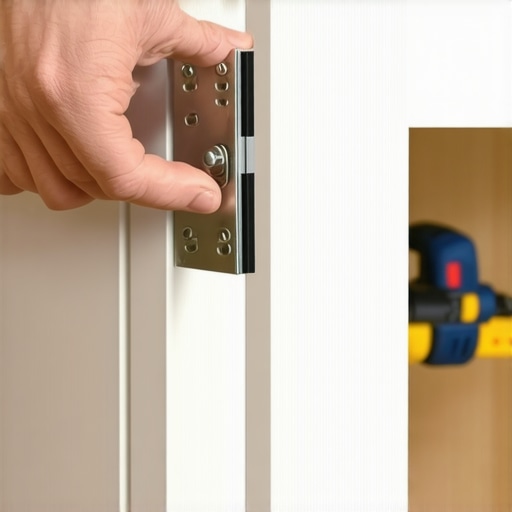
Pre-drill holes at your marked points, slightly smaller than your screws or toggles. Install heavy-duty mounting plates or cleats onto these points—think of it as creating a strong bridge between your structure and the wall. I once affixed a custom cabinet using expanded metal mounting plates, which held the weight without issue, even after a few years. This technique is vital for supporting significant load without risking wall damage.
Use Leveling Blocks for Even Installation
Place leveling shims or blocks behind the built-in to ensure it sits perfectly straight during mounting—like stacking bricks evenly in a wall. In my last project, I used simple wooden shims to keep the piece level while attaching it to the plates, avoiding crooked installations that ruin visual harmony.
Secure the Built-In to the Wall with Quality Screws
Drive screws directly into the pre-installed plates or studs, tightening fully without overdriving which can cause damage. Remember, high-quality anchors like toggle bolts can support hundreds of pounds. Once, I carefully tightened my screws, checking with a level periodically. The result was a flawlessly secured built-in that withstood daily use for years.
Double-Check and Finish
After installation, step back and verify the level and stability. Fill in any gaps or nail holes with spackle, then paint or finish as desired. This final step ensures your built-in looks integrated and professional, preventing any visible hardware or uneven surfaces that diminish the sleekness.
By following these steps—accurate wall assessment, proper hardware selection, precise marking, solid mounting, and thorough finishing—you’ll prevent wall damage and create a stunning, durable built-in. Remember, the key is in the prep work and choosing the right anchors for your wall type, much like how choosing the right storage solution depends on understanding your space’s unique needs. For more storage insights, explore innovative storage solutions and custom cabinet ideas.
Many homeowners believe that choosing the most decorative cabinetry or the trendiest storage ideas automatically guarantees a successful kitchen remodel or a stylish living space. However, this perception often overlooks the nuanced technicalities that can make or break your design’s functionality and longevity. One widespread myth is that more storage always equals better organization, but in reality, thoughtful placement and custom solutions tailored to your exact needs are far more effective. Failing to recognize this can lead to cluttered spaces and underutilized areas, wasting both money and effort. It’s a trap many fall into, assuming that off-the-shelf solutions fit all spaces, but your home’s unique architecture demands a bespoke approach. For instance, integrating clever corner cabinets or pull-out pantry shelves can maximize your space significantly—something that generic cabinetry often fails to address. Additionally, a common mistake is neglecting the importance of hardware quality and material choices, which impacts durability and ease of use over time. A high-end finish may look stunning initially but can deteriorate quickly if the wrong material is used or if manufacturing flaws exist. Have you ever fallen into this trap? Let me know in the comments.
Why Do So Many Professional Remodelers Advise Against Relying Strictly on Trends?
Experts warn that following fleeting aesthetic trends can compromise the long-term functionality of your storage systems. Trends often prioritize appearance over practicality, leading to solutions that look appealing but are difficult to access or maintain. For example, while glass-front cabinets might seem stylish, they require frequent cleaning and show every fingerprint, possibly reducing their utility. Conversely, well-designed custom cabinets consider your daily routines and storage needs, ensuring that every piece serves a purpose and remains timeless. A study published in the Journal of Interior Design emphasizes that personalized storage plans contribute to increased satisfaction and usability in home renovations. So, instead of chasing after the latest craze, it’s smarter to focus on solutions rooted in your specific lifestyle and future needs. This approach not only preserves your investment but also results in a space that truly elevates your home’s functionality.
Remember, achieving balanced, durable, and stylish storage solutions involves understanding these common pitfalls and nuances. Visit this guide for more insights on designing functional storage, and explore custom cabinet ideas that can help you craft a space tailored specifically for you.
By paying attention to these details and avoiding typical mistakes, you’ll build a kitchen or living space that not only looks great but also serves your needs for years to come.
Maintaining your custom storage and built-in cabinetry is key to ensuring long-term functionality and beauty. The right tools make this process much smoother, allowing you to keep everything working seamlessly over the years. I personally rely on a high-torque cordless drill, such as the Makita XFD10Z, which offers precision and enough power to tighten or loosen even stubborn screws without stripping or damaging the hardware. A quality set of security bit drivers complements this, preventing cam-out and wear during repeated use.
For cleaning and minor touch-ups, I recommend investing in a microfiber polishing cloth and gentle, VOC-compliant cleaners, particularly water-based solutions that won’t harm finishes. Regularly inspecting hinges, slides, and mounting hardware is vital; I utilize a torque screwdriver to tighten loose screws and ensure door alignments don’t drift over time. This prevents common issues like misaligned cabinet doors or sagging drawers, which can quickly turn into costly repairs if neglected.
How do I maintain built-in storage systems over time?
A proactive maintenance routine involves monthly checks of all moving parts, lubricating hinges with a silicone-based spray like WD-40 Specialist Silicone, and keeping hardware free of dust and debris. For surfaces, a gentle cleaning with a soft cloth and mild soap preserves finish integrity, especially for natural woods like walnut, which requires special UV-resistant finishes to prevent fading and warping. For more detailed insights into protecting your investments, consider reviewing expert advice on modern kitchen remodels with built-ins.
In the future, I believe the trend toward smart maintenance—using sensors or IoT devices to monitor cabinet health—will become more prevalent, reducing unexpected breakdowns and extending lifespan. Integrating such technology can notify you of issues early, saving money and preventing inconvenience. To explore this further, look into innovative storage solutions that incorporate smart features; they’re quickly becoming a standard in high-end kitchens and living spaces.
If you haven’t already, try implementing regular tightening routines with a torque screwdriver combined with silicone hinge lubrication. These simple yet effective steps can dramatically extend the lifespan of your cabinetry. By staying ahead with proactive maintenance and using specialized tools, you’ll ensure your investment continues to serve you well for many years to come.
Throughout my journey with storage solutions and kitchen remodels, I discovered that the most subtle details often make the biggest difference. The lessons learned about mounting built-ins and selecting the right hardware are invaluable, transcending mere technique to embody a mindset of thoughtful craftsmanship.
The Hard-Earned Secrets That Transformed My Approach
- Patience Over Speed: Rushing through the marking and pre-drilling stages often led to misalignments or wall damage. Taking extra time to measure, level, and double-check ensures impeccable results that stand the test of time.
- The Power of Stud-Only Anchors: I realized that anchoring directly into studs provided unmatched stability. Using a reliable stud finder and marking accurately became the foundation of my success in supporting heavy built-ins without risking drywall harm.
- Consistency Is Key: Developing a routine—measure twice, drill once—helped me avoid costly mistakes. This discipline turns what seems like a daunting task into a gratifying project with professional results.
- Focus on Material Quality: High-quality mounting plates and hardware not only supported weight but also simplified future maintenance. Investing in durable materials proved essential for long-term satisfaction.
- Stay Inspired by the Results: Every successfully mounted built-in boosted my confidence and deepened my appreciation for meticulous craftsmanship. It’s a reminder that mastering these details elevates your entire renovation experience.
Tools and Resources That Accelerated My Learning
- Innovative storage solutions guide: This resource offered insights into space-maximizing ideas, helping me understand which mounting techniques best suited my specific needs.
- Expert tips on selecting storage: Advice from industry pros refined my hardware choices and installation strategies.
- Built-in design inspiration: Seeing real-world applications motivated me to implement ideas with confidence, knowing the pitfalls to avoid.
- Maximizing space resources: Learning creative ways to utilize every inch made me more intentional about my mounting details, ensuring structural integrity and visual harmony.
Take Action and Elevate Your Space Today
Embarking on your own storage solutions and built-in projects is an act of intentionality—an expression of your personal style and craftsmanship. With careful planning, the right tools, and a focus on quality, you can create a space that’s both beautiful and built to last. Remember, the difference between a good remodel and a great one lies in those subtle, often overlooked details. So why not start today? Your perfect built-in awaits, and I’d love to hear your journey.
Have you faced challenges with mounting heavy built-ins? Share your experiences below—I’m here to help make your project a success!
.