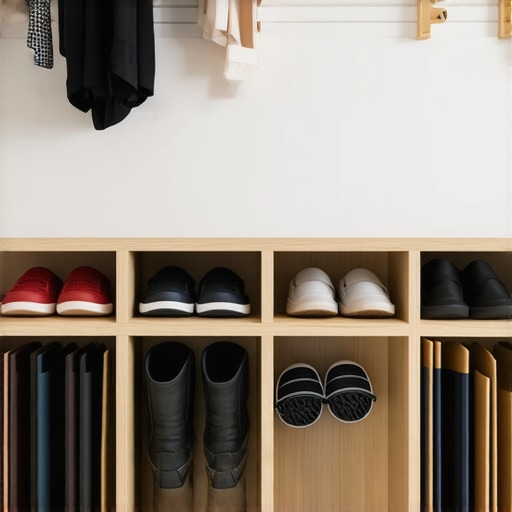
Why Your Mudroom Needs Built-In Cubbies with Slotted Boot Trays
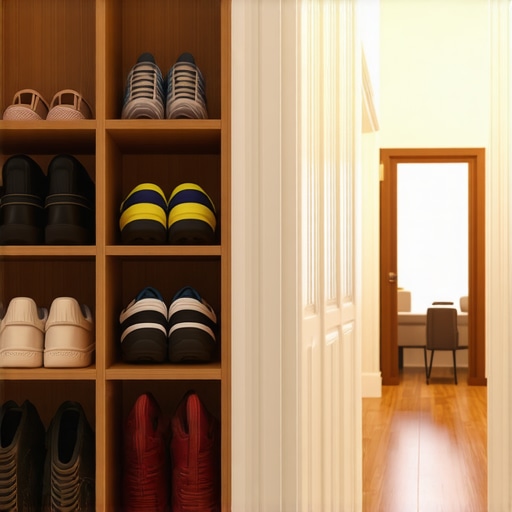
It was a typical, chaotic Saturday morning when I finally had enough. Shoes scattered across the entryway, wet boots dripping onto the hardwood, backpacks tumbling over mismatched hooks. The mess was overwhelming, and I realized something had to change—fast. That lightbulb moment made me rethink the way I approached storage in my home. I needed a solution that wasn’t just functional but also integrated seamlessly into my space.
The Challenge of Disorganized Mudrooms
Many homeowners struggle with muddy shoes, wet boots, and cluttered entryways, especially during the rainy or snowy seasons. Conventional storage solutions often fall short, leading to clutter and frustration. My experience taught me that quick fixes like plastic bins or unsecured hooks are only temporary—they don’t address the root of the problem.
Is a Built-In Solution Really Worth the Investment?
At first, I was skeptical about installing built-in cubbies with slotted boot trays. They sounded expensive and complicated. However, the early mistake I made was thinking that any storage option would do. The truth is, without proper organization designed for your specific needs, clutter persists. Once I invested in custom-built cubbies, I saw a dramatic improvement—not just in tidiness, but also in the overall functionality of my mudroom. Reliable, purpose-built storage isn’t just about aesthetics; it enhances daily convenience and reduces stress.
According to a study by the National Association of Home Builders, effective storage solutions can increase a home’s functionality and even its resale value. So, if you’ve been pondering whether a mudroom upgrade is worth it, the answer is a resounding yes. But the key is choosing the right system—something that combines practicality with design.
In this post, I will walk you through why built-in cubbies with slotted boot trays are game-changers and how you can implement them in your home. Ready to transform your entryway into a tidy, welcoming space? Let’s dive into the benefits and the steps to make it happen.
Sketch a Layout for Your Custom Storage
Start by measuring your entryway, noting the available width, height, and depth. Use painter’s tape on the floor to outline potential cubby positions, helping you visualize the space. Remember, simplicity is key—keep enough room for opening doors and walking comfortably. I once spent a Saturday afternoon with a tape measure and a notepad, sketching different configurations before settling on a design that fit perfectly and looked sleek.
Select Quality Materials for Durability
Choose sturdy hardwoods like maple or oak for longevity, especially if the mudroom handles wet shoes and heavy boots. Avoid softwoods that may warp or dent easily. While selecting materials, I noticed that a solid wood top in my prototype prevented wobbling—something cheaper particleboard wouldn’t withstand. Consider joints and finishes that resist moisture, and seal all surfaces with a waterproof sealant for added protection.
Create Precise Cutouts for Slots and Trays
Cut the cubby openings to fit standard boot trays snugly. Use a straightedge and a saw for clean lines; a jig saw works well for curves or intricate slots. For my project, I double-checked measurements twice—mistakes here can cause trays to misalign or fall through. When fitting the trays, leave a small gap (~1/8 inch) to allow for expansion, preventing warping over time.
Build or Assemble the Cubby Units
If you’re handy, assemble each section with strong wood glue and finish nails or screws, ensuring tight joints. For a seamless look, strive for consistent spacing and alignment. I used clamps to hold pieces steady while the glue dried, which resulted in a solid, professional feel. For added stability, consider reinforcing the corners with metal brackets—especially in high-traffic areas.
Install the Storage System in Your Entryway
Mount the units securely to wall studs using heavy-duty anchors and screws. Level the entire setup with a carpenter’s level before fixing permanently. I remember carefully marking drill points, then checking each unit with a level—an extra step that paid off with a perfectly aligned installation. For aesthetic consistency, match the hardware and finishes to your existing decor or choose contrasting accents for visual interest.
Incorporate Accessories to Maximize Functionality
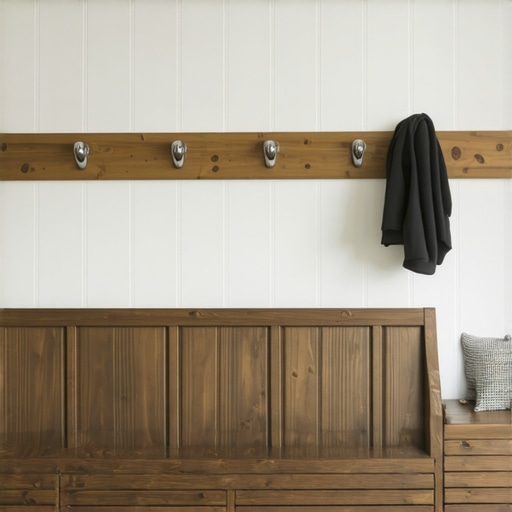
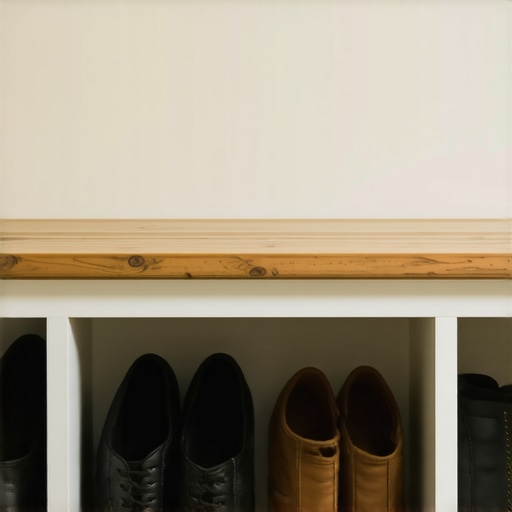
Enhance your built-ins with hooks for umbrellas, baskets for accessories, and proper lighting—consider LED strip lights hidden under shelves for better visibility. For a practical touch, install a small bench seat or fold-out surface for putting on shoes. I added a magnetic strip inside the cubby doors to hold small metal tools or keys, making every inch purposeful. Plus, integrating a charging station discreetly in the cubbies keeps cords out of sight but easily accessible.
Maintain and Adjust Over Time
Regularly check the stability of shelves and trays, tightening screws as needed. Refinish or seal surfaces periodically to keep moisture at bay. My first installation held strong after months of daily use, but I did tighten some screws and refinished surfaces twice a year to keep everything looking fresh. Thoughtful maintenance ensures your investment continues to serve your family well for years.Many homeowners jump into installing built-in cabinets or storage solutions expecting immediate perfection, but there are often overlooked nuances that can derail an entire project. A prevalent myth is that custom is always costly and complicated; in reality, selecting the right materials and methods can make custom solutions more affordable and durable than off-the-shelf options. For example, opting for high-quality plywood instead of particleboard, especially in areas exposed to moisture, can significantly extend the lifespan of your cabinetry.
A common mistake is underestimating the importance of precise measurements and fit. Even the slightest miscalculation can lead to gaps, uneven surfaces, or hardware misalignments that compromise both aesthetics and functionality. Advanced homeowners often use digital tools or laser levels to ensure accuracy, which might seem like overkill but saves time and money in the long run.
Furthermore, many believe that minimalist storage is always better—less is more. However, in high-traffic areas or kitchens, thoughtful integration of storage—such as corner pull-outs or hidden compartments—can optimize space utilization robustly. Modern design incorporates these nuanced features that enhance usability without cluttering visual appeal.
One key nuance that often gets overlooked is the impact of climate and humidity on materials. Softwoods or unsealed MDF can swell or warp over time if not correctly selected or treated. Industry experts recommend using moisture-resistant finishes and proper sealing techniques, especially in humid climates, to prevent such issues. According to a 2022 study by the Kitchen & Bath Industry Show, improper material selection is a leading cause of repair and replacement within three years of installation.
From a DIY perspective, many assume that installing built-ins is straightforward. The truth is, advanced joinery techniques and anchoring methods are critical for safety and durability, especially in load-bearing applications. Reinforcing with metal brackets or using lag bolts into studs ensures the stability of heavy cabinets and shelves.
If you’re considering a kitchen remodel or custom cabinetry, don’t overlook the power of integrated features like hidden electrical outlets or lighting. These hidden details not only add convenience but also prevent clutter and enhance the sleekness of your design. Visiting expert resources, such as this guide, can help you navigate the complex decisions.
Have you ever fallen into this trap? Let me know in the comments. Precise planning, understanding the material nuances, and employing advanced techniques are what truly elevate built-in solutions from good to exceptional.Ensuring your custom cabinetry and built-in storage solutions remain functional and beautiful over time requires the right tools, routine maintenance, and an understanding of system longevity. Personally, I swear by a combination of high-quality hand tools and specialized cleaning products to keep everything in top shape. A cordless multi-tool, like the Fein MultiMaster, is invaluable for making minor adjustments or tightening loose joints without removing entire sections—saving me hours of frustration and maintaining the integrity of my installations. Regular inspection of hinges and drawer slides identifies issues early, preventing costly repairs down the line.
When it comes to cleaning, I recommend using a microfiber cloth with a gentle, pH-neutral cleaner; this prevents the buildup of grime and keeps the finish looking fresh. For stubborn spots or water stains, a mixture of warm water and a small amount of mild dish soap works wonders, especially on the waterproof finishes I prefer for areas exposed to moisture.
Investing in quality lubricant for hinges and slides, like WD-40 Specialist White Lithium Grease, ensures smooth operation and reduces squeaking—an underrated aspect of long-term functionality. I apply it biannually to hinges and sliding mechanisms. This practice, combined with periodic tightening of fasteners, significantly extends the lifespan of built-in units.
Looking ahead, trends in digital monitoring might revolutionize maintenance, with smart sensors alerting you to moisture ingress or hardware issues before they become visible. The integration of IoT-enabled hardware, such as moisture sensors connected to your smartphone, could be the next step in maintaining your storage solutions more proactively.
How do I maintain my built-ins over time? Regular inspections, prompt adjustments, and using the right tools make all the difference. I suggest trying the method of applying a dedicated lubricant to hinges and slides during your quarterly checks—it’s a game-changer. For more detailed advice tailored to your specific setup, don’t hesitate to reach out. Staying proactive with maintenance not only preserves your investment but also ensures your storage continues to serve perfectly for years to come.
The Hardest Lessons I Learned About Built-Ins and Storage Solutions
- Overestimating the simplicity of custom builds can lead to unnecessary delays. I once thought measuring once was enough—turns out, multiple measurements avoid costly mistakes.
- Choosing the right materials makes all the difference. Opting for high-quality, moisture-resistant woods saved me from frequent repairs, especially in humid climates.
- Patience during installation pays off. Rushing to finish resulted in misaligned shelves. Taking extra time ensured a seamless, professional look.
- Maintenance is key—regular inspections and minor tweaks keep built-ins functioning smoothly and looking fresh for years.
- Investing in proper tools and learning advanced joinery techniques transformed my DIY project from amateur to impressive, saving money on repairs.
My Favorite Resources for Mastering Built-In Storage
- Artisan Cabinetworks Blog: Offers comprehensive guides on custom cabinets and storage solutions, trusted for its practical tips and detailed tutorials.
- Professional-grade tools like the Fein MultiMaster: Essential for precise adjustments and finishing touches—I’ve found they make a noticeable difference in quality.
- Expert tips on selecting storage solutions: Provides insights on blending functionality with design, which helped me make smarter choices.
- Social media groups focused on home remodels: Real-world advice and troubleshooting help from fellow enthusiasts keep my projects on track and inspired.