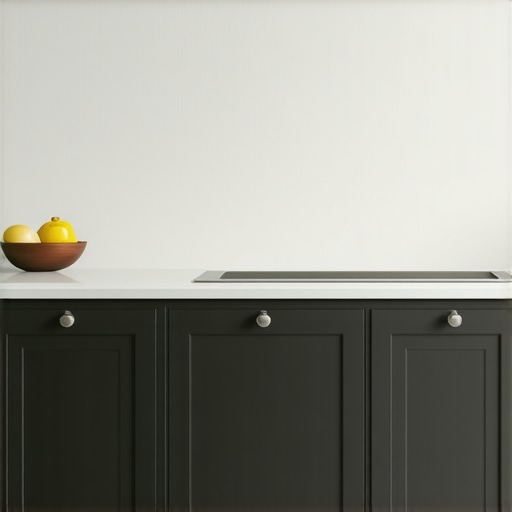
Why Your Toekicks Should Match Your Cabinets, Not Your Floors
It happened to me during my recent kitchen remodel—an unexpected detail that kept nagging at me every time I walked into my new space. I had invested so much time and money into the cabinets, countertops, and backsplash, but little did I realize that a simple oversight on the toekicks would detract from the overall look. At first, I dismissed it as a minor detail, but soon, I couldn’t unsee how mismatched toekicks made my entire kitchen feel less polished.
This experience was a lightbulb moment for me, revealing just how impactful the tiniest design choices can be. If you’ve ever felt something isn’t quite right in your kitchen after a renovation—perhaps it’s missing that cohesive feel—this article will show you why matching your toekicks to your cabinets makes all the difference. I’ll walk you through the reasons behind this—based on personal trial, error, and a good dose of expert advice—and help you avoid my early mistake of overlooking this crucial detail.
The Hidden Power of Toekick Alignment in Kitchen Design
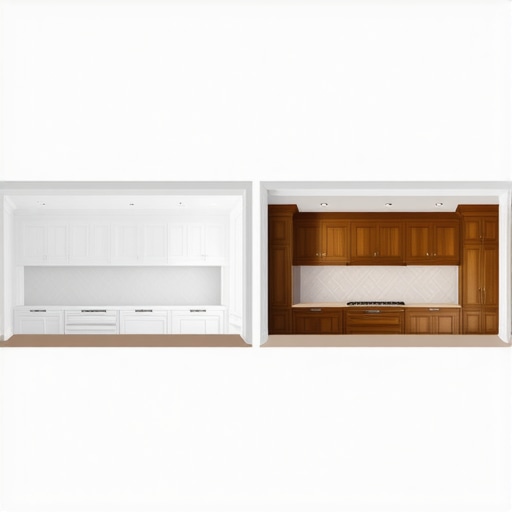
Most homeowners focus heavily on cabinet styles, hardware, and countertops, often neglecting the toekicks beneath. But these small strips of material, usually about 3 to 4 inches high at the base of your cabinets, play a significant role in the visual harmony of your space. When mismatched or painted differently from your cabinets, toekicks can create a jarring disconnect, making the entire kitchen look less intentional.
I learned that when toekicks match the cabinet finish—be it a painted shaker, stained wood, or modern laminate—it creates a seamless flow that elevates the overall aesthetic. Not only does this consistency make your kitchen appear more cohesive, but it can also make your space look more modern and thoughtfully designed. And the benefits go beyond appearance; well-chosen toekicks can sometimes improve the functionality of your cabinets, especially if you opt for custom options that connect with your storage goals.
If you’re planning a renovation or just refreshing your kitchen, consider visiting sites like [artisan cabinetworkz](https://artisancabinetworkz.com/modern-kitchen-remodels-featuring-custom-cabinets-and-built-ins) to see how modern designs incorporate matching toekicks effortlessly. It’s these kinds of details that truly separate a well-designed kitchen from one that feels just a little off.
But I get it—your initial instinct might be to save costs by skipping the matching or painting the toekicks in a neutral tone. That’s a common mistake early on in remodeling projects, and I’m here to tell you why it’s worth investing in. Stay with me, and I’ll show you how mastering this small detail can make your kitchen look and feel more custom, polished, and inviting.
Are you facing the frustration of mismatched trim beneath your cabinets? Or perhaps you’ve already noticed how small design choices like this can make a big difference? If so, you’re not alone—many homeowners overlook this simple fix until it’s too late. The good news is, with a little guidance, you can correct this and enjoy a more cohesive look.
Now that I’ve set the stage, let’s explore how exactly you can make this happen and transform your kitchen into a space you’re truly proud of.
Begin with Precise Measurements
Start by measuring the height and depth of your cabinets to determine the ideal toekick dimensions. Use a tape measure and note these measurements. A common height is 3.5 inches, but custom kitchens may vary. Accuracy here ensures a seamless match and prevents gaps or overlaps that can ruin the aesthetic.
Select the Material and Finish
Choose a material that complements your cabinetry—whether painted wood, stained veneer, or laminate. When in doubt, bringing a sample or digital color swatch to the store simplifies decision-making. For example, I once picked a painted MDF for my toekicks that matched my cabinet doors perfectly, creating a unified appearance. Opt for a finish that is durable and easy to clean, especially in high-traffic kitchens.
Plan for Building or Buying Pre-made Toekicks
You can either custom-build toekicks using your measurements and preferred material or buy pre-made ones from suppliers like artisancabinetworkz. Custom options may require tools like a circular saw or router for precise cuts. I chose custom-built toekicks, which allowed me to incorporate a subtle chamfer detail, elevating my kitchen’s style. If you opt for prefab, ensure the dimensions can be adjusted or cut to size on-site, saving time and effort.
Prepare Your Cabinets and Workspace
Clear the area beneath your cabinets and lay down protective sheets. Remove any existing toe kick trims or covers. Using a level, mark the baseline for your toekicks directly on the cabinet bases. This step prevents crooked installation, which can be glaringly obvious in a room aiming for perfection.
Attach the Toekicks Securely
Apply construction adhesive or screws to fix the toekicks to the cabinet base. For better longevity, screws should be inserted through the face of the cabinet toe kick area at regular intervals. I found that pre-drilling holes helped prevent splitting, especially when working with MDF or softer woods. For a cleaner look, countersink the screws and fill the holes with wood filler or paint to match your finish.
Create a Professional Finish
Finish off by caulking any gaps between the toekick and the cabinet or wall using paintable silicone. This step smooths out any imperfections and enhances the seamless appearance. Once cured, lightly sand any excess caulking for a tidy look. A well-finished toekick isn’t just about aesthetics; it also prevents dirt accumulation in gaps, making cleaning easier.
Integrate Storage Solutions When Possible
Consider incorporating hidden storage in your toekicks—like a toe-kick drawer—when space allows. These can be used for bakeware, small appliances, or cleaning supplies. I installed a toe-kick drawer in my own kitchen, which, despite initial messiness, proved invaluable for keeping things organized and accessible without cluttering countertops. Look into options like built-in storage ideas to maximize every inch.
Maintain Consistency Throughout
Ensure your cabinet toekicks match not only in material and finish but also in profile and style. This uniformity ties the entire kitchen together visually, avoiding fragmented or patchwork effects. Revisit your original design plan and double-check measurements before final installation for the best results.
Many homeowners believe that choosing stylish cabinets and trendy storage solutions guarantees a successful kitchen upgrade. However, I’ve seen countless projects falter because of overlooked nuances that even seasoned designers recognize. **Contrary to popular belief, more expensive and elaborate built-ins aren’t always the best choice if not integrated thoughtfully.** For example, installing custom cabinets without considering the overall workflow can lead to cluttered counters and inefficient storage spaces. Often, clients get seduced by eye-catching features and neglect the practical implications, such as accessibility and maintenance. One major misconception is that bigger or more complex storage is always better, but in reality, it can cause confusion and make your kitchen less user-friendly. Does that mean you should avoid custom solutions altogether? Not at all. Instead, focus on how each element serves your specific needs, balancing aesthetics with function.
What are the pitfalls of ignoring storage flow in custom kitchen designs?
Experts stress that seamless access to frequently used items enhances daily efficiency. According to a study by the National Kitchen & Bath Association, poorly planned storage can increase kitchen clutter by up to 30%, reducing usability and increasing cleaning time. When designing built-ins or selecting storage solutions, consider not only the size but also the placement and accessibility of each component. For instance, incorporating pull-out shelves or integrated spice racks can significantly streamline your cooking process. To learn more about innovative options, check out expert tips on selecting storage solutions. Another mistake I often see is neglecting to account for future needs or flexibility. Clients stick to traditional layouts, unaware that adaptable systems—like adjustable shelving or movable dividers—can prolong the usefulness of their investment. Remember, the kitchen is a dynamic space, and plans should reflect that. When you rush into a design without considering these nuances, you risk creating a space that feels outdated or requires frequent, costly remodels. Having a clear understanding of how built-ins and storage solutions interact with daily routines ensures your kitchen remains functional and beautiful for years to come. Don’t fall into the trap of defaulting to standard layouts; instead, engage with professionals who emphasize tailored solutions over cookie-cutter designs. They can help you craft a space that marries style with smart usability, overcoming the common pitfalls that often trip up homeowners. Want more insights on maximizing your kitchen’s potential? Explore innovative storage ideas for detailed strategies. Recognize the subtleties now, and you’ll be one step closer to a truly custom kitchen that works for you, not against you. Have you ever fallen into this trap? Let me know in the comments.
Keep It Running: Maintenance & Tools You Can Rely On
Achieving a beautiful, functional kitchen isn’t a one-and-done deal; it requires ongoing care and the right arsenal of tools to preserve your investment. From safeguarding your custom cabinets to ensuring your storage solutions stay optimal, having dedicated equipment and maintenance routines is key. I personally swear by the Bosch 12V Max Cordless Caulk & Sealant Gun for quick touch-ups on sealing gaps around cabinetry, preventing moisture infiltration, and keeping everything looking pristine. Its lightweight design and precision tip help me apply caulk seamlessly without mess, which is crucial for maintaining that professional finish over years.
When it comes to keeping built-ins functional and efficient, I lean on a digital multimeter like the Fluke 117 to troubleshoot electrical components. This device helps me verify the wiring integrity of new lighting fixtures or outlet connections—something I learned the hard way after installing under-cabinet lighting. Regular inspections with such tools ensure everything still works perfectly, preventing costly repairs down the line.
Software tools also play a role in maintaining your kitchen long-term. I use 3D design applications like SketchUp to plan minor upgrades, like adding a pull-out spice rack or removing obtrusive trim. These programs allow me to visualize changes before lifting a hammer, saving time and avoiding mistakes that could diminish your space’s functionality.
Future-Proof Your Kitchen: What’s Coming Next?
Looking ahead, I predict increasing adoption of smart maintenance devices—think connected leak detectors or voice-activated cleaning schedules—that will revolutionize how we care for our kitchens. Integrating IoT (Internet of Things) devices could allow real-time alerts for plumbing issues or appliance malfunctions, saving you from unexpected disasters and costly repairs.
How do I maintain my customized storage solutions over time?
Routine inspections are vital. For example, periodic tightening of drawer slides and door hinges ensures smooth operation. I recommend checking these every six months with a simple screwdriver and verifying that soft-close mechanisms still function correctly. Also, cleaning tracks with a silicone-based lubricant keeps everything gliding effortlessly. This approach extends the lifespan of your storage solutions and preserves the sleek appearance of your built-ins. For further insights into optimizing your storage systems, visit expert tips on storage solutions.
Finally, adopt a proactive cleaning routine using microfibre cloths and mild soap to prevent dust and grime buildup. Regular maintenance not only keeps your kitchen looking fresh but also prevents minor issues from escalating into expensive repairs, ensuring your renovation remains a source of pride for years to come. Invest in quality tools and stay vigilant—your dream kitchen will thank you! Try implementing a quarterly inspection regimen with your favorite toolkit to keep everything functioning smoothly beyond the initial remodel.
Reflecting on my kitchen journey, I realize that the smallest details—like the shade of toekicks—can define the space’s personality. Emphasizing these nuances transformed my renovation from a good project into a truly custom masterpiece. The most valuable lesson I learned is that attention to detail isn’t just about aesthetics; it’s about creating an environment that feels unified and intentional. Don’t overlook elements like hardware, finishes, or trims—when they align perfectly, they tell a story of thoughtful design and craftsmanship. Remember, the path to a stunning kitchen isn’t paved merely with luxury materials but with the meticulous consideration of every touchpoint that your eyes and hands will engage with daily.