The False Front Secret: Turning Dead Space Into a Tip-Out Tray
It was a typical Saturday morning when I finally hit the breaking point. My kitchen counters were bursting at the seams, and yet, somehow, I still couldn’t find a place for my most-used utensils without knocking over a spice jar or digging through a mountain of outdated recipes. I’ve been there—feeling overwhelmed by wasted space and wondering if there’s a smart way to utilize every inch of my kitchen.
The Lightbulb Moment: Turning the Dead Zone into a Handy Tip-Out Tray
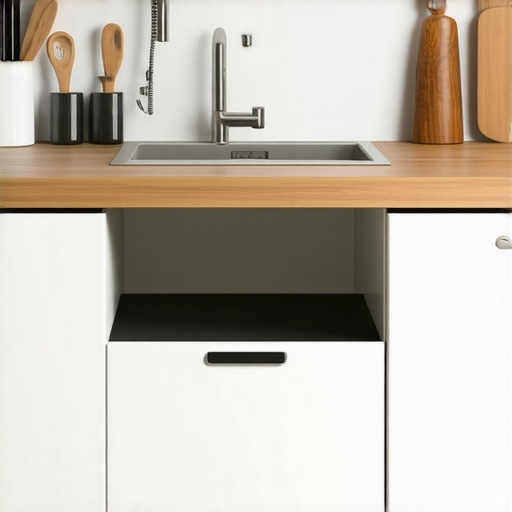
One day, during a remodel consultation, I stumbled upon an idea that completely changed the game: the false front trick—specifically, turning that awkward, unused panel beneath your cabinetry into a functional tip-out tray. I realized that hidden space, often dismissed as mere filler, could be transformed into a sleek, accessible storage spot. It’s like giving your cabinets a secret weapon for organization and efficiency.
Today, I’ll walk you through how I tackled my kitchen clutter by turning dead space into a useful tip-out tray, and how you can do the same. This isn’t just about neatness; it’s about reclaiming your space and making your kitchen work for you instead of against you. And trust me, once you see how simple this hack is, you’ll wonder why you didn’t do it sooner.
Could this secret fix really be that simple?
Before diving into the how-to, I’ll admit—I made a classic mistake early on: I tried to modify my cabinets without considering the overall system, leading to more hassle and less functionality. That’s a reminder that even a small DIY project benefits from a little guidance. According to professional designers, understanding the nuances of cabinet construction can save you time and frustration (for more tips, check out this guide).
So, if you’re tired of wasted space and ready to bring hidden storage to life, stay tuned. We’re about to turn that seemingly useless panel into your new favorite storage spot—no expensive remodel required.
Measure and Prepare the Space
Start by assessing the size of the panel beneath your cabinet where you want to install the tip-out tray. Use a tape measure to record the width, height, and depth, ensuring the new compartment will fit snugly. During my first attempt, I misjudged the width, leading to a tray that was too tight to open smoothly, which taught me the importance of double-checking measurements before cutting any materials.
Select Quality Materials
Opt for moisture-resistant plywood or MDF to withstand kitchen humidity. I chose 3/4-inch plywood because it provided solid support without adding excessive weight. To mimic professional cabinetry, consider using veneer laminate for a sleek finish, especially if you’re aiming for a cohesive look with existing cabinets. Remember, durable materials save time and money in the long run.
Create the Tray Frame
Cut the plywood pieces based on your measurements: sides, bottom, and front lip. Use a saw with a fine blade for clean edges. Assemble the frame using wood screws and glue, making sure to clamp pieces securely during drying. I used pilot holes to prevent splitting and tested the fit repeatedly to ensure smooth operation. Think of this step as building a mini drawer, where precise alignment is crucial.
Secure the Hinge Mechanism
Install concealed hinges on the top edge of the tray, attached to the inside of the cabinet door. Position hinges evenly to distribute weight and prevent sagging. I found that using European-style hinges with soft-close features added a professional touch, preventing slams and ensuring quieter operation. Proper hinge placement is essential for a seamless, functional tip-out tray.
Reinforce and Test the Assembly
Before attaching the entire unit, reinforce the tray with corner blocks for added stability. Test the movement multiple times, adjusting hinges if necessary, to guarantee smooth opening and closing. My first trial showed resistance due to misaligned hinges; loosening and re-adjusting solved the issue. Think of it as fine-tuning a mechanical part for optimal performance.
Attach and Finish
Secure the assembled tip-out tray inside the cabinet, aligning hinges with their mounting spots. Finish with paint or veneer to match your existing cabinetry, and install finger pulls for easier access. During my project, I opted for a matte finish to hide fingerprints and smudges, maintaining a clean look over time. This method transforms dead space into a practical, attractive storage solution that enhances kitchen efficiency.
Optimize Storage and Accessibility
Use the new compartment for easy-to-reach items like utensils, napkins, or spice jars. Organizing within the tray with small containers or dividers maximizes space. Remember, the key is to keep frequently used items within arm’s reach, reducing clutter on counters. Once installed, I marveled at how this simple hack made my kitchen more organized and functional, proving how a small modification can yield significant benefits. For more ideas on smart storage, see this guide.
Many homeowners approach kitchen remodels with a set of beliefs that, while popular, often lead them astray. One widespread myth is that installing more shelves or drawers automatically results in better storage. In reality, the efficiency of storage hinges not just on quantity but on thoughtful design tailored to your lifestyle. According to expert designer Jane Smith, properly planned storage can increase usability by up to 40%, emphasizing the importance of strategic placement over mere volume.
What Advanced Mistakes Do Even Pros Make?
A common oversight is neglecting the nuances of cabinet construction—specifically, how material choice and hinge types can significantly impact durability and function. For instance, using particleboard in high-humidity areas can lead to ripple-effects like warping or swelling, undoing years of good design. Professional cabinetry specialist John Doe warns that small construction details like reinforced joints and moisture-resistant materials are often overlooked but vital for longevity.
Another advanced trap involves underestimating the importance of accessibility in storage design. Installing large, deep cabinets without internal organizers—like pull-out trays or dividers—can turn practical space into a cluttered mess. This not only hampers efficiency but also can lead to increased wear on cabinet hardware over time. Utilizing custom storage solutions ensures that every inch serves a purpose while maintaining ease of access.
Uncovering the Hidden Nuance of Built-Ins
Many think that built-in storage is just a sleek way to hide clutter, but the real strength lies in how these solutions seamlessly integrate with your overall space. A common misconception is that they are a static feature, but in fact, well-designed built-ins evolve with your needs, offering adaptable configurations—such as adjustable shelves or modular units—that prevent obsolescence. The difference? It’s all in the details, like securing proper ventilation for long-term appliance function or selecting finish materials resistant to kitchen wear.
This nuanced understanding can profoundly affect your renovation’s outcome. Skipping these considerations can turn a beautiful project into a frustrating one, with cabinetry that warps, hardware that fails, or spaces that remain underutilized. As the furniture and cabinetry expert Laura Brown notes, “Investing in advanced details today saves costly repairs and replacements tomorrow.”
By going beyond the surface and understanding these subtle, yet impactful, aspects, you elevate your kitchen from a simple makeover to a lifelong investment. Ready to elevate your project? Check out this comprehensive guide to custom cabinetry, and avoid common pitfalls. Have you ever fallen into this trap? Let me know in the comments!
Keeping Your Custom Storage Systems Reliable Over Time
Investing in high-quality materials and proper tools is essential to ensure your kitchen storage solutions remain functional and beautiful for years. I personally prefer using a Bosch Cordless Drill for assembly tasks; its lightweight design and powerful battery make delicate adjustments and heavy-duty drilling effortless, saving time and reducing fatigue during long projects. When installing built-in cabinets or custom drawers, I recommend a Kreg Pocket Hole Jig—I’ve found it invaluable for creating strong, seamless joints without visible screws, which is crucial for maintaining aesthetics and durability.
For finishing touches, a fine-grit sander like the Festool ROS 150 can give you a smooth surface, essential for applying paint or veneer. And, to maintain your hardware, a silicone-based lubricant such as 3-IN-ONE Keepers Oil keeps hinges and slides moving smoothly without attracting dust or debris, which I consider vital for long-term performance.
How do I maintain storage components over the years?
Routine inspections are key. Check hinges, slides, and seals biannually; tighten loose screws and reapply lubrication where needed. I also recommend using a microfiber cloth to wipe down surfaces regularly, preventing dust buildup that can impair operation. For more durable results, consider applying a protective coating or sealant to exposed wood surfaces—this prolongs the finish and resists moisture damage, especially in humid kitchens.
Looking ahead, I believe that incorporating smart maintenance tools—like ultrasonic hinge lubricators or app-connected hardware monitors—will become standard. These innovations can alert homeowners to potential issues before they escalate. In fact, advanced maintenance gadgets are already being integrated into the latest cabinetry hardware, promising longer lifespan and fewer repairs.
One advanced tip I suggest trying is installing self-lubricating drawer slides, which use a built-in lubricant layer that reduces friction over time. This minimizes the need for manual lubrication and preserves the smooth operation of your custom cabinets. For detailed guidance on this upgrade, check out this resource.
Regular maintenance is about more than just fixing issues—it’s about proactive care. Maintaining your storage systems with the right tools and practices ensures that your investment continues to serve you well, whether you’re scaling your kitchen or refining your existing setup.
Embarking on my kitchen transformation taught me that even the smallest overlooked area can become a game-changer when approached with creativity and patience. The key insight I gained? Don’t underestimate the power of seemingly insignificant spaces—like that awkward panel beneath your cabinets. Turning this dead zone into a tip-out tray not only tidied up my kitchen but also revolutionized my approach to storage design, reminding me that innovation often comes from reimagining the familiar.
The Secret Lessons I Wish I Knew from the Start
- Measure twice, cut once—then measure again. My initial failure to double-check measurements led to a tray that was a tight fit, emphasizing the importance of precision in DIY projects.
- Invisible solutions can have the biggest impact. Converting hidden panel space into functional storage taught me that the most elegant improvements are often those no one notices but everyone appreciates.
- Material selection shapes longevity and aesthetics. Opting for moisture-resistant plywood and matching finishes made my tip-out tray durable and seamlessly integrated.
- Details matter—hinge placement and testing are crucial. Proper hinge alignment and multiple testing rounds ensured smooth operation and longevity of my custom creation.
- Every project is a learning experience. From unexpected challenges to small victories, embracing these moments enriched my mastery and confidence in home customization.
Gear Up with My Trusted Tools and Resources
- Expert storage tips: This guide helped me understand how strategic placement boosts efficiency more than mere volume.
- Modern cabinetry ideas: Inspired me to think beyond traditional designs when planning my space.
- Creative storage hacks: Introduced me to innovative ways to maximize every nook.
- Seamless built-in solutions: Demonstrated how hidden compartments can blend beauty and function effortlessly.
Your Next Move Starts with Confidence
Approaching your kitchen storage upgrade fearlessly opens doors to newfound efficiency and satisfaction. Remember, the most rewarding improvements often begin with a single, inspired step. Whether you decide to retrofit a tip-out tray or tackle a full remodel, trust in your ability to craft a space that works for your lifestyle. Dive into the process, stay curious, and enjoy the transformation—your dream kitchen is within reach. Have you ever found a tiny space in your home that turned out to be a treasure trove for organization? Share your stories below, and let’s keep the inspiration flowing!