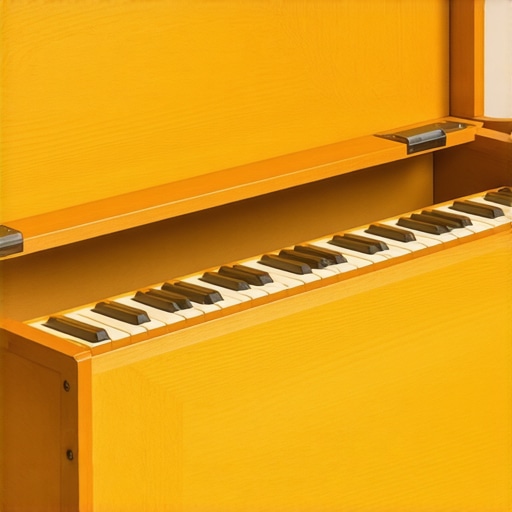
The Bench Seat Secret: Using Piano Hinges for No-Slam Toy Boxes
I remember the exact moment I realized I had failed as a woodworker. It was 2:00 AM, and a thunderous crack echoed through my hallway, followed by the high-pitched wail of my toddler. I’d spent weeks building a beautiful heirloom toy box, but I’d cut corners on the hardware. That heavy oak lid had slammed shut like a guillotine, narrowly missing small fingers. It was a visceral wake-up call. I thought I knew about custom cabinets and structural integrity, but I’d ignored the physics of a moving lid. Today, I want to share the simple fix that changed everything for my builds: the piano hinge. We are going to solve the safety crisis in your playroom by turning a dangerous lid into a smooth-gliding, finger-saving bench seat.
Stop the Slam Before the Next Accident Happens
When you are working on built-ins that elevate your living rooms functionality, you often think about the finish or the wood species first. But for a toy box, the hinge is the heart of the project. A standard butt hinge—the kind you find on a bedroom door—is a recipe for disaster on a horizontal lid. It puts too much stress on a few small points of wood. I made the mistake of using three individual hinges on my first bench, and within a month, the screws started pulling out because of the leverage. A piano hinge, or continuous hinge, runs the entire length of the back. This distributes the weight so perfectly that the wood never feels the strain. According to safety data from the Consumer Product Safety Commission (CPSC), heavy lids on storage chests have historically been a significant source of entrapment and crushing injuries, which is why a continuous support system isn’t just a design choice—it’s a moral one for parents. Pair this with a torsion stay, and you’ve got a lid that stays exactly where you leave it.
Do these industrial metal strips really belong in a nursery?
I hear this all the time: ‘But they look like they belong on a locker or a toolbox!’ It’s a fair point. However, once that lid is closed, the hinge is virtually invisible. Unlike when you how to adjust European hinges when your doors are crooked, a piano hinge offers a level of rock-solid alignment that hidden hinges just can’t match for heavy horizontal loads. If you’re worried about the look, you can buy them in brass, nickel, or even powder-coated black to match your decor. I’ve even used them in smart storage solutions for small kitchens in 2025 for hidden bench seating. Have you ever had a DIY project look great but feel dangerous to use? I’d love to hear about your ‘oh no’ moments in the comments. We’re about to dive into the step-by-step of getting that perfect, zero-gap fit.
Get the Length Right Before You Reach for the Hacksaw
I once treated a piano hinge like a rough framing project, hacking away with a dull blade. The result? A jagged edge that snagged my daughter’s sweater every time she reached for a doll. Now, I treat it like I’m fitting a custom suit. You want that hinge to be about 1/4 inch shorter than the total width of the box. This prevents the sharp metal edges from peeking out and scratching shins. When you are looking at the ultimate guide to custom cabinets for a stylish kitchen overhaul, you’ll notice that precision is what separates a ‘handy’ project from a ‘heirloom’ project. Use a hacksaw with a fine-tooth blade to make the cut, then spend five minutes with a metal file to round over the corners. It’s a small step that prevents a lot of tears later.
The Secret Tool That Prevents Stripped Screws
The biggest mistake is free-handing the screws. Because a piano hinge has dozens of holes, if you’re off by even a millimeter on the first three, the rest of the hinge will ripple like a wavy potato chip. I use a Vix bit—a self-centering drill bit—to ensure every hole is dead center. It’s the same logic we use when we have to how to repair a stripped screw hole in a cabinet door; if the initial hole is messy, the hardware will never sit flush. The Vix bit has a spring-loaded nose that fits into the hinge hole, guiding your drill perfectly into the center of the wood. 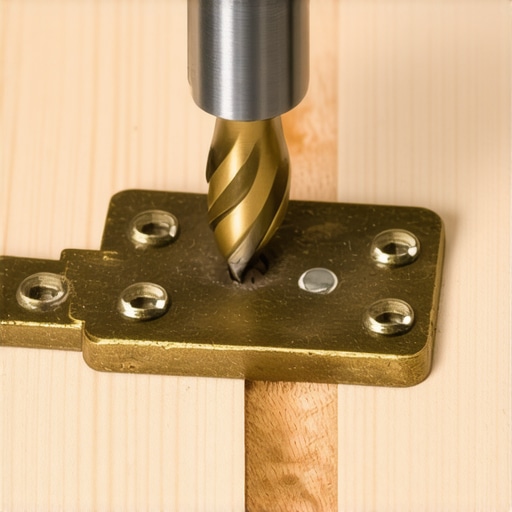
Secure the Lid Without Chasing It Around the Shop
To keep the lid from shifting while you drive the screws, use a strip of double-sided woodworking tape. It’s like having a second pair of hands that doesn’t complain about the weight of the oak. I learned this the hard way on a modern kitchen remodel featuring custom cabinets and built-ins where a heavy pantry door slipped and gouged the finish. For the toy box, stick the hinge to the back of the box first, drive two screws (one at each end), then flip the lid on and repeat. This ‘tacking’ method ensures the gap stays uniform. If you struggle with hardware, knowing how to fix cabinet doors that hit each other in the middle often comes down to this exact kind of early-stage alignment.
Add Torsion Stays to Fight Gravity
But the hinge only solves the structural support. To stop the ‘guillotine effect,’ you need torsion stays. These are the unsung heroes of maximizing space with innovative storage solutions for every room. They provide resistance against gravity. Without them, even the best hinge won’t save a finger if the lid is heavy enough. I remember a client who insisted on a solid walnut lid that weighed nearly forty pounds; we had to use three heavy-duty stays just to make it hover. If you’ve ever dealt with the reason your slow close drawers still slam and the quick fix, you know that momentum is your enemy in furniture design. Finally, throw away the cheap screws that come in the hinge packaging. They are usually made of soft metal that snaps the moment it hits hardwood. Instead, use high-quality steel screws. This is why why you should never use standard wood screws for cabinet installation is a rule I live by—especially when a child’s safety is the metric for success.Most homeowners walk into a showroom and demand 100% solid wood everything. It is a classic sign of a well-meaning amateur. In reality, solid wood is a living, breathing material that reacts to humidity. If you use solid wood for a large pantry shelf, it is going to cup or bow over time. This is exactly why we recommend plywood cases over particle board for heavy pantry shelves; the cross-grain lamination in high-quality plywood provides the structural stability that raw lumber simply lacks. I have seen high-end kitchens look like a mess because the designer ignored the expansion and contraction of wood. Have you ever fallen into this trap where the ‘best’ material actually caused the most problems? Let me know in the comments.
Stop Chasing the Solid Wood Myth for Every Shelf
Another common oversight is the hardware choice for high-stress areas. We often think that a screw is just a screw, but why you should never use standard wood screws for cabinet installation becomes painfully obvious when you see a heavy upper cabinet pull away from the wall. Standard screws lack the shear strength of specialized cabinet screws with integrated washers. The Architectural Woodwork Institute (AWI) notes that moisture content in wood should ideally stay between 6% and 11% to prevent structural failure, yet most DIYers do not even own a moisture meter. When you are planning the ultimate guide to custom cabinets for a stylish kitchen overhaul, you have to account for these environmental factors before the first board is cut.
Why do my expensive hinges feel crunchy after a few months?
It is usually not a manufacturing defect; it is construction dust or kitchen grease. Even the best hardware fails if it is not maintained. If your drawers are sticking, why your soft close slides are failing and the quick cleaning fix often involves nothing more than a can of compressed air and a microfiber cloth. 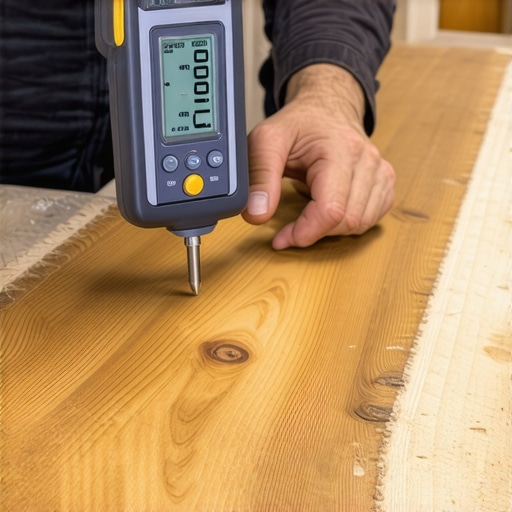
Watch Out for the Inset Door Gap Nightmare
If you are going for that high-end, flush look, you are likely looking at inset doors. However, many people forget that the gap you set in July will not be the gap you see in January. This leads to the inset cabinet gap re-aligning doors after seasonal humidity changes becoming a mandatory part of your home maintenance. If your cabinet maker did not leave at least a 3/32-inch gap, those doors will bind the moment the furnace kicks on. Precision is great, but over-precision without accounting for nature is a recipe for a service call. When you maximize space with innovative storage solutions for every room, always build in a little ‘breathing room’ for the materials themselves. It is the difference between a project that lasts five years and one that becomes a true heirloom.
Stop Relying on Your Grandfather’s Level for Cabinetry
For years, I fought with traditional 4-foot bubble levels, only to find that my built-ins that elevate your living rooms functionality were still slightly off when I checked the plumb of the face frames. Now, I never set a single box without a 360-degree green beam laser level. If you are serious about modern kitchen remodels featuring custom cabinets and built-ins, the laser is non-negotiable. It projects a perfectly level line across every wall simultaneously, ensuring your uppers and lowers are perfectly parallel. This level of precision is the only way to avoid the nightmare where your countertop looks like a slide at a playground. If you are doing a the ultimate guide to custom cabinets for a stylish kitchen overhaul, invest in the tech first. It will save you hours of shimming and swearing.
How can I ensure my storage solutions survive the changing seasons?
The greatest threat to your woodwork isn’t your kids; it is the air itself. The Architectural Woodwork Institute (AWI) Quality Standards explicitly state that interior woodwork should be maintained at a relative humidity between 25% and 55% to minimize dimensional change. When I install custom cabinets ideas that transform your homes style, I always leave a small hygrometer inside a pantry cabinet for the homeowner. If that number spikes or drops, you will eventually see the inset cabinet gap re-aligning doors after seasonal humidity changes. Long-term results depend on environmental stability. I predict that within five years, high-end smart storage solutions for small kitchens in 2025 will come with built-in sensors that alert your HVAC system when the wood is at risk of warping. It sounds sci-fi, but when you spend five figures on cabinetry, a $10 sensor is cheap insurance.
The Scribing Hack That Saves My Sanity
Every wall in every house is crooked. If you try to push a perfectly square bookshelf against a ‘standard’ wall, you will see gaps that make the project look amateur. This is where an oscillating multi-tool becomes your best friend. I use it to back-bevel my stiles after I have marked them with a compass. It is the secret behind how to scribe a bookshelf to a wonky plaster wall without spending all day with a hand plane. This tool allows for surgical precision in tight corners where a jigsaw would just splinter the veneer. 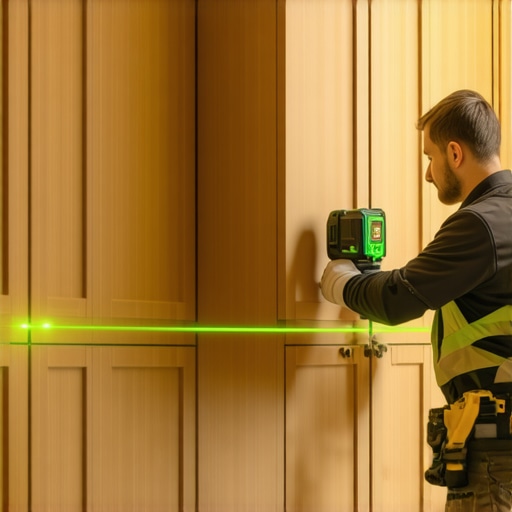 Don’t forget about the moving parts, either. If you find your hardware getting ‘crunchy,’ remember that why your soft close slides are failing and the quick cleaning fix usually just requires a quick wipe-down and a dry PTFE lubricant. Avoid grease-based lubes; they act like a magnet for sawdust and kitchen grime, eventually turning into a grinding paste that destroys your bearings. I want you to try one thing on your next build: use a Vix bit for your hinge screws. It’s a $15 tool that guarantees your hardware sits perfectly flush every single time. It’s the smallest change that yields the biggest professional result.
The Three Hardest Lessons I Learned at the Workbench
Building a toy box taught me that precision isn’t about being perfect; it’s about knowing exactly where the wood is going to move. First, I learned that a hinge is only as good as the screws holding it. If you use the brass-plated junk that comes in the box, they’ll snap. I now keep a dedicated bin of stainless steel screws for every project involving selecting storage solutions for a perfect kitchen upgrade or nursery builds. Second, don’t ignore the ‘pinch points.’ A piano hinge closes a gap, but it doesn’t stop the speed of the lid—that’s what torsion stays are for. Finally, always account for the ‘kid factor.’ They won’t just lift the lid; they’ll stand on it, jump on it, and treat it like a stage. Overbuilding isn’t just an option; it’s the baseline requirement for safety in any household project.
My ‘Don’t Leave the Shop Without These’ Tools
When you’re ready to revolutionize your kitchen remodel using built-ins or playroom furniture, these three items are my go-to resources. First, Sugatsune heavy-duty torsion stays are the only ones I trust to hold a heavy oak lid mid-air. They are the gold standard for preventing accidents. Second, a high-quality 6-inch metal file is essential for deburring the edges of your piano hinge; don’t let a sharp metal corner ruin a beautiful finish. Lastly, the ‘Cabinetmaking’ guide by Bill Hylton is a resource I still consult today to understand custom cabinets as a game-changer in any room of the house.
Your Path to Crafting a Safe Heirloom
Woodworking is more than just making boxes; it’s about creating a safe, functional environment for the people you love. Whether you are tackling a massive toy chest or just trying to figure out the 12-inch island overhang rule for comfortable kitchen seating, the goal is always the same: durability and functionality. Take your time, measure twice, and don’t be afraid to redo a step if the alignment feels slightly off. Your future self—and your kids’ fingers—will thank you for the extra effort you put into these storage solutions today. Have you ever had a hardware disaster that forced you to start over? Let me know in the comments below!