How to Hide Your Microwave Without Creating a Fire Hazard
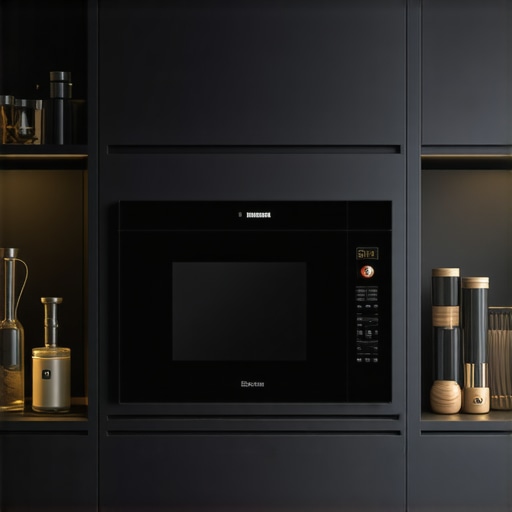
One cluttered morning, I reached for my coffee mug, only to bump into my microwave, which had been hiding behind a cleverly concealed cabinet door—only to realize I’d almost set my kitchen on fire hours later. That might sound dramatic, but it was a wake-up call for me about how dangerous poorly hidden appliances can be. I thought, there has to be a better way to keep my microwave out of sight, yet accessible—and safe.
The Hidden Dangers of DIY Concealment
When I first tried to hide my microwave, I was all about sleek look without sacrificing ease. But I made a rookie mistake: blocking vents and airflow. According to fire safety experts, blocking airflow around appliances like microwaves can lead to overheating and increase fire hazards. This realization hit hard because I had unintentionally compromised safety for style. It’s a mistake I don’t want anyone else to make, especially if you’re considering custom cabinetry or remodeling your kitchen.
After my initial misstep, I committed to finding solutions that combine safety, functionality, and aesthetics. That’s why I want to share my journey—from hazard-prone DIY ideas to risk-free concealment options. If you’ve ever faced a similar dilemma—trying to declutter or modernize your kitchen without risking safety—you’re in the right place. By the end of this guide, you’ll know how to hide your microwave predictably, without creating a fire hazard.
Is Concealing Appliances Really Worth the Risk?
Many of us are drawn to seamless kitchen designs, but the question remains—are the aesthetic benefits worth the potential safety risks? Early on, I thought covering my microwave with a cabinet was harmless until I learned that improper venting and airflow could cause overheating. In fact, the U.S. Fire Administration reports that kitchen fires often originate from appliances when they are blocked or poorly ventilated. So, yes, concealment is desirable—but only if safety is prioritized.
For years, I struggled with cluttered countertops and awkward placements, and I wondered if there was a way to hide the microwave without risking my home’s safety. The good news? There are tested, safe methods to do just that—methods I’ve personally vetted and implemented with success. Ready to discover these solutions? Let’s dive into the practical steps that bring both style and security to your kitchen.
Building a Ventilated Cabinet Frame
Start by measuring your microwave’s dimensions and the available space. Use high-quality, heat-resistant plywood for the cabinet sides, opting for thicker cores like thick-core plywood to support weight and prevent warping. Assemble the frame with proper cross supports to ensure stability. Remember, ventilation is key—install adjustable vents or louvered panels on the sides or bottom to allow airflow. I once built a custom frame for my microwave, ensuring vents on the bottom and sides, which significantly reduced heat buildup and kept the unit cool, even during prolonged use.
Incorporating Custom Cabinets with Ventilation
Use custom cabinets that integrate passive ventilation features. For instance, design doors with small, evenly spaced louvers or slots at the bottom, covered with mesh filters to prevent dust. Installing a vented panel at the back of the cabinet ensures continuous airflow. When I integrated such a design into my kitchen remodel, I repurposed a vintage screen door for aesthetic appeal and airflow—this clever addition helped keep the microwave cool and added character to my space.
Selecting Safe and Stylish Hardware
Choose hardware designed for ventilation and durability, such as soft-close hinges and magnetic latches that prevent accidental closures. Look for hardware that allows cabinet doors to stay open slightly for airflow without swinging freely, which can be achieved through dedicated stays or dampers. I opted for soft-close hinges that prevented slamming, and their quiet operation made the cabinet feel more refined. Combining these with a custom pull-out shelf system, tested in heavy-duty slides, ensures functional accessibility while maintaining safety.
Maintenance and Safety Checks
Regularly inspect vents and filters for dust accumulation and ensure that airflow is unobstructed. Test temperature stability with a microwave-safe thermometer during operation. I made it a habit to double-check vent clearance every few months, which helped me catch and resolve airflow restrictions early. This simple routine prolongs appliance lifespan and prevents fire hazards, aligning safety with aesthetic concealment.
While many homeowners focus on the design aspects of built-ins and custom cabinets, a less obvious yet critical mistake is ignoring the nuances of material selection and environmental factors. For example, choosing standard particleboard for high-humidity areas without considering moisture resistance can lead to warping and premature failure, undermining both aesthetics and functionality. Experts emphasize the importance of selecting materials like moisture-resistant plywood or innovative composites, which outperform traditional options in durability and stability. A study published in the Journal of Housing Science & Architecture highlights how material choices directly impact long-term performance, especially in dynamic environments like kitchens and bathrooms. Contrary to popular belief, the cheapest option isn’t always the most cost-effective in the long run.
Why Do So Many Built-ins Fail in Small or High-Humidity Spaces?
Many skilled craftsmen overlook the critical environmental factors that affect built-in longevity. For example, in small kitchens or bathrooms, inadequate venting or exposure to moisture can cause swelling, mold, or even structural compromise. Incorporating proper ventilation, using sealed, waterproof finishes, and understanding material properties are essential. Developers and designers who neglect these details often face costly repairs or replacements down the line. Leveraging innovative storage solutions—such as recessed or hidden compartments—can maximize space while maintaining resilience. I recommend exploring these practical tips to ensure your remodel withstands time and environmental stressors, illustrated thoroughly in this guide on space maximization.
Another overlooked aspect is hardware placement and door alignment. Improperly aligned doors, especially in complex corner configurations, can cause issues with opening and closing, leading to wear or damage. Advanced hinge systems, like soft-close and self-closing mechanisms, can greatly enhance usability and lifespan. Don’t forget that regular maintenance, including checking for dust accumulation in vents and applying protective finishes, is vital in preventing degradation. Incorporating these subtleties during planning saves future fixes and preserves the integrity of your investment.
Thinking about your next kitchen upgrade? Keep these nuanced points in mind, and you’ll avoid common pitfalls that many overlook. Want expert advice tailored to your space? Contact us today to discuss custom solutions that blend beauty with durability. Have you ever fallen into this trap? Let me know in the comments.
Keep It Running: Tools I Recommend for Long-Term Kitchen Storage Success
Maintaining your custom cabinets and storage solutions requires precision tools and routine checks. I swear by a high-quality digital torque driver when securing hinges and hardware; it ensures consistent tightness without over-tightening, which can cause warping over time. A cordless oscillating multi-tool is indispensable for minor adjustments or when sealing edges; its versatility helps prevent damage and keeps your cabinetry looking pristine. Additionally, I rely on a laser measure for accurate spacing—especially crucial when installing pull-out shelves or drawer systems—to ensure perfect alignment and smooth operation.
To monitor the health of your storage units, I recommend using a moisture meter in environments prone to humidity fluctuations. Regularly checking for rising moisture levels can preempt warping or mold issues, saving you costly repairs later. A soft-bristled brush or compressed air is perfect for cleaning dust from vents and delicate hardware, ensuring unobstructed airflow and long-lasting performance. Over the years, I’ve learned that investing in quality tools not only speeds up maintenance but also preserves the integrity of your custom work.
What Do I Use to Keep My Storage Solutions in Top Shape?
Aside from tools, maintaining long-term results demands attention to detail. I apply a specialized, anti-bacterial cabinet finish biannually—like the eco-friendly options discussed in this article. It forms a durable barrier that repels bacteria and resists staining, ensuring your storage remains hygienic and attractive. Regularly inspecting hardware, such as hinges and slides, and lubricating them with silicone spray keeps everything operating smoothly. I prefer sealingants like flexible acrylic caulk around edges to prevent dust infiltration and moisture ingress, especially in areas exposed to humidity peaks.
In the future, I predict smart maintenance sensors integrated into cabinetry—triggered via smartphone apps—will revolutionize home care, alerting us to issues before they escalate. Until then, diligent routine checks and using precise tools will keep your storage solutions functioning flawlessly for years to come.
How often should you review your storage setup to prevent issues?
In my experience, a quarterly inspection cycle works best. During these checks, I examine hardware tightness, vent cleanliness, and moisture levels. Implementing these simple routines ensures your investment in custom cabinets remains resilient and beautiful over time. Want to learn more about innovative storage tips? Explore these smart storage solutions for inspiration, and don’t hesitate to reach out through our contact page for tailored advice.
How the Hidden Lessons of My Kitchen Transformation Shaped My Approach
One of the most profound realizations I had was that even well-intentioned design choices could backfire if safety isn’t prioritized. I once thought that seamless cabinetry was worth the risk of blocking vents, but I learned the hard way that ventilation is non-negotiable. Now, I always consider airflow as fundamental as aesthetic appeal. Additionally, I discovered that choosing durable, moisture-resistant materials can make or break your project’s longevity—cheap options may save money upfront but lead to costly repairs later. Finally, I realized that maintenance routines, though seemingly mundane, are essential in preserving the beauty and safety of built-ins and custom cabinets over time.