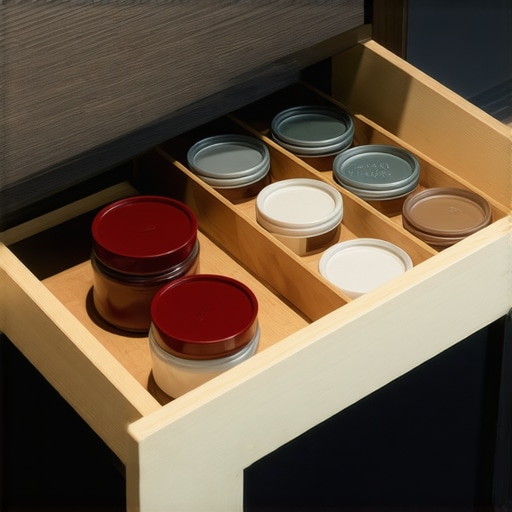
Stop Losing Lids: The Vertical Divider Strategy for Deep Drawers
One morning, I reached into my kitchen drawer to grab a lid, only to find myself wrestling with a jumbled mess of mismatched covers, silicone seals, and baking sheets. Frustration bubbled over as I realized I’d been wasting precious minutes rummaging, tossing, and stacking—only to end up empty-handed. It was a lightbulb moment: my deep drawers had become unmanageable, and I knew I wasn’t alone in this struggle.
If you’ve ever faced the chaos of lost lids or misplaced utensils lurking in your storage spaces, you’re probably wondering if there’s a better way. Well, there is. After experimenting with different solutions, I discovered a simple yet game-changing trick that reorganized my deep drawers and kept everything accessible—the vertical divider strategy.
The Real Secret to Taming Deep Drawer Clutter
This method isn’t just about neatness; it’s about reclaiming your time and sanity. Imagine opening your drawer and finding exactly what you need instantly. No more digging, no more frustration. That’s the promise I want to share today. By incorporating vertical dividers into your deep drawers, you turn chaos into order without sacrificing space or style.
Beware of Shortcut Fixes That Don’t Last
Many rush into drawer organizers without understanding the root of the problem. I made that mistake early on—thinking a fancy tray or multiple small compartments would suffice. But they often shifted, cluttered, or simply didn’t fit well in my deep drawers. The key is designing a system tailored to the depth and shape of your storage—something I learned the hard way. If you’re tired of temporary fixes, stick around; I’ll walk you through the right approach that truly works.
Curious about how to implement it in your space? Keep reading, and I’ll guide you step-by-step. Plus, I’ll share tips on avoiding common pitfalls and leveraging the strategy for other storage challenges around your home. Ready to take control of your deep drawers? Let’s dive in and make your kitchen work for you, not against you.
Select the Right Materials for Your Vertical Dividers
Start by choosing sturdy, thin yet durable materials like plywood or acrylic. I used 1/8-inch acrylic sheets, which are lightweight, flexible, and easy to cut, allowing me to customize the height and width precisely for my drawers. Visit https://artisancabinetworkz.com/4-recycled-ocean-plastic-cabinets-that-wont-warp-in-2026 to explore durable materials suitable for kitchen environments. Measure the interior dimensions of your drawers accurately using a tape measure, noting the width, depth, and height. Precise measurements are critical to ensure the dividers fit snugly and don’t shift over time.
Design a Custom Divider System
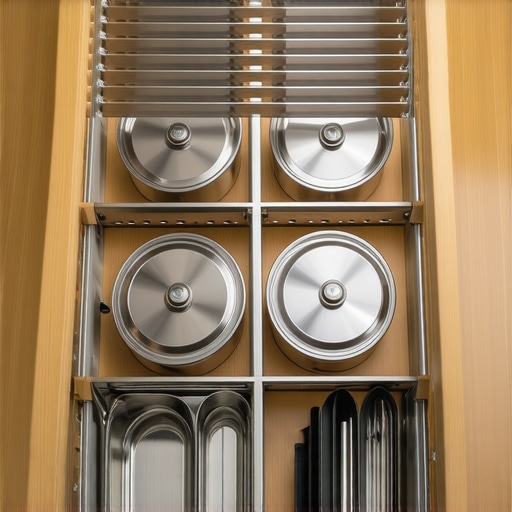
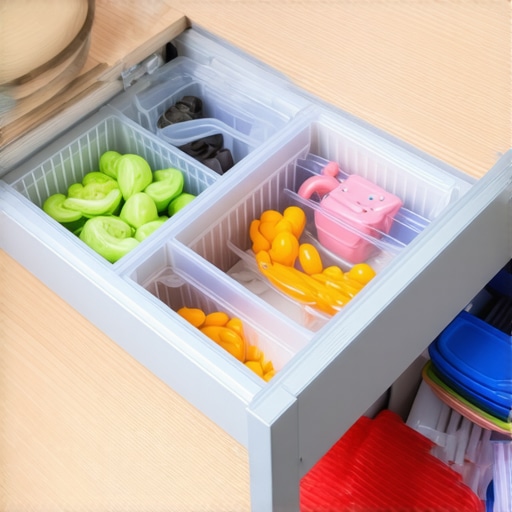
Picture a rack of books standing upright—this is exactly how your dividers should support your lids and utensils. Create a grid layout on paper, planning the number and size of compartments based on your measurements. For example, I designated narrower slots for lids and wider areas for baking sheets, optimizing my space. Use a straightedge and pencil to draw your design on the material, planning for easy removal and adjustment. This tailored approach ensures each item has its designated spot, reducing clutter and search time.
Cut and Assemble Your Dividers
Using a fine-tooth saw or a glass cutter for acrylic, carefully cut along your marked lines. When I did this, I laid the sheets on a stable surface and used a straight edge to guide my cut. Smooth the edges with fine grit sandpaper to prevent snags or damage to your stored items. Secure the dividers into your drawer using double-sided tape or small clamps during placement. The goal is a stable, yet removable structure that keeps items upright and separated.
Integrate Dividers into Your Drawer
Place the assembled dividers into your drawer and adjust the fit as needed. I found that a slight trim on some pieces improved stability. Position the dividers so they don’t obstruct drawer slides or hinder opening and closing. You might want to reinforce the base or sides with small brackets if your items are heavy. This method turns your deep drawers into efficient storage units, mirroring the functionality of custom cabinetry without the cost. For more tailored kitchen storage solutions, check out https://artisancabinetworkz.com/smart-storage-solutions-for-small-kitchens-in-2025.
Maintain and Adapt Your System
Regularly check your dividers for wear or shifting, especially if you frequently add or remove items. When I noticed some sections becoming loose, a quick tweak with additional adhesive fixed the issue. Feel free to customize further, perhaps adding labels or color coding for different categories. This adaptive approach ensures your organization system remains effective over time, making deep drawers a joy rather than a frustration. If you want ideas for other storage upgrades or kitchen remodel inspiration, browse https://artisancabinetworkz.com/custom-cabinets-ideas-that-transform-your-homes-style or https://artisancabinetworkz.com/modern-kitchen-remodels-featuring-custom-cabinets-and-built-ins.When it comes to designing lasting, functional custom cabinets and integrating built-ins, many homeowners fall prey to misconceptions that can undermine the project’s success. One common myth is that choosing high-end materials alone guarantees durability. However, even the finest veneers or solid woods can fail if not properly designed for environmental conditions like humidity and temperature fluctuations. For example, solid wood is prone to warping in high humidity, a point often overlooked by DIYers who assume all premium materials are universally suitable. Expert sources, such as the Kitchen Cabinet Manufacturers Association, emphasize the importance of selecting materials based on climate and application, not just aesthetic preference.
Another nuance often missed is the focus on aesthetics over functional ergonomics. Many prioritize looks, neglecting the importance of proper clearance, reach zones, and compartment depths. This oversight leads to drawers that are difficult to open or shelves that are impossible to access comfortably—mistakes that could have been avoided by applying principles outlined in professional kitchen layouts, like those discussed in our guide on maximizing space with innovative storage solutions for every room.
Beyond materials and ergonomics, misinformation persists around the cost of truly custom work. Some believe DIY fixes or semi-custom options can achieve the same results at a fraction of the price. While tempting, this approach often results in subpar alignments, poor-fitting doors, or cabinets that warp over time, especially if the project involves complex built-ins or intricate details. Actual craftsmanship, backed by proper planning and the right materials, ensures longer-lasting results—a fact reinforced by industry experts warning against shortcuts that could jeopardize structural integrity.
A critical mistake I see frequently is underestimating the importance of precise measurements and planning. Custom cabinetry isn’t about filling space; it’s about creating a system that works seamlessly within your home’s dimensions. Small errors here can cascade into misalignments, wasted space, or obstruction of door openings. Advanced homeowners often ask, “How can I ensure my custom design maintains its function over time amid shifting humidity and seasonal changes?” This question underscores the necessity of integrating flexible, well-planned joints and adaptable hardware—topics covered extensively in our detailed guides on built-in corridors and smart storage solutions.
Have you ever fallen into this trap? Let me know in the comments. Remember, successful custom cabinetry combines good design principles, proper material selection, and expert craftsmanship to truly transform your space—so avoid the pitfalls of misconceptions and make informed decisions that stand the test of time.
Maintaining Your Custom Cabinets and Built-ins for Longevity
Investing in custom cabinetry and storage solutions is only the first step. To ensure they continue to serve your space effectively, regular maintenance is crucial. I recommend incorporating routine inspections every six months to check for loose hinges, worn finishes, or shifting dividers. Using a soft, lint-free cloth with a high-quality furniture polish can preserve finishes and prevent dust accumulation that may degrade material over time.
Tools I Trust for Long-Term Care
For precise adjustments and temporary fixes, I rely on a few specialized tools. Acosmetic cabinet clamp is invaluable for tightening loose joints, while aprecision screwdriver set allows me to adjust hinges or tighten screws without damaging delicate finishes. For especially stubborn grime, a soft toothbrush dipped in a gentle cleaner helps maintain detailed carvings or intricate hardware.
When it comes to hardware, amulti-bit screwdriver with magnetic tips streamlines replacement tasks, and adibber orflexible measure tape makes it easy to verify consistent spacing and alignment during maintenance. I avoid harsh chemicals; instead, I prefer natural oils like mineral or lemon oil to nourish wood surfaces, preserving their beauty and structural integrity over time.
Preparing for Future Trends in Storage and Cabinetry
The future of storage solutions points towards smarter, more adaptable systems. Technologies such assensor-activated hinges andmodular components will become more commonplace, allowing homeowners to customize on-the-fly without tools. Staying updated with industry innovations by following sources like industry standards from cabinetry standards can help you plan for these advancements.
How do I maintain my cabinetry over time?
To keep cabinetry functional and looking its best, establish a routine that includes cleaning, hardware checks, and adjusting hinges or slides as needed. Using the right tools like aprecision screwdriver set andsoft cloths can make all the difference. Regular attention preserves the craftsmanship and ensures your investments last for years. Don’t hesitate to try advanced maintenance techniques, such as calibrating soft-close hinges with aspecialized hinge screwdriver, to optimize performance. For more insights on durable finishes that resist daily wear, check out our recommended cabinet finishes.
The Hardest Lesson I Learned About Custom Cabinets and Storage
Early in my journey, I believed that buying the latest drawer organizers would solve my clutter problems. However, I quickly realized that without tailored solutions, messes reappeared, and I was constantly readjusting. The true lesson was that customized, well-planned dividers make all the difference—an insight I wish I had discovered sooner.
3 Misconceptions That Sabotaged My Kitchen Remodel
Many homeowners assume that high-end materials alone guarantee durability. I found out the hard way that selecting the right materials involves understanding environmental factors, like humidity, to prevent warping. Additionally, I underestimated the importance of ergonomic design—leaving me with beautiful cabinets that were hard to access. And finally, I thought DIY fixes could replace professional craftsmanship, but shortcuts often lead to long-term issues.
Where My Storage Solutions Really Changed the Game
Implementing vertical dividers tailored to my drawer dimensions transformed my space. It wasn’t just about creating compartments; it was about understanding my habits and customizing accordingly. The ability to easily adjust or replace these dividers means my storage evolves with my needs, proving that thoughtful planning beats off-the-shelf solutions every time.
Resources That Picked Up My Strategy for Long-Lasting Functionality
For materials, I trust acrylic sheets from trusted suppliers because they combine durability with ease of customization. My favorite toolbox includes a precision screwdriver set—crucial for fine adjustments without damaging finishes. Books like High-Performance Kitchen Storage opened my eyes to innovative space-saving techniques, while online platforms like artisan cabinetry guides keep me informed on the latest trends. These resources collectively helped me develop a storage system that truly works.
Helping Your Custom Storage Shine for Years to Come
The journey to efficient, lasting storage solutions is ongoing. I encourage you to regularly inspect your dividers and hardware, using natural oils to nourish surfaces and prevent deterioration. Embracing emerging technologies like sensor-activated hinges or modular components can future-proof your cabinets. Keep learning, adapting, and most importantly—enjoy the process of transforming your space into something extraordinary. Want to kickstart your own custom cabinet project? Share your goals or ask questions in the comments below, and let’s build better storage solutions together!