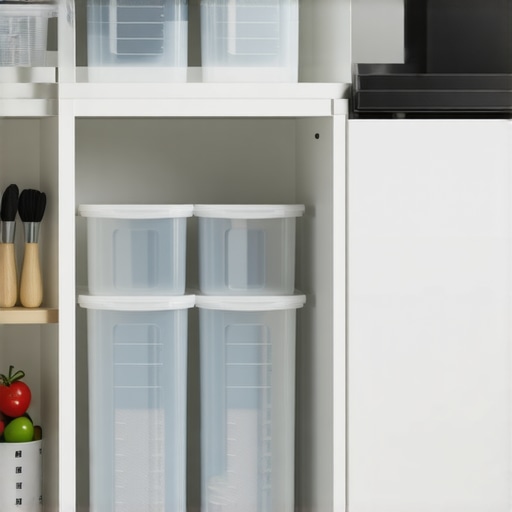
7 Mudroom Cubby Dimensions That Actually Fit Adult-Sized Boots
Ever had that moment when you open your mudroom closet and realize your adult-sized winter boots barely squeeze into the storage cubbies? I remember the first time I tried to shove my chunky hiking boots into a standard cubby—failed miserably, with half of the boot hanging out and the other half unceremoniously squished. It was a lightbulb moment for me—many of those ready-made storage solutions just don’t cut it when it comes to real life, especially with our larger footwear. That’s why today, we’re diving into the world of mudroom cubby dimensions that genuinely accommodate adult-sized boots, so you can say goodbye to awkward fits and cluttered spaces. We’ll explore practical measurements, share personal tips, and help you avoid common mistakes that can turn your mudroom into a shoe storage nightmare.
Why Proper Cubby Sizing Matters More Than You Think
The Hidden Frustration of Ill-Fitting Cubby Spaces
When I first remodeled my mudroom, I underestimated the importance of measuring my boots before picking out cubby dimensions. I was seduced by stylish designs and affordable prices, only to find that my bulky work boots and snow shoes refused to fit without bending or scraping. It wasn’t just annoying—it created a mess, and worse, it discouraged my family from keeping the space tidy.
According to experts in storage organization, ill-fitting cubbies often lead to clutter and frustration, defeating the whole purpose of dedicated storage in the first place. The key is to understand the **actual dimensions of your footwear** and how to translate that into practical cubby sizes. Don’t assume that a standard 12-inch cube will work for everyone; many adult shoes, especially boots, require more room.
To avoid this headache, I recommend measuring the length, width, and height of your largest footwear and then adding a few extra inches for easy access and air circulation. For instance, a pair of winter boots can easily be over 14 inches long and 6 inches wide. Planning for a cubby that’s at least 16 inches deep and 8 inches wide gives your shoes room to breathe and slide comfortably.
If you’re overwhelmed with the idea of designing custom cubbies, don’t worry. The right measurements can often be integrated into existing furniture or DIY builds, especially when you check out ideas on [custom cabinets that transform your home’s style](https://artisancabinetworkz.com/custom-cabinets-ideas-that-transform-your-homes-style). Making your mudroom work for your family’s specific needs starts with understanding these fundamental dimensions.
Before jumping into measurements, I want to ask—have you ever struggled with storage solutions that seemed perfect on paper but turned out to be a bad fit in real life? If so, you’re not alone, and luckily, there’s a smarter approach to creating storage that works seamlessly. Let’s move forward to the practical steps and tips to get your cubby dimensions just right, so your boots and shoes find a proper home.
Determine the Exact Footprint of Your Boots
Start by laying your largest boots flat on a piece of paper. Trace around them with a pencil to capture their actual length and width. For example, my knee-high winter boots measured 15 inches in length and 7 inches in width, which was more than I initially estimated. This precise measurement prevents awkward guesses when designing your cubbies and avoids future fitting frustrations.
Create a Measurement Template for Consistency
Using the traced outline, cut out a cardboard template matching the dimensions of your most cumbersome footwear. This physical guide helps you visualize the space needed in each cubby. When I crafted a template for my snow boots, I realized I needed a cubby depth of at least 16 inches and a width of 8 inches to allow easy sliding in and out without forcing or bending.
Design Your Cubby Dimensions Based on Real Data
Applying the measurements from your template, plan for extra clearance—adding about 1 inch to the length and width for comfort and air circulation. For instance, an 8-inch wide boot fits comfortably in a cubby that is 9 inches wide, ensuring it isn’t squeezed tight. Don’t forget to account for the thickness of shelves or dividers, which can reduce usable space if not considered upfront.
Use Analogies to Simplify Planning
Think of your cubby as a parking spot. You wouldn’t park a truck in a compact car space, right? Similarly, assigning flexible dimensions prevents your bulky footwear from ‘hitting the walls.’ If you were installing built-ins in your kitchen, you’d measure your largest pots and pans first to ensure they fit perfectly—this same rule applies to shoe storage.
Build or Select Storage Options That Match Your Calculations
Once you have your dimensions, you can opt for custom cabinetry or modify existing units. For example, I used adjustable shelf brackets to accommodate different boot sizes, ensuring everyone in the family could access their gear without hassle. Check out custom cabinets that transform your home for ideas on adapting your space efficiently.
Confirm Fit Before Finalizing the Design
Before installing permanently, place your boots or a mock-up in the planned cubbies to test accessibility and comfort. I did this with my cardboard templates, which revealed that my initial 16-inch depth was sufficient but needed an extra inch for easier access. This step saves time and money, preventing costly adjustments later.
Apply Minor Adjustments for Optimal Fit
If you find a snug fit or awkward space after testing, make small modifications: adjust shelf heights, widen cubbies, or add removable dividers. Personalize the storage to fit your footwear collection perfectly, much like customizing a kitchen layout to suit your cooking style. Regularly reassess as your footwear collection grows or changes, ensuring your space remains functional and clutter-free.Many homeowners assume that opting for custom cabinets or built-in storage automatically leads to a perfect, hassle-free space, but the reality is more nuanced. The common myth is that custom equals flawless—it’s not. A major oversight is believing that all building processes are created equal or that the highest price guarantees the best result. In my experience, understanding the intricate details—such as joint quality, material selection, and finishing techniques—is crucial for durability and aesthetics. Additionally, many overlook the importance of integrating storage solutions seamlessly into existing architectural elements, which can lead to awkward gaps or cumbersome access points.
Are You Considering the Long-Term When Choosing Your Custom Solutions?
Research shows that homeowners often prioritize immediate visual appeal over long-term functionality. For example, selecting hardware or finishes without considering wear and tear can lead to premature replacements. An expert at the [Renewable Materials Council](https://artisancabinetworkz.com/expert-tips-on-selecting-storage-solutions-for-a-perfect-kitchen-upgrade) warns that shortcuts in craftsmanship or using low-quality materials may result in significant costs down the line. It’s essential to scrutinize the construction process, demand high-quality joinery, and ensure that hardware and finishes are designed for durability—especially in high-traffic areas. The trap many fall into is neglecting the nuances of installation—misaligned doors, uneven shelving, or improper clearance can turn your custom investment into a source of daily frustration. Be proactive: verify the builder’s craftsmanship with reference checks or visit ongoing projects to see their work firsthand. Conscientiously designing storage, whether through innovative solutions or traditional approaches, hinges on understanding these subtle yet critical elements. To elevate your project, explore how custom cabinets can transform your home’s style and ensure that every detail aligns with your lifestyle needs. Remember, the goal is functional elegance that withstands the test of time. Do you think you’ve fallen for any of these hidden pitfalls? Let me know in the comments and share your experiences!When creating custom cabinets and storage spaces, investing in the right tools and establishing good maintenance routines are essential for long-term success. Personally, I rely on a few key items that have consistently delivered quality results. A cordless laminator, for example, is invaluable for applying protective surface finishes with precision, ensuring durability and a professional look without the need for an external finishing service. I also swear by a high-quality carpenter’s square; it’s a simple device but vital for maintaining perfectly aligned panel edges and cabinet faces over time, preventing misalignments that can compromise the visual appeal and function. When working on a large kitchen remodel, I use a digital caliper to measure hardware and joint gaps with exceptional accuracy, which pays off during installation and future adjustments.
For software, I recommend SketchUp Pro for designing storage layouts. Its intuitive interface allows me to visualize space before cutting any wood, reducing errors and material waste. The ability to simulate custom cabinet inserts and storage solutions helps in fine-tuning dimensions—saving time and money—and ensures a better fit for your specific needs. As technology advances, I predict plugins integrating real-time material cost estimates and durability analytics will become standard, making design decisions even more informed.
Maintaining your built-ins and custom cabinets can extend their lifespan significantly. Regular cleaning with gentle, non-abrasive cleaners preserves surfaces. For wooden components, occasional application of a high-quality furniture wax or mineral oil enhances resistance to wear and moisture, especially in humid environments. Addressing minor scratches early with suitable touch-up kits prevents deterioration and maintains aesthetic integrity.
**How do I maintain my storage solutions over time?** The key is routine inspection—checking hinges, drawer slides, and hardware for wear. I replace worn slides with soft-close undermount options, like those recommended in this guide—which not only improve longevity but also enhance the user experience.
For scaling, modular storage systems are a game-changer. They offer flexibility for future adjustments or expansions without replacing entire units. Investing in adjustable shelving and dividers ensures the space adapts to new storage needs, making your kitchen or mudroom resilient against evolving lifestyles.
Remember, regular upkeep combined with the right tools ensures your custom-built cabinets and storage solutions remain both beautiful and functional for years. I highly recommend integrating an advanced tip: install a hidden LED lighting system underneath shelves—this small upgrade dramatically improves visibility and adds a touch of elegance. Give it a try to elevate your storage game and make your space not just practical but truly inspiring.
Lessons from the Front Lines of Kitchen Customization
One of the most profound realizations I had was that even the best-designed storage solutions fall apart without precise measurements and thoughtful planning. I once rushed into a project, relying on standard dimensions, only to find that my custom cabinets couldn’t accommodate my bulky cookware. That lightbulb moment taught me the importance of meticulous detail—measuring, re-measuring, and then measuring again. It’s these small but critical steps that distinguish a good remodel from a great one.
Another lesson was understanding that built-ins aren’t just aesthetically pleasing—they’re about optimizing workflow. I learned to think like a chef, designing spaces that support natural kitchen movements rather than hinder them. Integration of thoughtful storage, like pull-out spice racks or hidden appliance garages, makes a massive difference. Truly, mastering these details transforms your kitchen into a harmonious space that’s both beautiful and functional.
Finally, I discovered the power of flexible solutions. Fixed, inflexible cabinetry often leads to frustrations when your needs change. Investing in adjustable shelves or modular components gave me the ability to adapt my storage as my family grows or as my culinary interests evolve. This approach not only saves money in the long run but also keeps your kitchen feeling fresh and organized.
Tools and Resources that Changed My Approach
Designing and building custom cabinets requires more than just good intentions; it demands the right tools. I swear by SketchUp Pro for visualizing layouts and ensuring everything fits before a single cut is made. It’s intuitive and helps catch mistakes early. For measuring, a digital caliper has been a game-changer, allowing me to achieve pin-point accuracy on hardware fits and joint gaps, ensuring longevity and a polished look.
When it comes to sourcing materials and hardware, I trust expert tips on storage selection and custom cabinetry inspiration. These resources have helped me avoid common pitfalls, like choosing materials that don’t withstand humidity or hardware that wears out quickly. Knowledge is power, and these guides have been instrumental in elevating my projects from average to extraordinary.
Your Next Step in a Smarter Kitchen Future
The journey of creating an efficient, stunning kitchen isn’t finished after installation. It requires ongoing attention: routine maintenance, periodic reassessment of your storage needs, and an openness to innovative ideas. Simple upgrades like installing under-cabinet lighting or adding adjustable dividers can reinvigorate your space without a full remodel. Think of your kitchen as a living, breathing part of your home—constant refinement ensures it serves you well for years to come.
Remember, taking these lessons to heart turns a standard kitchen into a masterpiece of function and style. I encourage you to start with precise measurements, leverage the right tools, and stay curious about how small tweaks can make your space truly exceptional. Happy remodeling, and don’t forget—every well-designed kitchen begins with careful planning!