How to Install an Under-Cabinet Paper Towel Holder
I spent months planning my kitchen remodel, agonizing over every detail from the quartz slab to the crown molding, only to have the entire aesthetic ruined by a soggy roll of paper towels sitting next to the sink. It sounds like a small thing, right? But every time I needed a sheet to wipe up a spill, the roll would tip over, unravel across the wet counter, and leave me frustrated. My beautiful custom cabinets were supposed to make my life easier, yet there I was, battling a piece of cardboard and paper. That was my lightbulb moment: if you don’t plan for the small, functional accessories, your high-end kitchen will never feel truly finished. Today, I’m going to show you exactly how to get that roll off your counter and tucked neatly away.
Reclaim Your Countertop from the Paper Towel Tyranny
A kitchen should flow, and having a dedicated spot for your cleaning supplies is part of that expert tips on selecting storage strategy. When I first tried to solve this, I made the classic rookie mistake of using those ‘no-drill’ adhesive strips on my brand-new cabinets. I woke up at 2:00 AM to a loud thud as the whole assembly collapsed onto the floor, taking a bit of the finish with it. It was a painful lesson in why we do things the right way the first time. Utilizing built-ins and storage hacks isn’t just about the big pantry items; it’s about making sure the tools you use twenty times a day are within reach but out of the way. By mounting your holder underneath the upper cabinets, you instantly free up several square inches of workspace, which is a total game-changer if you are looking for smart storage solutions for small kitchens.
Will I Ruin My Custom Cabinets by Drilling Holes?
This is the number one fear I hear from my neighbors and readers alike. You’ve invested a lot into your kitchen, and the thought of taking a power drill to the underside of a cabinet box feels like heresy. However, the reality is that a properly installed holder is far safer for your wood than the moisture and friction of a countertop stand. According to the National Association of the Remodeling Industry (NARI), functional upgrades that increase the ‘utility’ of a workspace are the primary drivers of long-term homeowner satisfaction. The key is using the right screw length—something I learned the hard way when I almost poked a hole through the interior floor of my spice cabinet! Have you ever hesitated to add a convenient feature because you were too scared to drill that first hole into your woodwork? Let me ease that anxiety by showing you the professional way to prep your surface and select your hardware. We are going to ensure that your holder stays put for a decade without compromising the integrity of your cabinetry.To get started, you need to treat your cabinet bottom like a piece of fine art. Before you even touch a drill, you need to determine the exact footprint of your holder. I learned this the hard way during a particularly chaotic custom cabinets as a game changer in your kitchen remodel journey project where I tried to mount a holder while balancing on a step stool. I ended up with a crooked mount that drove me crazy for three years. Don’t be like past-me. Use blue painter’s tape. Apply a strip of tape to the underside of the cabinet where you want the holder to live. This allows you to mark your drill points with a sharpie without leaving permanent ink on your innovative storage solutions for modern kitchen remodels. It’s like a surgical prep for your woodwork; it protects the finish while giving you a clear roadmap for your screws. 
Get the Hardware Right the First Time
Pick Screws That Won’t Poke Through
The biggest disaster in cabinet accessory mounting is using a screw that is too long. If your cabinet floor is 3/4-inch thick, and your paper towel holder bracket is 1/8-inch thick, a 1-inch screw is going to cause a heartbreak. It will punch right through the interior, snagging your dish towels or scratching your plates. Much like why your cabinet boxes should be stapled, glued, and screwed, the strength comes from the bite, not necessarily the length. Aim for a screw that penetrates about half to two-thirds of the cabinet floor. I keep a box of 1/2-inch and 5/8-inch truss head screws in my kit specifically for this. They have a wide, flat head that grips the bracket firmly without needing a washer.
Drill Pilot Holes Like a Pro
Never, ever drive a screw directly into custom cabinetry without a pilot hole. Think of a pilot hole as a guide dog for your screw—it ensures the path is clear and prevents the wood from splitting under the pressure. I once rushed a job on a maple vanity and skipped this step; the wood split instantly, and I had to use wood filler and a touch-up pen to hide the shame. Use a drill bit that is slightly thinner than the shank of your screw. To ensure you don’t drill too deep, wrap a piece of tape around the drill bit at the desired depth. This poor man’s depth stop is the one tool you need for perfectly aligned cabinet knobs every time equivalent for drilling into the underside of boxes. It gives you the confidence to push hard without the fear of coming out the other side.
The Secret to a Wobble-Free Mount
Once your holes are prepped, it’s time for the install. If you find that the holder still feels a bit flimsy, it’s usually because the cabinet floor is thin or made of particle board. In these cases, I like to add a small dab of clear construction adhesive to the back of the bracket. While we know why you should never use silicone for cabinet joinery, a tiny bit of the right adhesive can act as a gasket, dampening the vibration every time you rip off a sheet of paper. This ensures the holder feels like a part of the house, not a flimsy after-thought.Let’s dig deeper into the layout logic. Most people assume that ‘custom’ means getting every possible bell and whistle. In reality, the best custom cabinets for a stylish kitchen overhaul are the result of knowing when to simplify and prioritize functionality over sheer volume. Everyone says you need a massive walk-in pantry, but in my experience, a series of shallow, reach-in cabinets often works better for organization because ingredients don’t get buried behind years’ worth of canned goods.
The High-Capacity Storage Myth
The hidden nuance of high-end design is that volume is often the enemy of visibility. If you over-stuff your kitchen with boxes, you create a claustrophobic environment that actually hinders cooking efficiency. Instead of maximizing cubic feet, you should focus on selecting storage solutions that prioritize specialized zones. For example, understanding why your kitchen workflow needs a dedicated baking zone is a much more effective strategy than just adding more generic upper cabinets. By grouping heavy mixers, flour, and baking sheets in one area, you reduce the physical steps you take during prep. One advanced tip: skip the lazy susan and install LeMans pull-outs instead. Traditional Susans often have a center pole that limits the height of items; a LeMans system brings the entire shelf out to you, utilizing every inch of that corner space.
Why Does a Fully Custom Layout Still Feel Cluttered?
This usually happens when the design focuses on the ‘closed’ aesthetic rather than the ‘active’ usage. A common trap is failing to account for ‘elbow room’ near major appliances. According to the National Kitchen & Bath Association (NKBA), a primary sink requires substantial landing areas to function properly. If you cheat these numbers to squeeze in a tiny extra cabinet, you’ll feel cramped every time you use a cutting board. 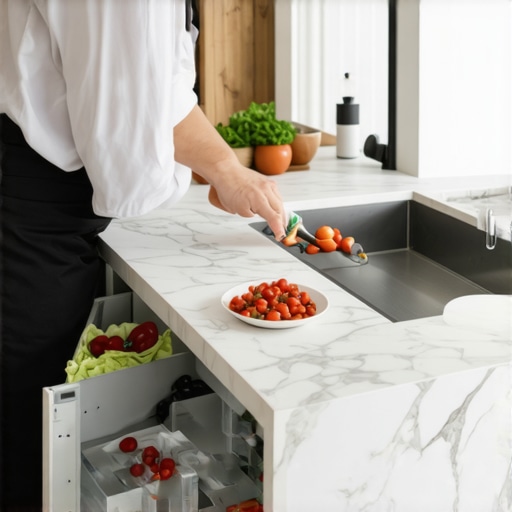 This is also why I’m a firm believer that we recommend 36-inch base cabinets for almost every modern project; they provide the optimal height for working without back strain. Another major ‘oops’ moment involves the dishwasher. Homeowners often insist on putting it in a tight corner to hide it, only to realize later that placing a dishwasher directly against a wall makes it impossible to unload comfortably. You end up trapped between the open door and the wall. Furthermore, many people overlook interior flexibility; this is why your pantry shelves should be adjustable, not fixed. Your needs change over time, and fixed shelves are a prison for your storage potential. Have you ever fallen into this trap of prioritizing looks over the actual physics of the room? Let me know in the comments. We should be designing for how we move, not just how the room looks.Once the dust settles and your kitchen remodel is complete, the real work of homeownership begins: preservation. I’ve seen stunning, high-end kitchens lose their luster in just three years because the owners didn’t know how to maintain the mechanical heart of their cabinetry. If you want your investment to last, you have to treat it like a fine instrument.
Keep Your Hardware Running Quiet and Smooth
The most common complaint I hear after a year is that the ‘magic’ of the soft-close has faded. Most people assume the piston is broken, but often, it is just a matter of simple maintenance. Dust and kitchen grease are the enemies of precision engineering. I personally use a pressurized air canister—the kind you use for keyboards—to blow out the tracks of my drawer slides every six months. If things still feel sluggish, knowing why your soft-close slides grind and the quick lubrication fix can save you from a costly replacement. A tiny drop of food-grade silicone lubricant on the ball bearings (never WD-40, which attracts more gunk) will make those heavy drawers feel weightless again. This is especially vital in modern kitchen remodels featuring custom cabinets and built-ins where the tolerances are tight and the hardware is sophisticated.
How do I keep my custom woodwork looking new for decades?
Maintenance isn’t just about the moving parts; it’s about the finish. If you opted for the trending dark aesthetics, you need to know how to clean matte black cabinet hardware without scratches to prevent that greasy fingerprint buildup that ruins the look. For the wood itself, avoid any ‘polishing’ oils that contain wax or silicone, as these create a hazy buildup that is nearly impossible to remove without stripping the finish. Instead, stick to a damp (not dripping) microfiber cloth with a drop of mild dish soap. This protects the integrity of your transform-your-kitchen-with-custom-cabinets-expert-guide-for-2025 goals by ensuring the topcoat doesn’t chemically break down. According to the Architectural Woodwork Institute (AWI) standards for premium grade cabinetry, mechanical fasteners should be checked periodically to ensure alignment remains within a 1/32-inch tolerance. Over time, the weight of your plates can cause slight shifts; a quick turn of a screw can restore that perfect gap. 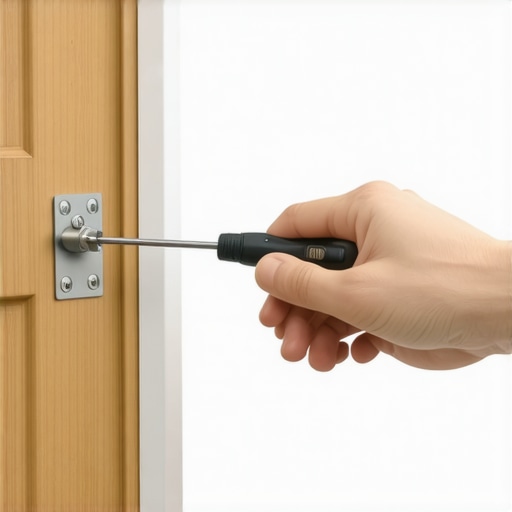
The Tool Every Homeowner Should Own
Stop using the multi-tool that came in your ‘new home’ kit. For custom cabinetry, you need a dedicated Pozi-drive or Torx T-15 screwdriver, depending on your hinge brand. Most European hinges use these specific heads to prevent stripping. I keep a small ‘cabinetry kit’ in my utility drawer that includes a high-quality level and a set of shims. Why? Because houses settle. If you notice a door is rubbing, don’t wait for it to chip the paint. Learn how to adjust european hinges for a perfectly level door reveal and you can fix the problem in thirty seconds. Looking toward the future, I predict we will see more ‘smart’ sensors integrated into hinges that alert your phone when a door is out of alignment or when moisture is detected under the sink. Until then, your eyes and a good screwdriver are your best defense. I challenge you to go into your kitchen right now, find that one drawer that’s been sticking, and give the tracks a quick blast of air and a wipe-down. You’ll be amazed at the difference.
What I’ve Learned from a Decade of Sawdust and Spills
Building a kitchen is more than just picking a color; it’s about anticipating how you’ll move on a Tuesday morning when you’re late for work. I’ve realized that the ‘forever kitchen’ is actually a flexible one. This is exactly why your pantry shelves should be adjustable, not fixed—because your bulk cereal habit today might become a gourmet olive oil collection tomorrow. Another hard-won lesson? Never underestimate the power of specialized zones. I’ve seen people regret beautiful layouts simply because they didn’t know the best way to store baking sheets in a narrow cabinet, leading to a loud, metallic clatter every time they made cookies. Lastly, don’t let the fear of a mess stop you from choosing what you love. If you’re worried about staining, just make sure you know how to choose the right sink for your kitchen remodel to handle the heavy lifting without the stress.
The Essential Survival Kit for Your New Cabinetry
If you want your kitchen to stay in showroom condition, you need more than just a sponge. I keep a dedicated ‘Cabinetry Care Kit’ in my utility drawer that has saved me thousands in potential repairs. First, get a high-quality Pozi-drive screwdriver; it’s the secret to learning how to adjust european hinges for a perfectly level door reveal without stripping the delicate screws. Second, keep a canister of pressurized air handy. It’s the easiest way to prevent build-up so you don’t have to wonder why your drawer slides are grinding later on. Finally, for those with light-colored finishes, a simple microfiber cloth and mild soap are your best friends to prevent the common issue of why your white cabinets are turning yellow over time. #IMAGE_PLACEHOLDER_E#
Your Kitchen Is Waiting for Its Upgrade
At the end of the day, your home should serve you, not the other way around. Whether you are adding a single paper towel holder or planning an entire suite of custom cabinets, the goal is to create a space that feels effortless. Don’t be afraid to take that first step, even if it’s just drilling one small pilot hole. Every tiny functional tweak brings you closer to a kitchen that truly works. If you’re feeling overwhelmed, you can always contact us to help navigate the technical side of your project. Have you ever struggled with a specific storage ‘pain point’ that felt too small to mention to a contractor? Let me know in the comments below!